Puppies and kittens and squirrels, oh my!

Well folks, I have been trying to branch out a bit from my horses and rabbits, and it has been an interesting journey.  For one, I simply haven’t been able to find any patterns that I like.  Well, that’s not exactly true.  There is a lot of adorable stuff going on in the world of felt right now- miniature felt animals, little collectibles etc.  But working with felt is a whole different game, and I am not wanting to get into it right now.  So I ordered a book (really a pdf file) of some cute little miniature animal patterns and thought I would do some experimenting.

There were two problems with the book.  The pattern sizes all needed to be adjusted because I don’t want to do miniatures and, well, all the instructions were in Japanese.

The first animal I attempted was a squirrel.  Woodland creatures seem to be very popular right now, so why not join the trend?  I found a nice rust colored, upcycled corduroy and got to work.  I did alright following the pictures, despite the Japanese instructions, but I failed to take into account the stretchiness of the fabric.  Once I started stuffing, I just couldn’t stop.  The little squirrel rear end got fatter and fatter until it was as round as a ball.  The boys thought it was hilarious, and so adopted the bottom half of my first attempt as a new ball game.  They call it tumble butt.

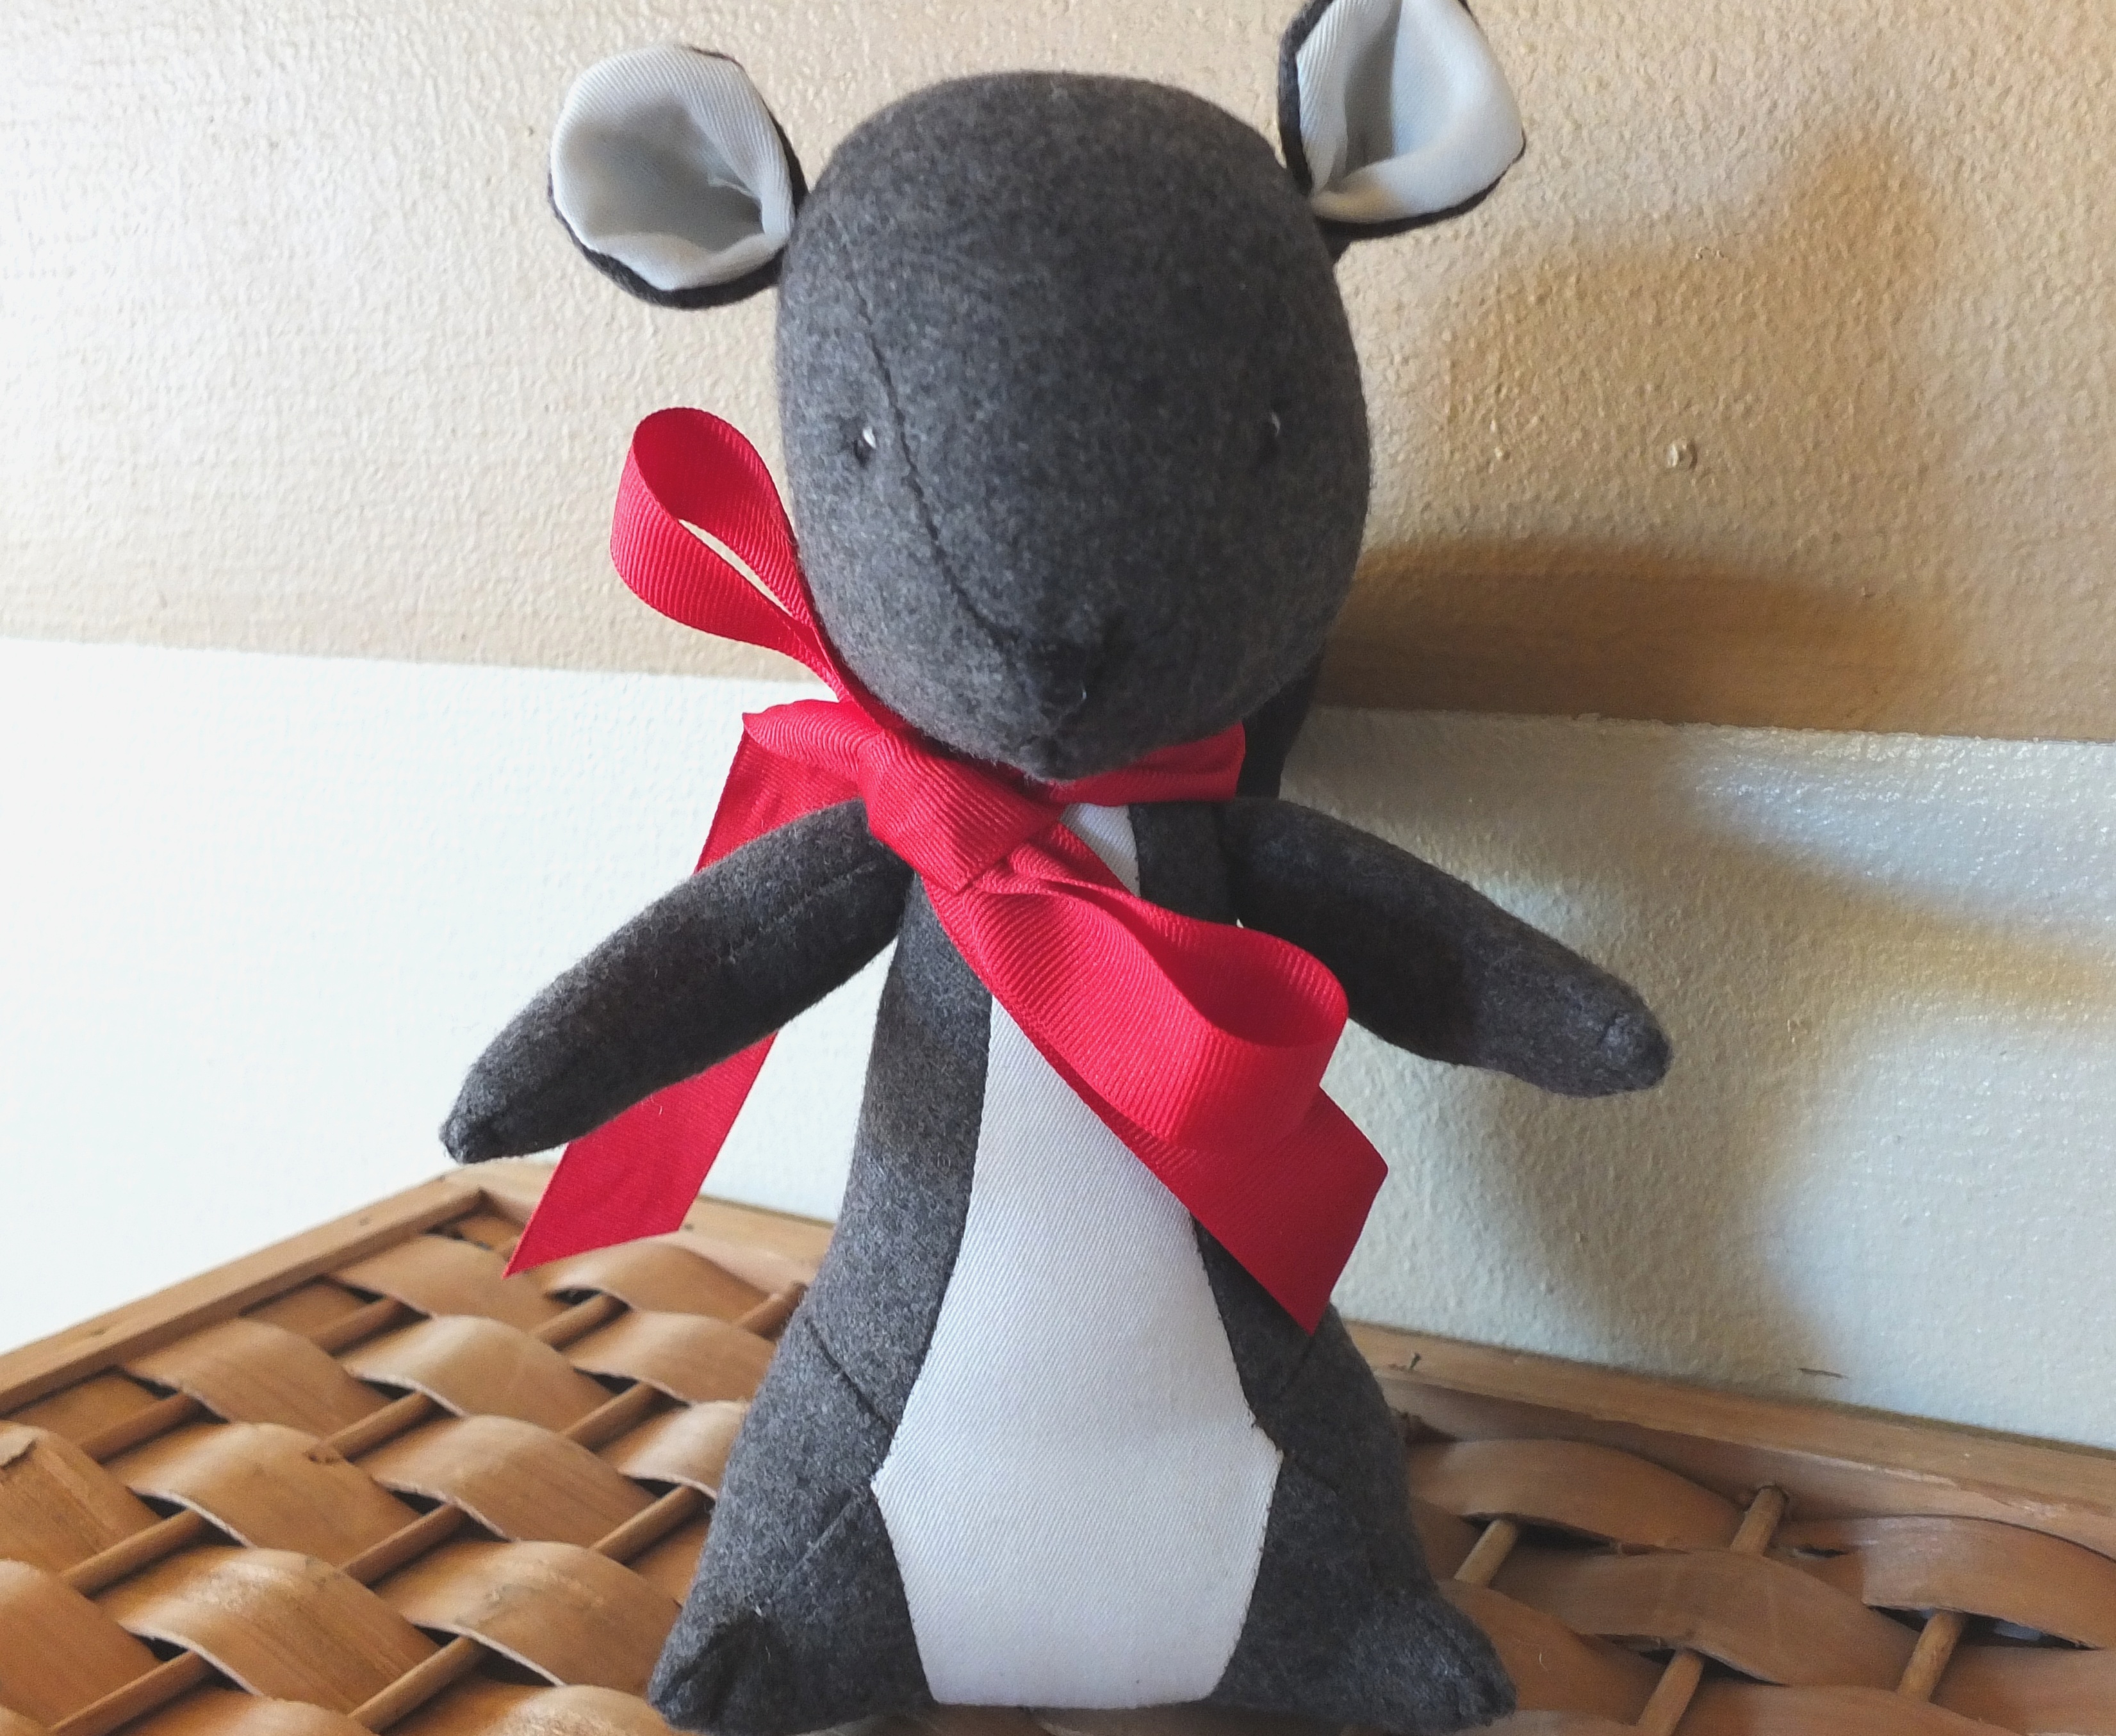
So then I tried it out in a nice, unstretchy,  charcoal- colored wool.  I like how this one turned out better, except every one in the family asked me if I was making a rat.  Turns out, squirrels and rats look a lot alike, except for the tails.  The tail made a big difference once it was on, but I think I should stick to brown colors the next time to avoid rodent confusion.

DSCF1076 DSCF1078 DSCF1079

After he was done, I thought it would be good to try a little something more common, like a cat or a dog.    The cat pattern turned out to be a lot more difficult, or maybe I need to brush up on my Japanese, because I had to redo it several times.  I like the final product, but I feel like there is a lot of room for improvement.  These are definitely rough drafts.

DSCF1081 DSCF1082 DSCF1083

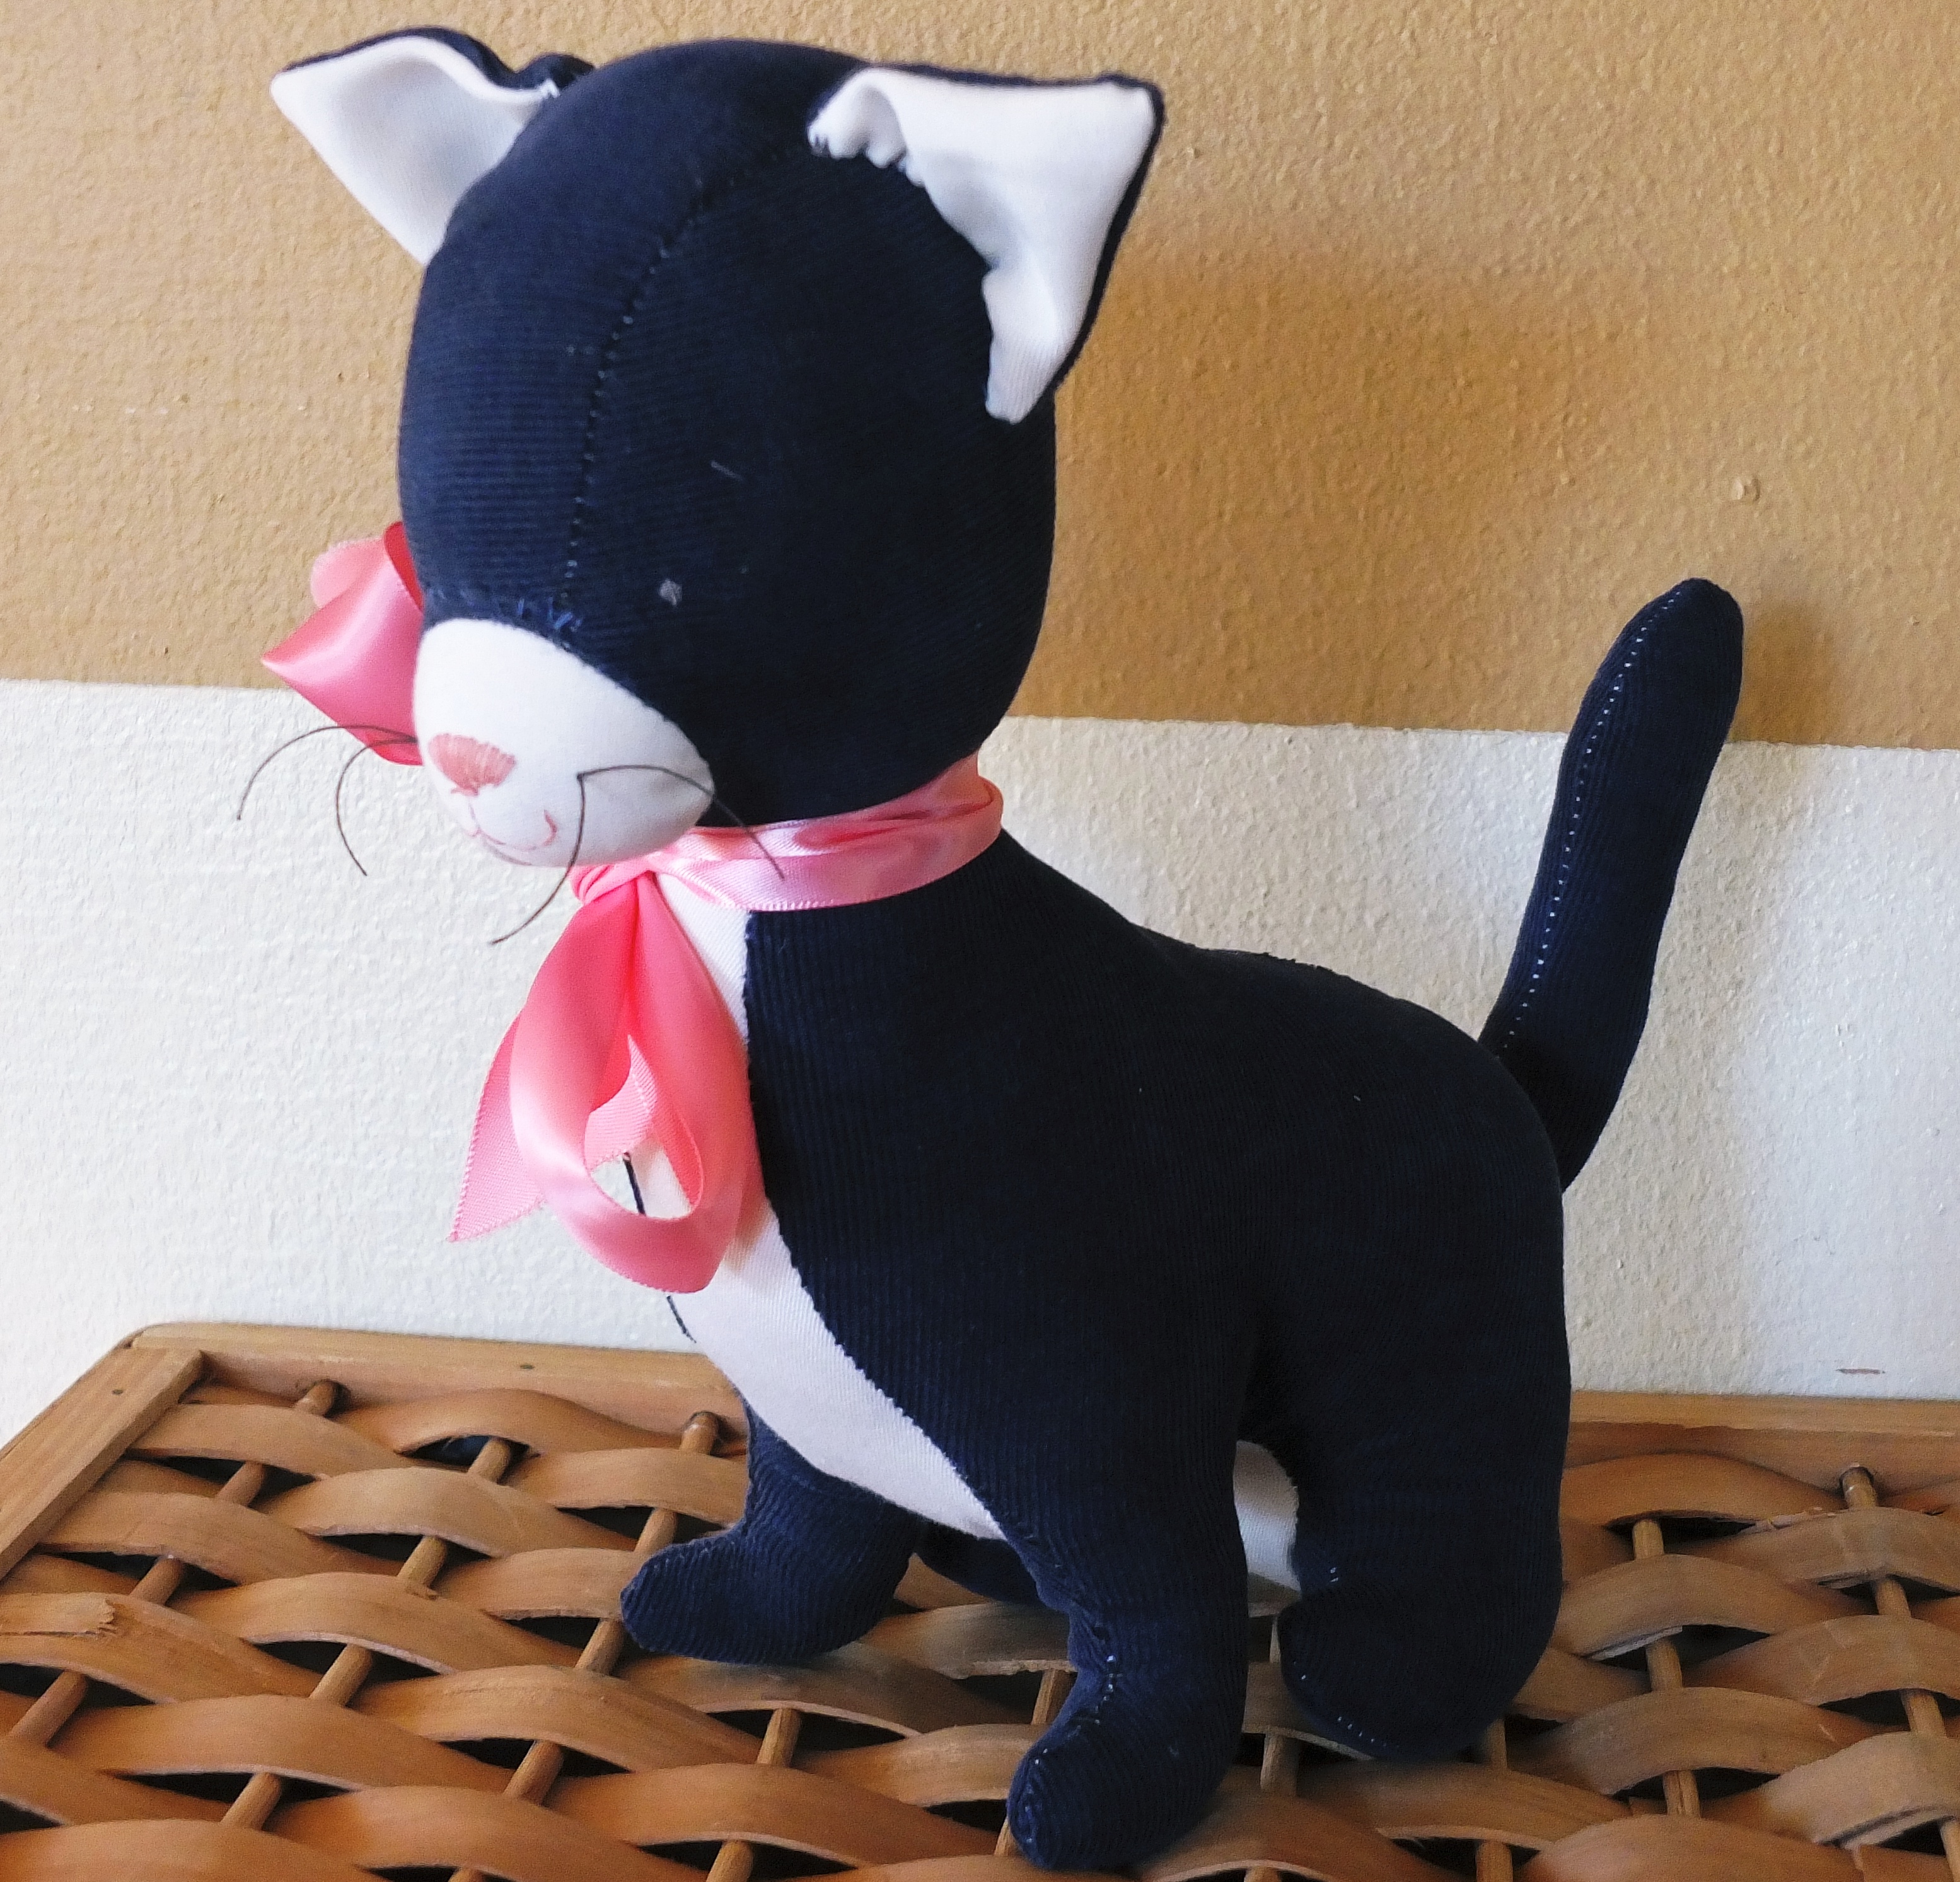
I do like her pink bow though.

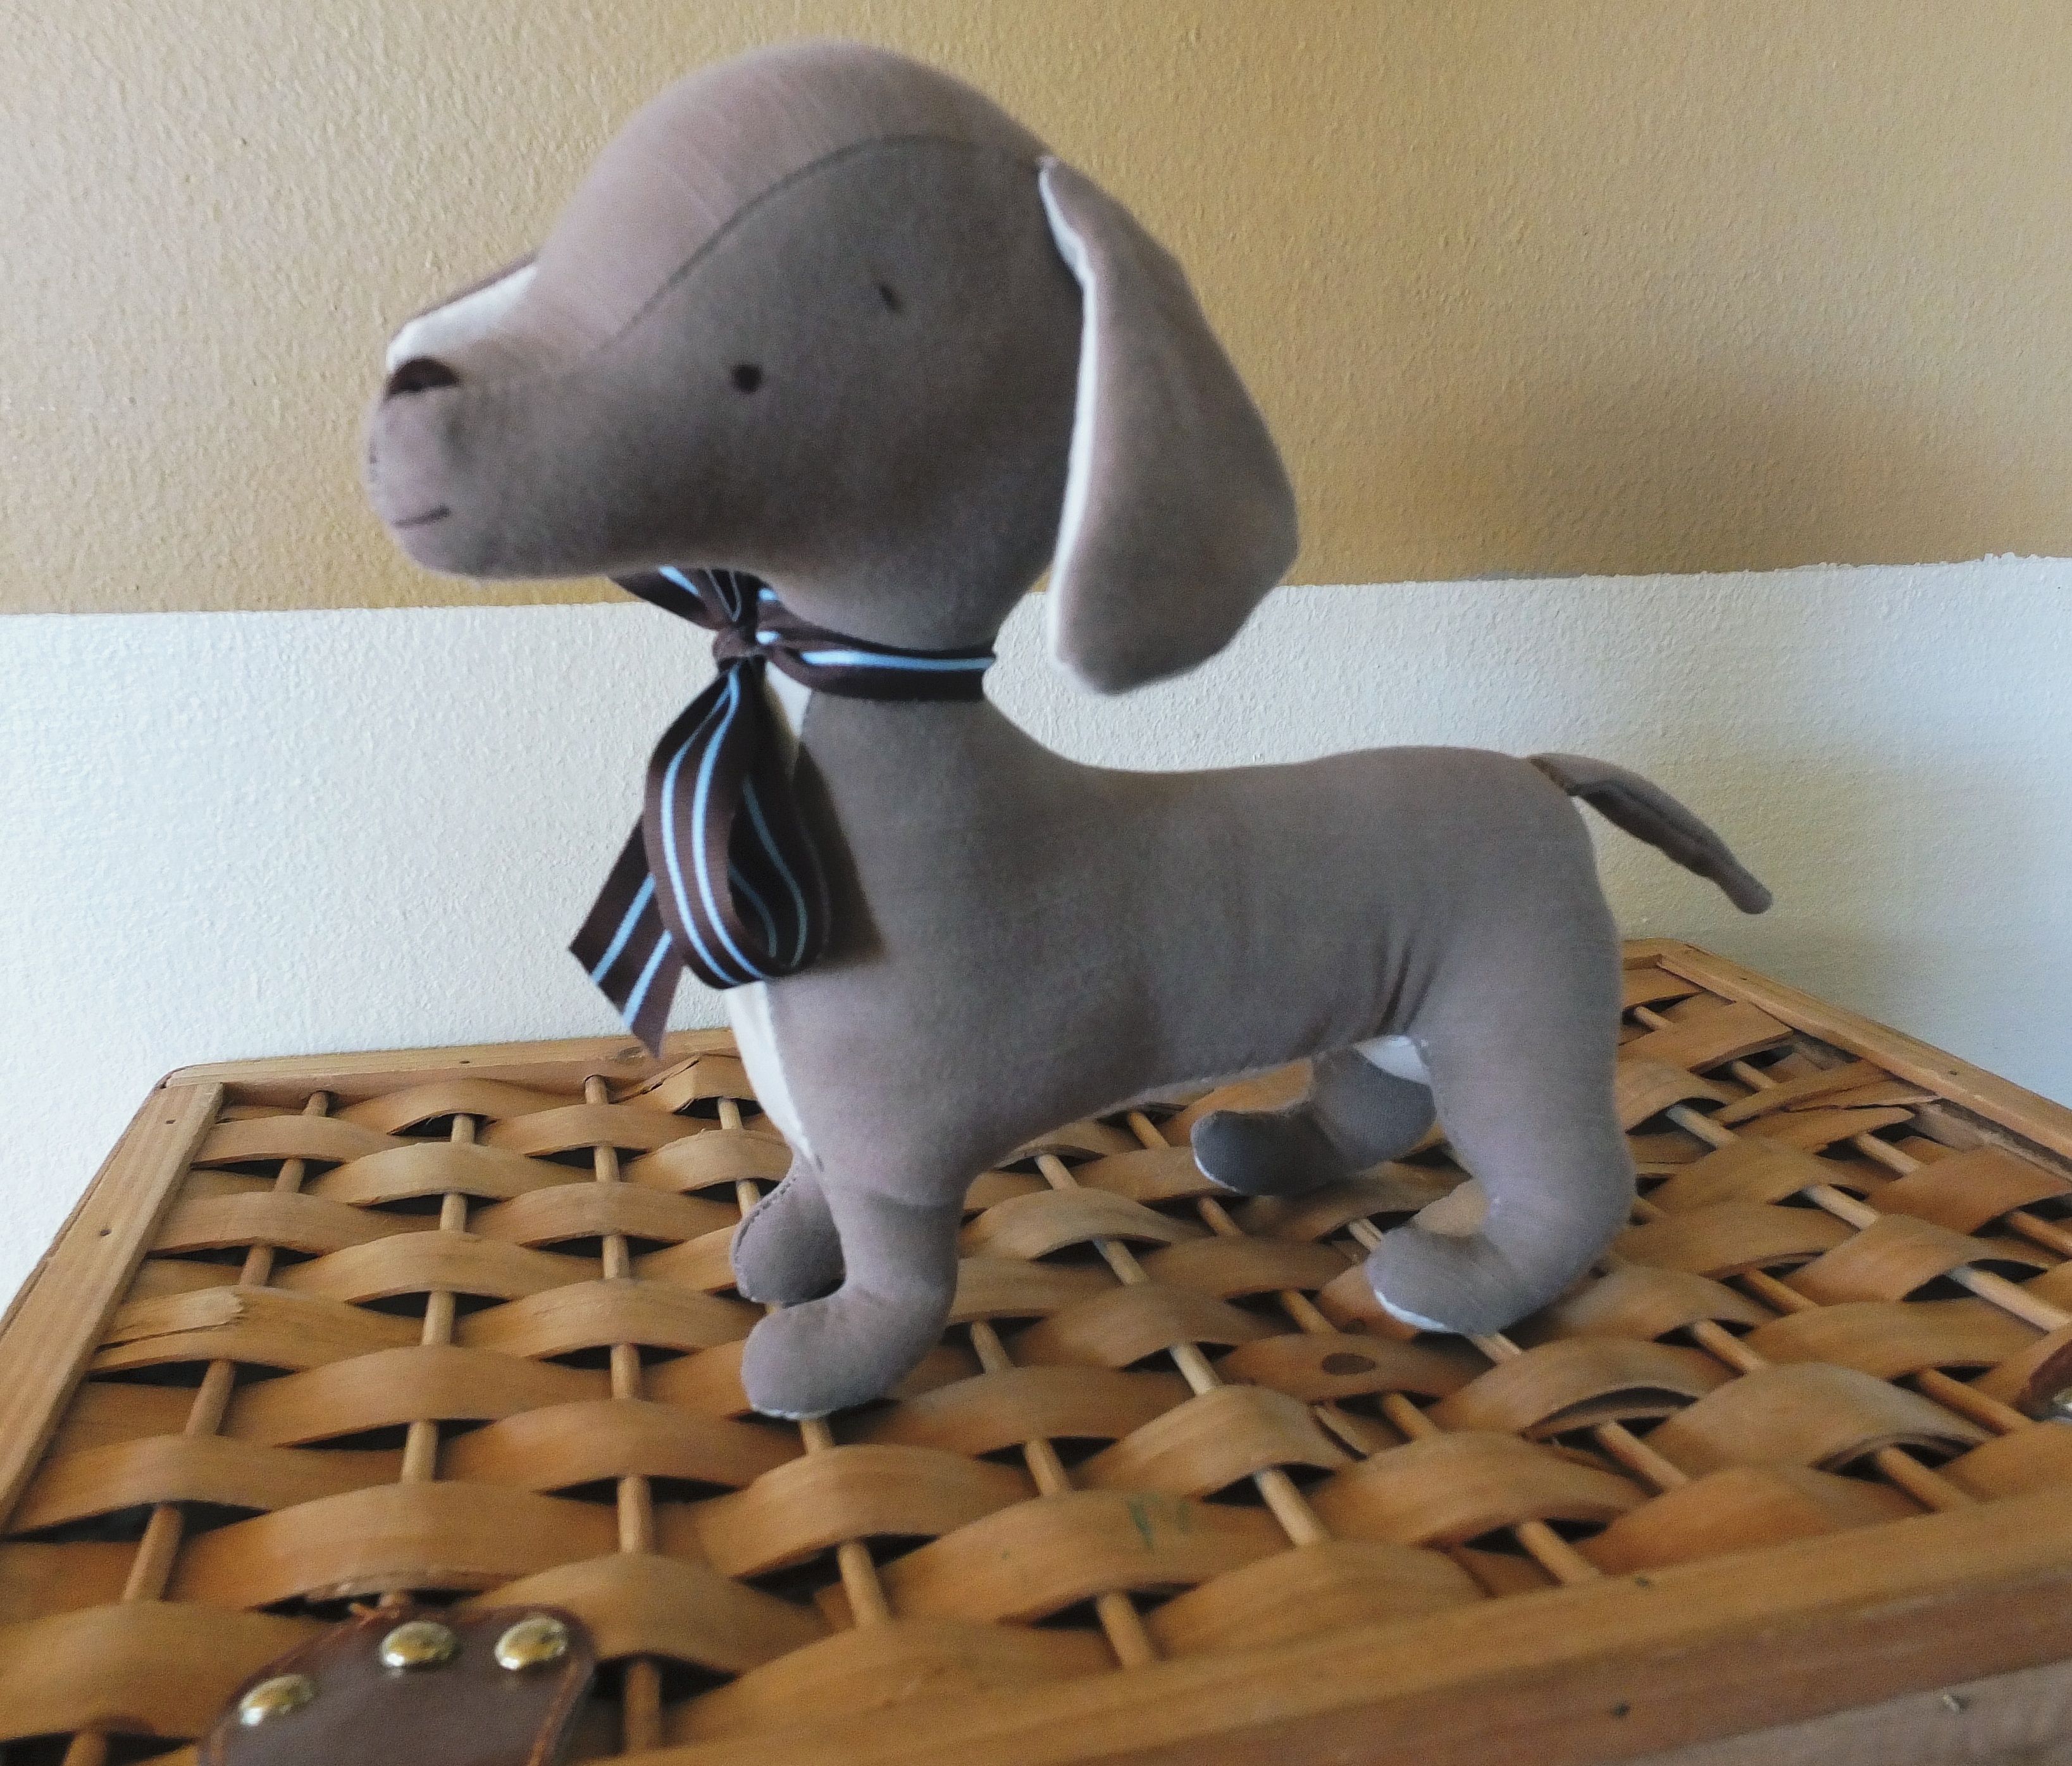
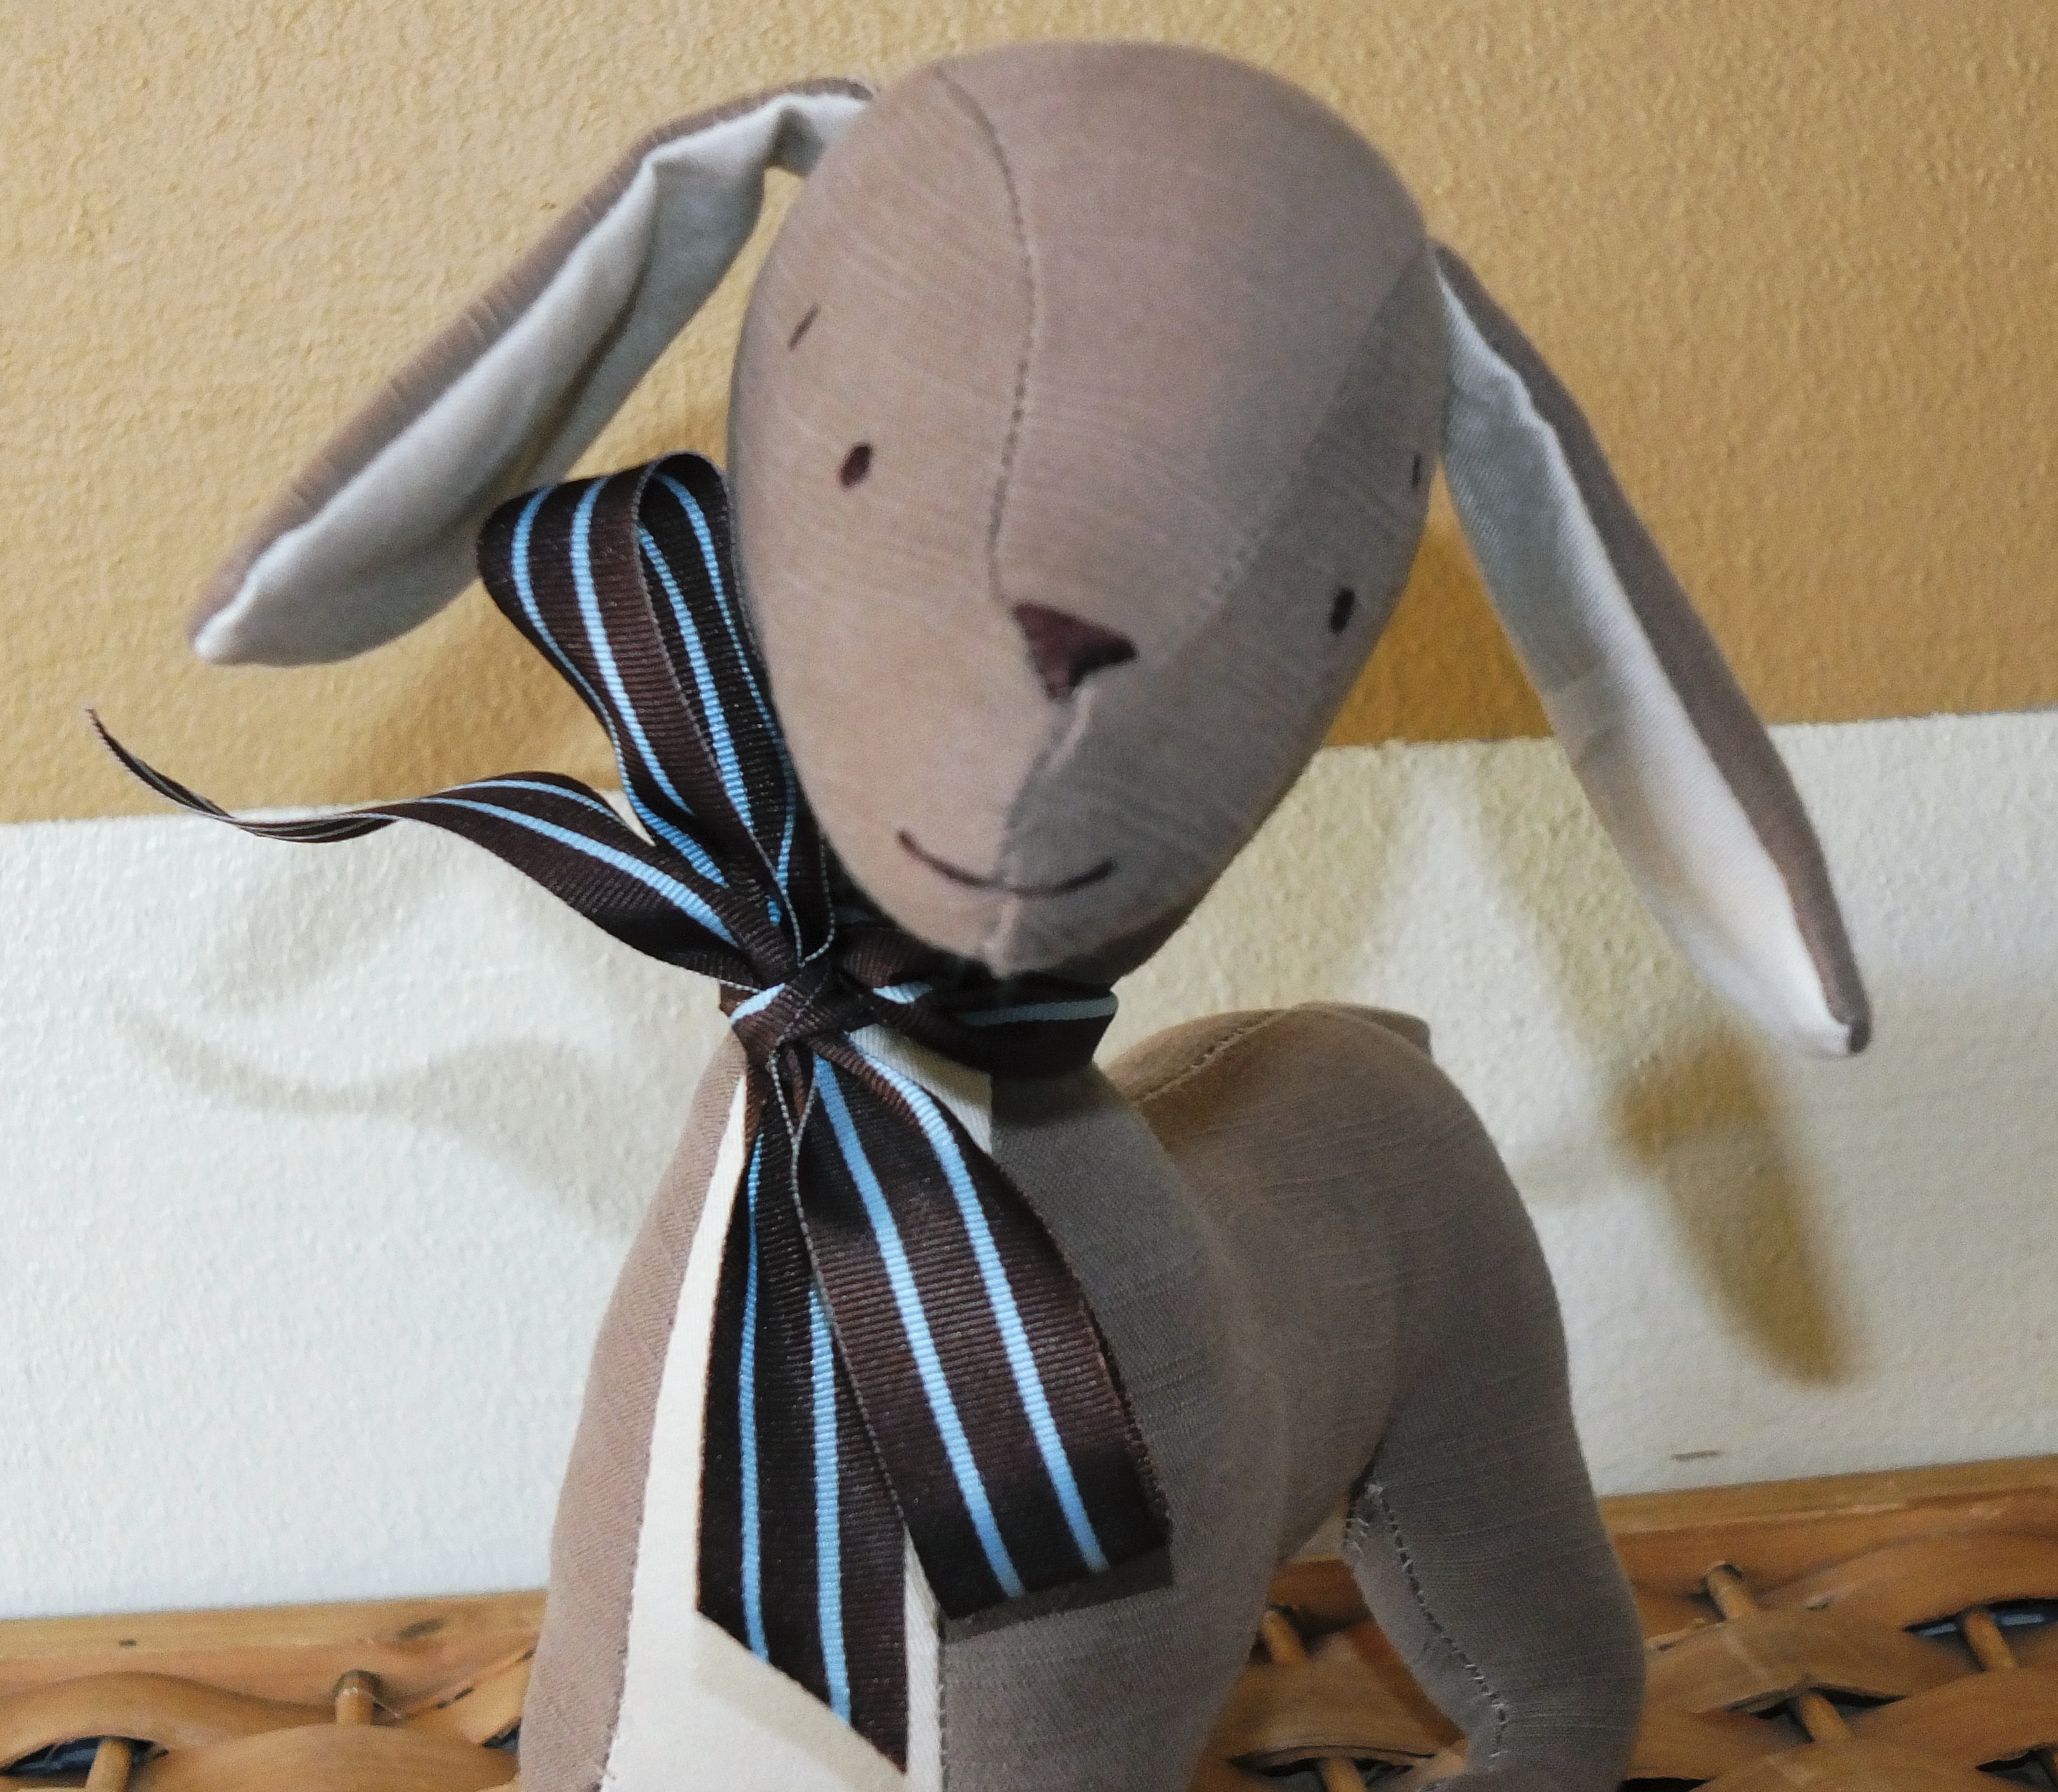
And last but not least, the puppy dog.  This pattern caused me a lot of grief, and my family much hilarity, because I couldn’t seem to adjust the head to the proper size.  It was absolutely too enormous for the little body.  I wish I had thought to take a picture of before and after shots.  I re-sized and re-sized it, and even now, I think it is too pointy.

DSCF1072 DSCF1066 DSCF1069

What I would really like is a good book on developing your own patterns.  Any suggestions?  And any other feedback?  I am pondering over which direction my little shop should turn.  Thanks!

Ickle Me, Pickle Me, Tickle Me Too

ickle me

I know, that may seem like an odd title for a recipe post, but for some reason, a lot of my cooking memories go back to my dad. (which is really unfair since my mom did the bulk of all the cooking for us growing up.)  Maybe because every time he did cook, it was such an event and he turned up the music really loud and he used every dish in the house. (which my mom always had to clean up after).  And then he would come up with funny little sayings that soon became household quotes like,

“Mmm, butter. The other white meat.”

My dad also read a lot of Shel Silverstein to us when we were little.  (bear with me, this story is going to come together eventually – I think) One of my favorites was-

Ickle Me, Pickle Me, Tickle Me too
Went for a ride in a flying shoe.
“Hooray!”
“What fun!”
“It’s time we flew!”
Said Ickle Me, Pickle Me, Tickle Me too.

Ickle was captain, and Pickle was crew
And Tickle served coffee and mulligan stew
As higher
And higher
And higher they flew,
Ickle Me, Pickle Me, Tickle Me too.

That’s part of it, anyways.  The important thing to note is the fact that ‘Tickle served coffee and mulligan stew’.  I always wondered what mulligan stew was, and then one day, my dad announced that he was going to make it.  At least that’s what I thought he said he was making, and for many years I thought one of our family’s favorite soups was the famed mulligan stew of the flying shoe.  Turns out, traditionally, mulligan stew is a hobo dish comprised of whatever ingredients can be found on hand and cooked over a fire in an old coffee can.  What my dad really made that day was Mulligatawny, an Anglo-Indian curry flavored soup,  but I still can’t separate the soup from the poem.  So there you are.

Now that we’ve cleared that up, let’s make some soup! It’s cold out there!

Here’s what you need-

DSCF1039

You have your basics like Onion, Celery, and Carrots. That iffy looking pile in the front is shredded chicken, and the pitcher is homemade chicken broth (store bought works fine).  We also have cream, rice, curry powder and a little surprise ingredient- an apple.  Oh and of course butter- the other white meat.

Start melting the butter in a big pot. I only used half the stick here. Pay no attention to the state of my dutch oven.  It is not dirty- it is simply well loved. DSCF1042

While that is melting, roughly chop up your veggies, and toss them in.

DSCF1044

BTW, did you know the French call this combo of veggies a mirepoix? I have also heard it called the holy trinity of French cooking.  I don’t know what you call it when you add an apple. Anyways…

Let your veggies soften at medium heat while you peel and dice your apple.

DSCF1046

Once your veggies are soft, toss in the diced apple and about a tablespoon of curry powder.

DSCF1047

Stir all that up and then pour in enough broth to generously cover the veggies and apple.

DSCF1048

Look, the apples float!  Turn up your heat and get things boiling.  Then to thicken it all up, you need to add either two cups of precooked rice (a great way to use up leftover rice) or one cup of raw.

DSCF1052

Then we add our seasonings.  A good tablespoon of salt, lots of pepper and a bit of dried thyme if you have it.

DSCF1055

I usually let the rice cook all the way before I add the chicken, so it doesn’t get overcooked.  Once the rice is cooked, you may need to add more broth, depending on how thick you like your soup.  Then just add your chicken and a hefty splash of cream.  Coconut milk is also very nice in this dish, but I didn’t have any on hand.DSCF1056

Then just stir it up, adjusting your seasonings as you go!

DSCF1057

Hope you enjoy, whether flying in a shoe or sitting at home.  And stay warm!

DSCF1061

Back to Business

Well, it’s been a struggle getting back in the saddle, business wise. Maybe something to do with Christmas and travel and jet lag and pregnancy and home school and well, that’s seems to be enough to be getting on with. I have had second thoughts about reopening my shop at all, since there will be a new baby thrown into the mix in a few months. But after all the work it took getting things off the ground, I hate to let it go entirely. Besides which, I already have a few new orders and I wanted to show you my newest doll!

She may not seem all that different, since her face and hair are pretty much the same, but she is actually a much larger doll. There are small details as well, like the fact that her hands actually have fingers!DSCF0978

DSCF0979
Since her clothing is larger, I am able to do more Alabama Chanin-esque detail work on it as well. DSCF0988

I even decided it was time to play around with something other than dresses for this girl.
DSCF0989

DSCF0991

I got a lot of feedback about my dolls over the holidays, but one thing I heard several times was that the dolls I had made were smaller than anticipated. Apparently it was difficult to tell the size of the doll from the pictures. I advertised them as twelve inches, but I admit they are a very petite 12 inches. So sorry if you were misled! My new doll is 18 inches and a big boned 18 inches at that. I decided to make a twin doll in the old size for comparison’s sake, with a measuring tape, so you can get a better idea.
DSCF0993

It was funny making this new doll. She just seemed so overly enormous, after the delicate girls I had been working with for so long, but I like how she turned out in the end. She is quite comparable to an American Girl doll in size.

And here are a few more shots of them together- Big sister and little sister, if you will.
DSCF0983

DSCF0986

DSCF0987

So there we are, back in business! I am playing around with pricing still, so if you have any questions, let me know!

Uncle Tom’s Cabin

One of the things that saddens me about living so far from where I grew up is the fact that I can’t share experiences with my children that made my own childhood special. They don’t know what it is like to always live near grandma and grandpa, to have access to a wealth of playmate cousins, to be surrounded by the astounding beauties of this part of the country. I am reasonable enough to know that even if I could recreate my own childhood for my children, it wouldn’t be the same. (They are all boys, for one. They are bound to see things differently.) Nor can I deny that there are things about where we live now that I prefer to my homeland. Nonetheless, when offered the chance this vacation for a short getaway to a favorite childhood haunt, I jumped at it. I couldn’t wait for my kids to experience Uncle Tom’s Cabin. (Go ahead and snicker. That’s really what we call it.)

Uncle Tom married into our very large family when I was about 8. He brought to the family things that we had never known- a speed boat and jet skis, a beautiful waterfront home where we celebrated 4th of July, and best of all, a quiet cabin on a nearby island. We spent a lot of time there as children, exploring the Puget Sound, discovering the wonders of phosphorescence on midnight boat trips, collecting shells and learning to ignore the slimy rocks and the biting cold of the water in our determination to swim.
And when we were older, it became a tradition to spend a few days there to de-stress after a big wedding. Thankfully the tradition still holds.

I was so excited for my boys to have their first ferry ride.

DSCF0498

DSCF0508

I was also excited that the forecast was for a sunny weekend. To my dismay, it was cool and cloudy when we got on the boat. But as we drove off the ferry, shafts of sunlight were making their way through. When we turned down the last hill towards the coast, the last of the clouds had disappeared.
Anyone who has ever lived in the PNW knows how exciting a thing sunshine can be. For the kids, it meant jumping out of the vans and heading straight to the beach for shells and wading and boat rides, no matter that it was January.

DSCF0529DSCF0532DSCF0563DSCF0629DSCF0628DSCF0621

For dad, it meant finding a chair and promptly falling asleep.DSCF0517

And for the rest of us, it meant long hours of sitting and pondering the light on the waves,

DSCF0515

seeking adventure in the ubiquitous tangles of driftwood,

DSCF0604DSCF0872

and hiking nearby hills for the view.

DSCF0867DSCF0866DSCF0859

But best of all, it meant someone decided to show off.

DSCF0717

Despite a late night of sitting around the fire roasting s’mores and stargazing, I set my alarm early the first morning, determined not to miss the sunrise, and to catch some quiet moments before eleven children came tumbling down from the upstairs loft.

As I came through the living room, I was astonished by how beautiful the scene was. I couldn’t believe that a place could be more beautiful than my sometimes exaggerated childhood memories.

DSCF0764

But what really brought the tears to my eyes was the sight of my first born, in his pajamas, standing on the steps leading down to the water, completely entranced.

DSCF0761

I gave him a moment, then quietly went out to join him, and we shared the experience.

Finished projects

Sorry to leave you all hanging after my last blog post. I’m sure you are all on the edges of your seats, waiting to know how my projects came out!
Again, I wish I had taken better pictures of the process, but let’s just dive back in with what we have. As I mentioned before, I was tackling three projects- two scarves and a skirt for my ten year old niece. The scarves are super simple. I found two good quality t-shirts with colors that complimented each other nicely. (BTW, I am picky about the jersey I use. For the most part, I look for Pima cotton, found most often in men’s polo shirts. It is very soft and durable, and won’t pill.)
For my mom’s scarf, I chose a navy blue and a leaf green shade. For the gift exchange scarf, I used a cheery bright red and a silvery gray. Using a rotary blade and mat, I cut about a ten inch width off the bottom of my shirts, front and back. (Just make sure it’s wide enough for your stencil to fit)

20140102-171716.jpg

20140102-171723.jpg
I left one side still sewn together with the original shirt seam and cut the seam off the other side. Make sure your two colors are equal in length.
I won’t use this post to show you how I made the skirt, but I used the most basic Alabama Chanin skirt pattern. It’s only four pieces, and I used a soft brown, with a bright blue-green for the appliqué.

20140102-172351.jpg
Pin the right sides of your scarf together, and sew the edges. I usually do this by hand using a simple running stitch, since my machine doesn’t handle knit cotton very well. Leave a few inches unsewn, so you can turn it inside out. (Sorry I forgot to take photos of this step!)
Once it is turned inside out, I like to sew the edges again with a running stitch. It makes everything look neater and more professional.

20140102-173959.jpg
Now here’s where we get to use our stencils. For the navy scarf, I traced the rose stencil using a chalk pencil, since ink won’t show up very well on dark fabric.

20140102-174251.jpg
For the red scarf, I used the medallion stencil from my book, and traced it with a disappearing ink pen.

20140102-174941.jpg
For the skirt (not pictured), I used the leaf pattern, also from my book. You can do your stencil lay out however you choose.

Now, you can just use an outline stitch to trace the stencils and secure the front and back together. But I really wanted to make the rose stand out, so I traced just the flower onto white jersey and cut out the petals. Then I pinned the petals to the navy, using the stencil as a guide.

20140102-175509.jpg Then I secured them using a blanket stitch.

Once your outline stitching is done, we can do a little more to make the patterns stand out. Take your sharp little scissors and cut out the center of the leaves and medallion shapes, taking care to leave a small border around the stitching. We want to see the color underneath!

20140102-175903.jpg
Sometimes, if the shapes are too small to cut out, I just color them in with a sharpie! Be creative!

20140102-175911.jpg
Once, they are all cut out, you are done!

20140102-180324.jpg
I failed to get a photo of the red one completed. My newly married sister snagged it in the gift exchange and went off on her honeymoon before I could get a shot of it. But this is the skirt, outlined, cut out, and embellished with a few buttons for fun.

20140102-180521.jpg

20140102-180529.jpg
It has been fun to get away from doll making for a few weeks and go back to some Alabama Chanin projects. I’m sorry if this ‘tutorial’ has been a little unclear. I will try for better pictures and instructions next time. But here is a question. I have been thinking of adding scarves and skirts to my shop. Would it be worth my time? Would you buy one?