A simple salad

Each year, as Thanksgiving draws near, I find myself reminiscing about the good old days when we were young and carefree, just out of college and with only one or two kids. For three or four years, we used to travel to St. Louis for Thanksgiving to visit my sister and her hubby. It was always so much fun. My energetic brother-in-law called it “The Great Thanksgiving Extravaganza” and kept us on our toes the whole weekend, doing things like switching the labels on the cans of cranberry sauce and olives while we were cooking, or dragging us all out into the cold to play a wild game of basketball after we had eaten way too much.
The last year we did it, it had become rather popular and I think about 12 various friends and family members traveled up to crowd into their cozy little house, (with one bathroom, mind you). It was the year my other sister got engaged, and it was such a festive time. It felt like we cooked non-stop the entire weekend, and I remember my sister being so startled that we had gone through 25 pounds of potatoes in a few short days.
The last meal we had together was on a Sunday, and a few friends from church had invited themselves to join us. My sister and I were a bit nervous since we only had a tiny roast for about 15 hungry adults, but my brother-in-law and I devised a plan. As soon as everyone had been seated, we walked around serving the meat, claiming it was too hot to pass at the table. Everyone got an equal portion, and we whisked the empty platter out of sight, so no one would ask for seconds. He and I hid the fact that we had gotten no meat, under a pile of gravy and potatoes. That was a memorable meal, even without any meat.
I remember we also had this salad that day, or at least one similar to it. The base of the salad is my sister’s recipe, the toppings are more like a salad my mom makes. I am not a fan of bottled salad dressings, so I have two or three basic vinaigrettes I like to use a lot, and I always feel a nice salad can make any meal just a little over the top, so here we go.

20131111-210311.jpg
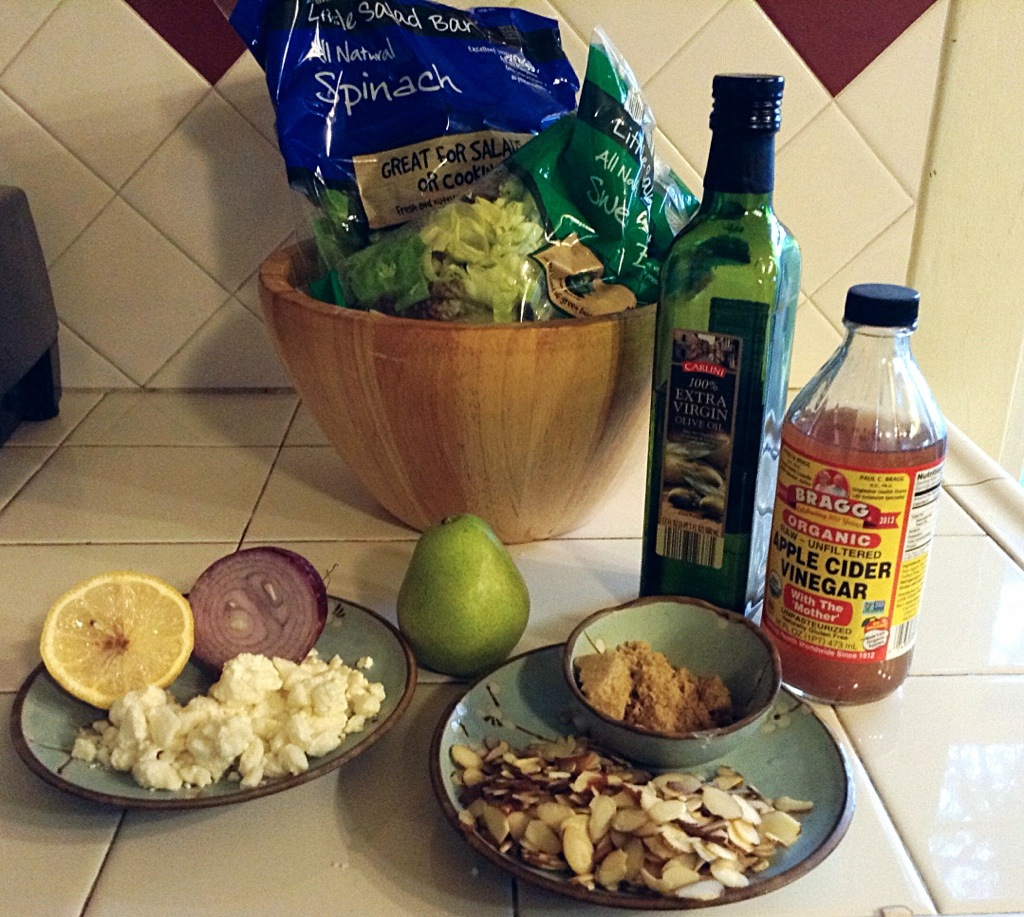
I don’t usually buy pre chopped salad greens either, but they were out of any other kind of lettuce at the store, the day I went! This is a bag of spinach and some baby greens, but any lettuce will do. At any rate, here is the dressing.
In the bottom of your salad bowl, whisk together

1/3 cup olive oil
1 Tablespoon apple cider vinegar
1/2 a lemon, squeezed
1 Tablespoon or so of brown sugar
Salt and pepper

20131111-210842.jpg
That’s it.
Put your lettuce on top, but don’t toss it yet. I used both bags of greens here.
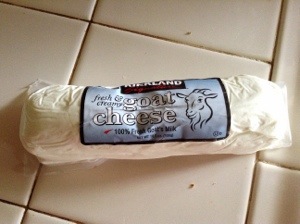
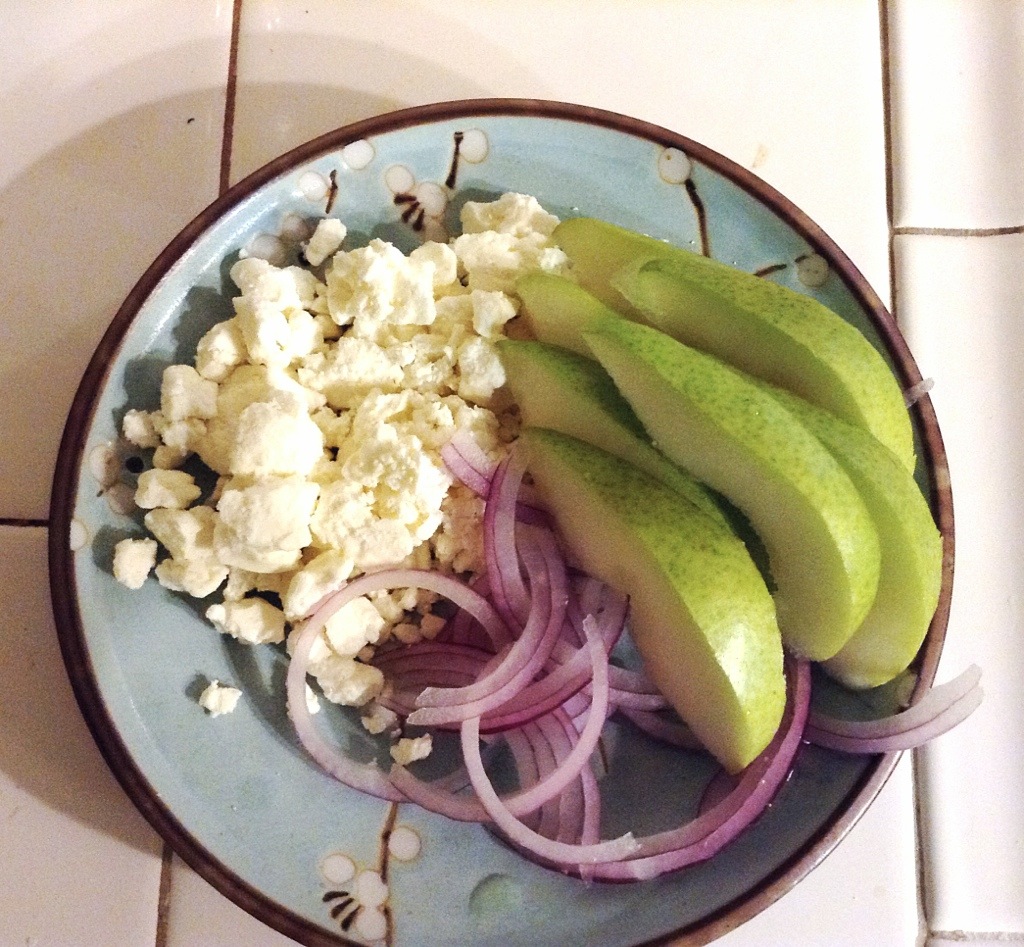
Then the toppings are up to you. This is a very versatile salad. I often switch out the pear with apples, or even strawberries. The almonds can be walnuts or pecans, and the cheese can be goat instead of feta as I have here. And I love a little slivered red onion.

20131111-211129.jpg
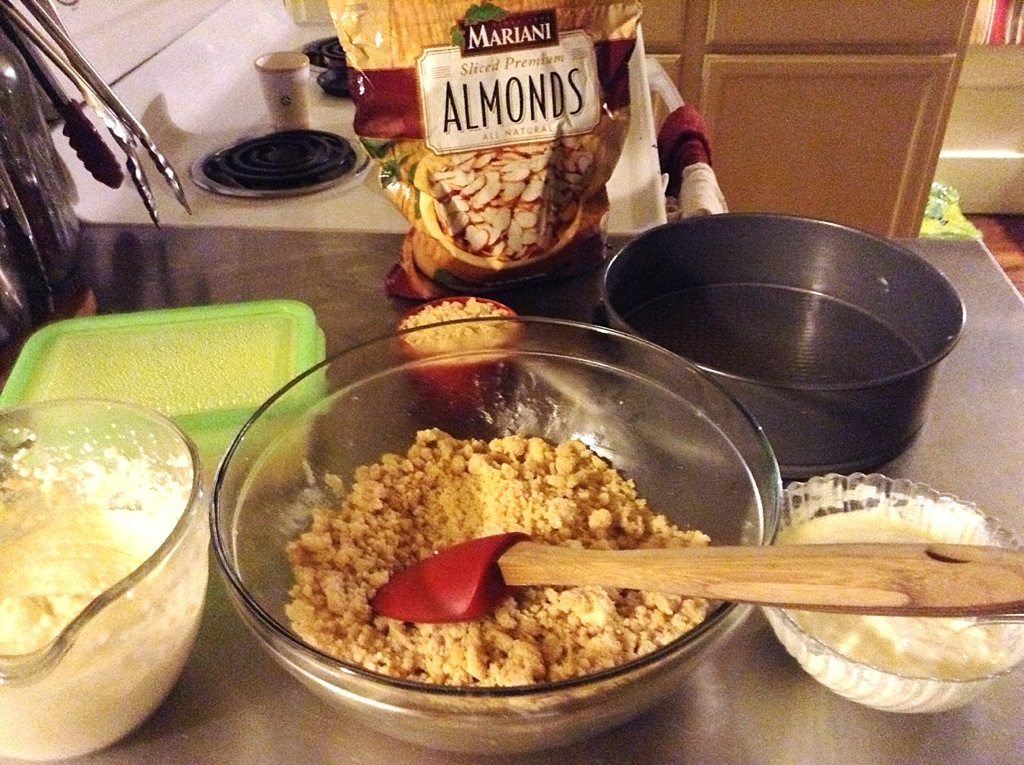
If you are short on time, you don’t have to candy the nuts, but I’ll show you how anyway. They can be used in so much more than salads. The only trick is not to walk away while the sugar melts. I have burned so many nuts that way!
Before you cook them, get out a piece of parchment paper or aluminum foil sprayed with oil and set it on the counter.

I am not big on measurements, but this was roughly

1/2 cup of slivered almonds
1/4 cup of granulated sugar

20131111-211453.jpg

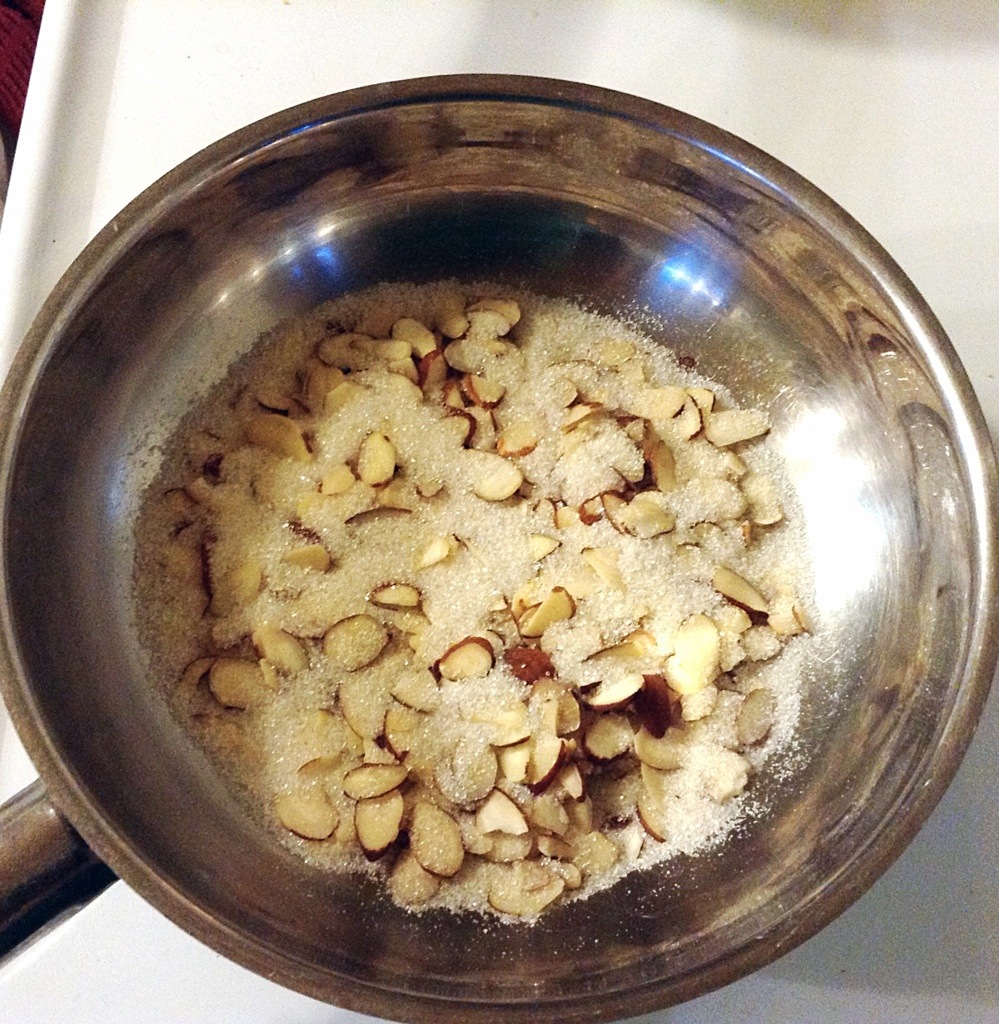
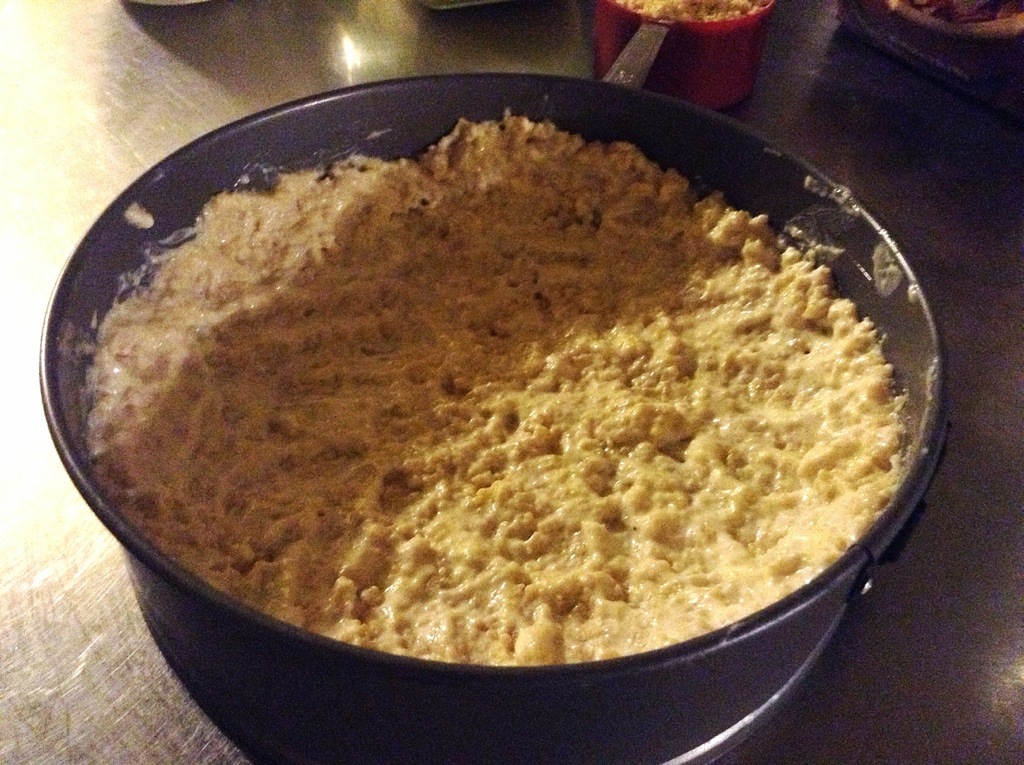
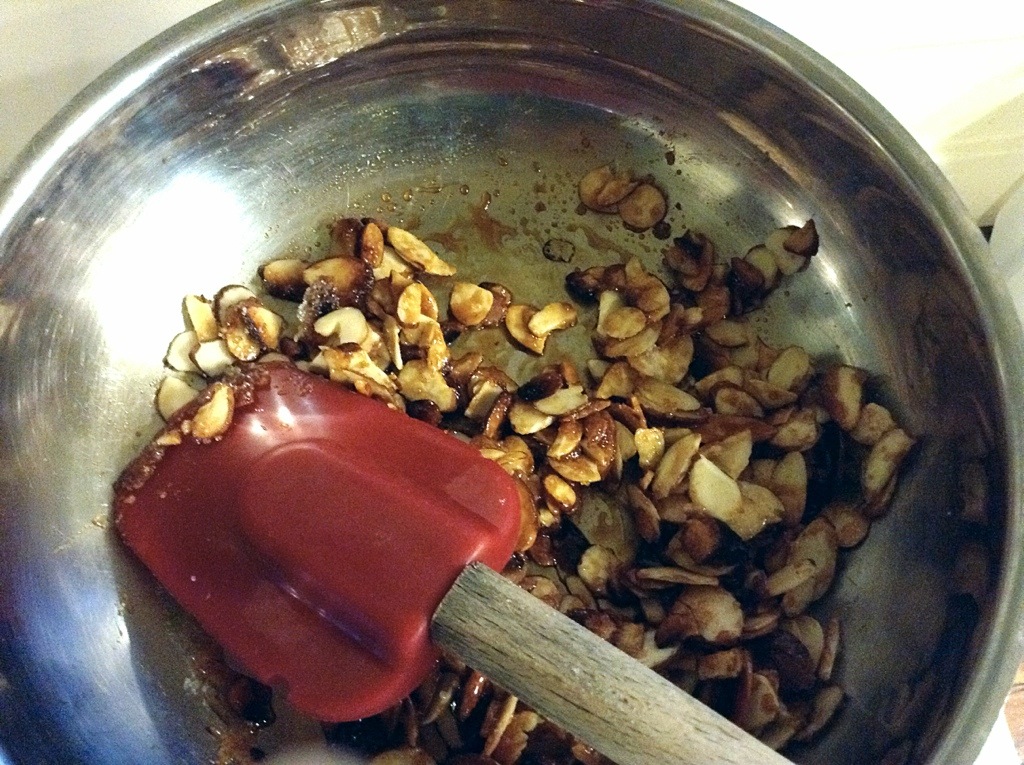
I never use a black non-stick pan for this, since it makes it difficult to see when the sugar starts to melt.
Turn your heat to MEDIUM! Don’t get impatient with the sugar and turn it up to high. I have burned so many nuts that way! Just watch until you start to see the edges turning brown and bubbly, about five minutes.

20131111-211838.jpg
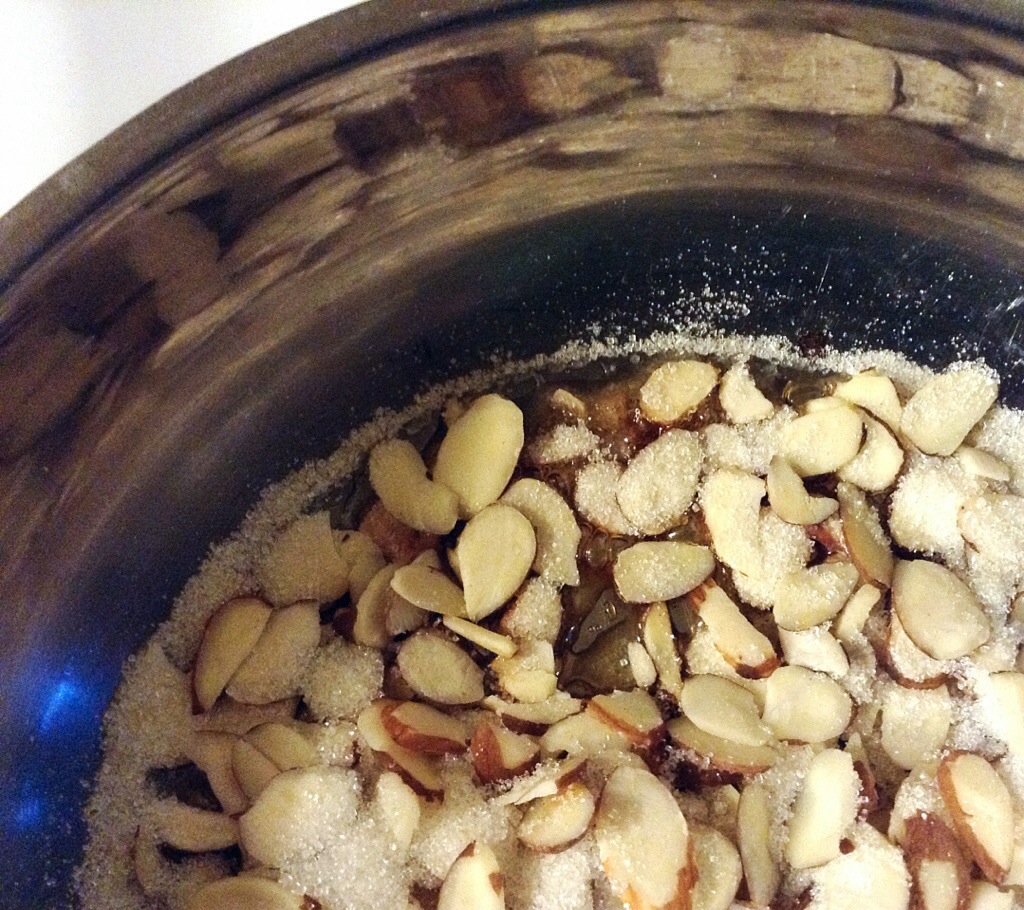
Start stirring until all the sugar has turned to caramel and the nuts are evenly coated. This can happen very quickly.

20131111-211940.jpg
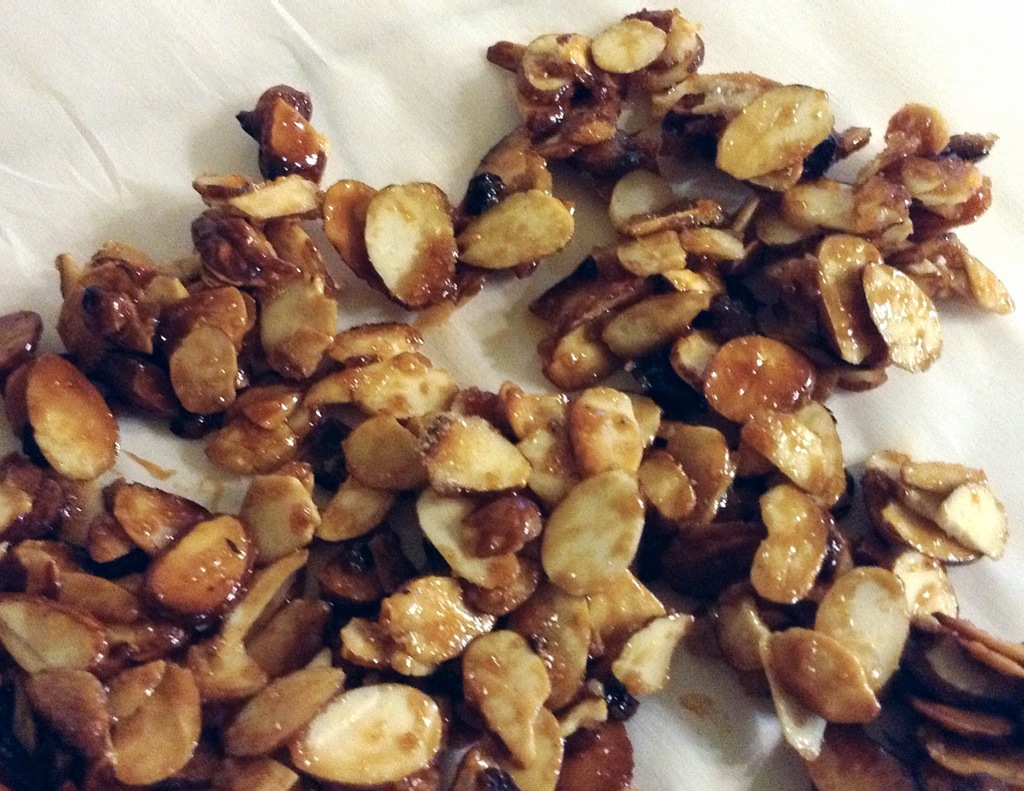
Before the caramel can harden, spread the nuts onto your parchment paper or foil, and let them cool. Then break them up into delicious little chunks and whack at your children’s hands as they try to sneak them.

20131111-212315.jpg

Now is the time to toss your salad. I usually just toss the lettuce and then layer the goodies on top for a more impressive finish!

20131111-212546.jpg
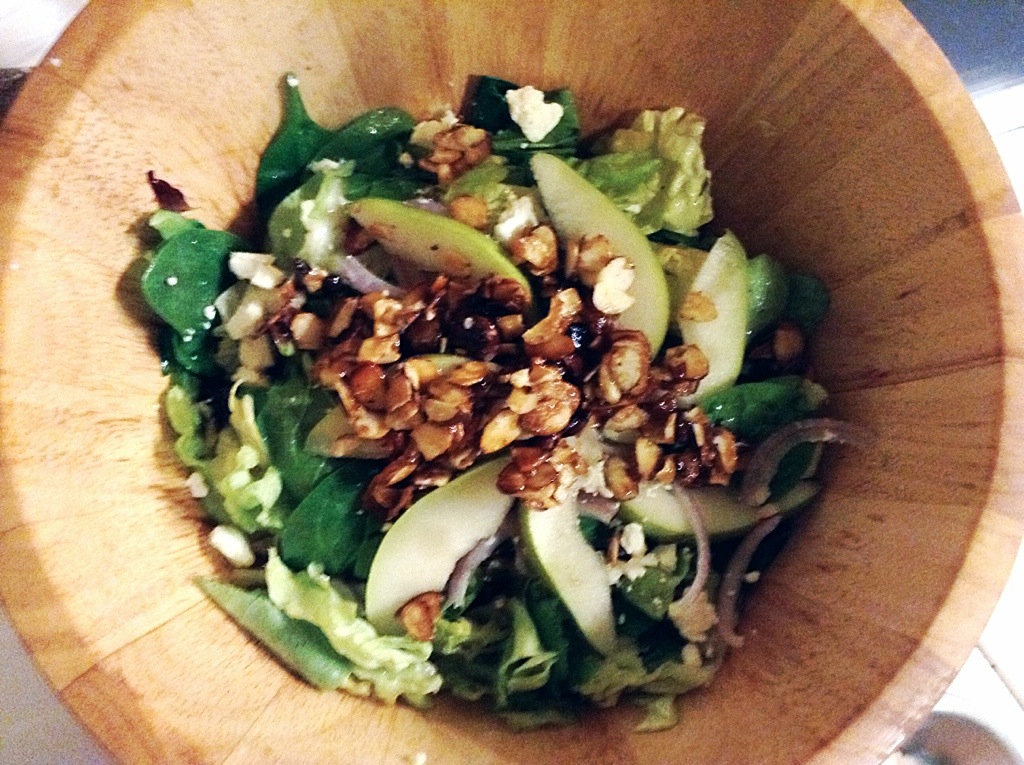
Serve it on a weeknight, or for your own Thanksgiving Extravaganza!
I once had a man who avidly declares all veggie’s to be “rabbit food” ask for seconds on this one, so I know it’s good.

Pumpkin, of course!

I feel like I have been slacking on the blog lately, since I have been sewing, sewing, sewing! But I’ll take a break from the needle to share a little festive recipe this morning. Whether you’re celebrating Halloween or Reformation day, or just glad it’s fall, this is a wonderful, comfort food kind of breakfast- Pumpkin Waffles! I’m trying to think of a funny cooking anecdote to go along with this recipe, but for now, here are your ingredients (just ignore the baking soda- there isn’t really any in this recipe.)

20131031-093812.jpg
I am doubling the original recipe here, because I like to make a lot and freeze the leftovers for future breakfasts. But I’ll give you the regular measurements as I go. Start with your wet ingredients. In a large bowl, combine

1 cup of pumpkin puree, either canned or fresh
I cup of buttermilk (regular milk works fine)
1/2 a stick of butter melted
A splash of vanilla (not pictured)

20131031-094324.jpg

Now I like to separate my eggs for waffles. This is not absolutely necessary, but if you beat your egg whites, it makes for a nice light and crispy waffle. So either crack two eggs into the bowl, or just the yolks, and set the whites aside.

20131031-094530.jpg

Now for the dry ingredients. In another bowl, stir together
2 cups all purpose flour
1 Tablespoon baking powder
1/4 cup of sugar
Your favorite pumpkin spices to taste- here I used about 1/2 tsp nutmeg and a hefty dose of cinnamon

20131031-094854.jpg

Add the dry to the wet and stir until barely combined.

20131031-094944.jpg
If you separated your eggs, now is the time to get out your mixer and beat them until they are stiff.

20131031-095033.jpg

20131031-095040.jpg.
Aren’t eggs amazing?
Just gently fold the whites into your batter. It should be fairly thick when combined.

20131031-095142.jpg

Now get your waffle iron, (or irons as the case may be) warmed up.

20131031-095304.jpg

Ooh, wait, I just remembered a funny waffle anecdote! Humor me, would ya?
Back when we were young, carefree and child free, (is that redundant?) my sister and brother in law came for a visit. I decided to make these waffles for breakfast. All went well- no baking powder mis-measurements or burnt waffles. But we were in a hurry to get out the door for something, and instead of pulling the last waffle out, I just unplugged the iron, so it would stop cooking, and off we went. When we got home hours later, I grabbed the iron and stuck it back in the cabinet, never thinking to check if there was still a waffle in it.

Had it been a regular waffle, it probably would have simply dried into a crispy waffle cracker, no harm done. But because of the moist, sugary pumpkin content, it grew into something black, hairy and terrifying. The next time we had waffles, say about three weeks later, I of course didn’t check the iron to see if there was an old growth of waffle inside, but plugged it in to warm it up. The resulting smell was truly the stuff of Halloween horror stories. When I finally discovered the source, I could hardly open the thing. Not only was I afraid, but it was pretty well glued together by three week old pumpkin muck. I was brave enough to try to clean it, but all the non stick covering came peeling off with the old waffle, so it ended up in the trash. Let that be a lesson to us all. Don’t leave these waffles in your waffle iron!

So as I have been rambling on, you should have made a decent stack of waffles by now. These are great with maple syrup of course, but since it’s a holiday, I decided to make a fabulous little sauce that we only have on very special occasions, since it really is positively sinful. Toffee sauce!
And here you were, thinking I was gonna post a recipe without whipping cream. Trick or treat!
In a saucepan, if you dare, combine

1/2 cup brown sugar
1 stick of butter
1 cup of heavy cream

20131031-101538.jpg
Told you it was sinful. Now let it come to a simmer until it is nicely combined and a wonderful toffee color.

20131031-101732.jpg
This sauce goes well with tons of things- over cakes, on ice cream, and you wouldn’t believe what it does to a cinnamon roll. But today, pour it liberally over your crispy, spicy, delicious waffles, and don’t think about tomorrow. It is bulky sweater season after all!

20131031-102019.jpg
Happy Fall!

A family fave

We’ve had a lot of babies born in our church lately, so last week, it was time to make another ‘new baby’ meal. I am just now getting around to posting the recipe. I decided to make chicken enchiladas. Now I am no expert on Mexican food, and am not sure how authentic these enchiladas are, but it does involve tortillas baked in a pan with meat and sauce, so that counts, right?

This recipe is an old family favorite that we got out of a church cook book. (Credit for the recipe goes to our friend Kim S.) Church cook books are really marvelous resources, don’t you agree? The original recipe is super simple- so easy, in fact, that it was one that my sisters and I often used when we were learning to cook. And since my recipes aren’t complete without a funny or embarrassing story to accompany them, and since I got my sister’s permission to share this, so long as I didn’t reveal her name, here is the tale.

My sister, as aforementioned, was attempting to learn cookery, and decided on this recipe. The filling for the original recipe is simply chopped chicken, sautéed and smothered in salsa. Well, she chopped up the half frozen chicken breasts, threw them in the pan, smothered them with salsa and finished the recipe as instructed. The house soon smelled wonderful, and the whole family sat down to enjoy the meal in eager anticipation.
I think I got about three bites into my enchilada before I was brought up short by a piece of chicken that simply wouldn’t be chewed. I worked at it a little longer before realizing that others at the table were experiencing similar difficulties in mastication. One sister discretely removed an unchewable morsel from her mouth and laid it on her plate. It was one of those awkward moments, where no one wanted to say anything, but no one wanted to keep eating. I think my mother finally broke the ice and started an investigation. We all thankfully removed the alien chicken from our mouths and tried to solve the mystery.
We asked my sister at length how she had prepared the meal, but she claimed she had followed the recipe to the letter. Poking at the foreign substance a little more revealed it to be some form of plastic. But how on earth could so much plastic be chopped up in one meal? An odd question indeed. My mother again broke the silence when she realized that my sister had inadvertently forgotten to remove the plastic sponge from the styrofoam chicken packaging. You know, that thing they put in the bottom to absorb all the excess raw chicken juices?
We had all laid our forks down by that point, and am afraid to say, didn’t pick them up again that meal. And I’m afraid we might never let my poor sister forget it. But the recipe is so good, that I wouldn’t let that one unfortunate episode ruin it forever. And now I will share it! Here’s what you need.

20131011-155021.jpg
Now don’t roll your eyes if I say that the secret ingredient in this recipe is cream, because it is. However, I just read an article on facebook saying that skim milk actually makes you fatter, so I’m feeling pretty good about myself.
I mentioned the original recipe calls for a filling of chicken mixed with salsa, which is great when you’re in a hurry, but sometimes I like to doctor mine up a bit. So I started by chopping a couple of onions, two or three peppers and some garlic. This is a really big batch because I am doubling it- one for us, and one for the new baby. Might as well kill two birds with one stone, right?

20131011-155425.jpg
Sauté it up until the veggies are nice and soft. Then, to make the filling stretch, I like to add a couple cans of beans- either black or pinto, or a mix of both.

20131011-155548.jpg
Now I cheated a bit here by having my chicken precooked and ready to go. This is about six chopped boneless, skinless chicken thighs, which I prefer since they don’t get as dry as chicken breast. Whatever cut you choose, you’ll need to cook it up before you add it. But for pity’s sake, remove the little plastic spongy thing! (Sorry sis, couldn’t resist)

20131011-155913.jpg
Stir this all together with a bit of salt and pepper, and then I like to add a little heat by means of a chipotle pepper in adobe sauce. Or if you look in your fridge and realize you are clean out of chipotle peppers in adobe, you can use a teaspoon of chipotle powder. Or just salt and pepper if you don’t like heat. I just love the smokiness of chipotle.

20131011-160207.jpg
So that’s your filling. Then you start your assembly line. You’ll see I have two pans here, one of them for us and one that is disposable so the new baby doesn’t have to wash and return it. Just plop a good amount of filling in the middle of your tortilla and roll it up tight.

20131011-160434.jpg
Keep going until the pan is full or you run out of filling, whichever happens first.

20131011-160524.jpg
And now for the sauce.

20131011-160753.jpg
The original recipe says to simply pour a pint of cream over the whole thing, but my big sister told me that if you want to cut the calories a bit, you could use half a pint of cream and mix in a can of enchilada sauce. I find this adds to the flavor quite a bit and perhaps makes them more authentic enchiladas! Either way, mix the two up for a fabulously simple sauce.

20131011-160853.jpg
Then just pour on the goodness

20131011-160954.jpg
Sprinkle with a good amount of cheese,

20131011-161031.jpg
And bake in a 350 degree oven for about 40 minutes, or until the cheese is nicely browned and bubbly.

20131011-161129.jpg
Serve it with your favorite Mexican sides. Here we just had sour cream, avocado and tomato, but rice is great too. And you can hold the beans in the filling and serve it with refrieds. The possibilities are endless!

20131011-162013.jpg
Enjoy!

Chocolate Strawberry Upside-Down Cake

Sometimes people ask me how, or where I learned to bake. Did I take classes? Did I learn cherished and secret family recipes at my mother’s knee? Or was I simply born with a flour covered thumb? (Sorry, couldn’t come up with the baking equivalent to a green thumb). Much as I would like to say it was one of these things, none of them quite describe my haphazard, self taught methods of baking. My mother did teach me some things, I watched my dad when he would come home from the restaurant with some new recipe, but I have never been one to ask for help. Mine was the experience of trial and error- and lots of those.
The key to some success I am sure, was that I started very young, and I persevered through the errors; through my first under-baked apple pie with the unpeeled apples inside, through the Christmas day I spent with my hands wrapped in ice after spilling boiled milk on them, through the heavy bricks of attempted homemade bread. I once put 1/4 cup of baking soda in my muffins instead of 1/4 tsp. Talk about bitter.
And then there was the mixer incident.
I stumbled upon a picture while sorting out some childhood memorabilia the other day. I felt I had to share it, just to encourage anyone out there who might be despairing over failed baking attempts. It is a photo from the time where I was experimenting in cake making. I think I was ten or eleven, judging from the cherished homemade paisley vest that I wore throughout fifth grade. I have always been a careless person, and the day this photo was taken was no exception. I was new to using a hand mixer, and the concept of tying my hair back while cooking had probably been mentioned by my mother at least a dozen times without making the least impression on me. Well, you know what they say- experience is the best teacher.
I was happily mixing my batter and reached over the bowl to grab an egg. My long blond hair slid over my shoulder and voila-

20131002-214601.jpg
And lest you think the expressions on my families faces are expressions of concern after rushing to the kitchen and finding me with a mixer glued to the side of my face and winding my hair tighter and tighter every second while I hollered at the top of my voice, think again. The overall experience for them was one of absolute hilarity. My dad was the one holding the camera, and I am surprised that the picture turned out at all, he was laughing so hard. In fact, grabbing the camera was the first thing he thought to do. No doubt he wished we had a video camera so we could send it in and get some money. My mother was merciful enough to pull the plug and she and my sister painstakingly unwound my tangled tresses whilst cake batter oozed all over my precious paisley vest. I wouldn’t use a mixer for many years after that, but I did share in the laughter at myself.

After that lengthy prelude, I would like to share a fabulous cake recipe with you. I must warn you that this cake will win no beauty contests. More often than not, it comes out lopsided and a little lumpy looking, but it makes up for that in yumminess. So here we go.

These are the ingredients for the cake

20131002-215859.jpg

And these are for the frosting.

20131002-220052.jpg
Well, technically, it’s a ganache, but let’s start there.

In a small saucepan, combine 1/2 cup each of chocolate chips, heavy cream and strawberry jam. The original recipe calls for seedless raspberry jam, which is also wonderful.

20131002-220333.jpg
Melt over medium heat and stir until smooth. Then pour this wonderful concoction into a 9×2 inch round cake pan.

20131002-220445.jpg That’s it for the frosting.

Now on to the cake. You’ll need two medium size bowls. In the first bowl, whisk together
1/2 cup boiling water
1/3 cup baking cocoa
1 tsp vanilla
1/3 cup of your jam of choice
1/4 cup of buttermilk. (It’s fine to use regular milk here, but I always use buttermilk in baking when I can. )

20131002-221112.jpg
In the other bowl combine –
1 stick of butter and
1/3 cup each of brown and white sugar

20131002-221213.jpg
Now normally I would mix this in my stand mixer, but just to show that I have overcome my fears and triumphed over my past, I am using my hand mixer. My hair is short now anyway.

Cream it up until it’s nice and fluffy, adding two eggs along the way.

To this bowl, mix in 1 cup of flour and 1/4 teaspoon, I repeat, teaspoon of baking soda.

20131002-221744.jpg

Then add your chocolate mixture, half of it at a time and scraping down the bowl as you go.

20131002-221912.jpg

Now just pour the cake batter right on top of the ganache in the pan. This may seem weird, but trust me. Can you see the darker ganache creeping up the outer edges of the pan?

20131002-222113.jpg

Bake it at 350 for 25-30 minutes, until the center is set. It tends to puff up quite a bit and then sink back when done. Pull it out and let it cool just for a minute.

20131002-222300.jpg

Run a knife around the edge, and carefully, using hot pads and a plate that is larger than the pan and so has room to catch the pooling ganache, flip the cake over.

20131002-222438.jpg

Pull the pan off, and your cake should be bathed in wonderful rich chocolate frosting. Scrape any remaining ganache from the pan and smooth out the top as best you can. If it still looks sloppy, add some strawberries or raspberries on top.

20131002-222724.jpg
That, I will tell you, is the easiest way to look like a pro in baking. Everything looks more impressive with fresh fruit on it. So enjoy, and go on to conquer your baking fears!

Peaches ‘n Cream

Being a northern girl, I didn’t grow up eating a lot of peaches. We had cherry trees and apples and lots of berries, but we were weak on peaches. Cherries have always been my favorite fruit, and I have always dreamed of having an orchard full of them. When we first moved to the south, I went to the local nursery and asked a gardener there if I could look at their fruit bearing cherry trees.
“We’re all sold out of cherry trees ma’am,” he said in his friendly drawl. “They sell out quick this time of year.”
“Oh,” I said, “So they grow well around here?”
“Nope,” he replied.

Though disappointed, I thought to myself, “when in Rome,” and bought some peach trees.

Those trees haven’t been too successful either, but there are always plenty of good peaches for sale this time of year, and this is one of our favorite (and easiest) ways to eat them. Grilled!

We have actually never owned a grill in our twelve years of marriage until this last labor day when the hubby found this itty-bitty table top grill on sale and brought it home. Up until labor day, I had been happy to grill peaches on my cuisinart griddler, but I must admit they are much tastier over charcoal.

It’s handy too because you can grill and eat your dinner, and then just throw halved peaches on there after the coals have cooled a bit.

20130922-182837.jpg

20130922-182846.jpg
It’s hard to say how long they take- between five and ten minutes. Just check them occasionally, flipping them once. They should be just the slightest bit black, and soft without falling apart.

While they are cooking, you can decide what to serve on top. Vanilla ice cream certainly works, or whipped cream, but our hand down favorite is my imitation crème fraiche. I know I talk a lot about the foreign things I have in my fridge, but I can’t afford to keep real crème fraiche on hand, so I have learned to substitute. The closest thing we have to crème fraiche in the U.S. is sour cream, but according to the hubby, it’s not quite right. So what do we do around here to fix things? Add cream of course! I told you we add cream to everything, even if it’s cream.

20130922-184421.jpg
I’m not a big fan of measuring things, so I usually just put a big glop of sour cream in a bowl (maybe a cup?) and pour enough heavy cream to cover it. Oh, and just a hint of sugar, maybe 2 tablespoons. (That’s raw sugar, in case you are wondering why it’s brown)

20130922-184614.jpg
Then just whip it up until it’s nice and thick and creamy. Let me tell you, this stuff is good.

20130922-184728.jpg

Put a nice dollop on each peach half. You could leave it like this, but I find that what really puts these over the top is a sprinkling of nutmeg, fresh ground if you can manage it.

20130922-184954.jpg
And there you have it. A super easy summertime dessert that I just realized I am posting on the first day of autumn.

20130922-185212.jpg
Ah well, better late than never.

Birthday breakfast part deux

Before this day is over, I suppose I should finish the cake post I started last night. When we last met, we had all our ingredients prepped and ready for an early morning session in the kitchen. Thankfully my alarm went off, I got my shower, and armed with coffee, I started back in.

You’ll have to pardon the quality of these pictures as it was still dark outside. Get out your participants and your greased springform pan.

20130915-181621.jpg

Pour the small bowl of sour cream into the bowl of crumble and mix well. Then pour this into your springform and spread it so that the batter comes about two thirds up the sides of the pan.

20130915-181750.jpg

20130915-181804.jpg
Next comes the bowl of cream cheese. Plop it on top of the batter and spread until it is smooth.

20130915-181857.jpg

20130915-181906.jpg

And now your fruit filling. Remember, you can use just about any jam you want, but I have to put in a good word for lemon curd here. I just feel like it gets a bad rap because of its name. I don’t know who came up with the name lemon curd but there are definitely no curds or curdling involved, unless of course you make it wrong. It’s just a lovely silky, buttery, lemony custard. But enough about lemons, curdled or not. Use what you like and spread it on top of the cream cheese-about half a cup.

20130915-182441.jpg

20130915-182450.jpg
Now you get to use that cup of crumble you set aside. Sprinkle it evenly on the other layers.

20130915-182614.jpg
And of course, top with slivered almonds. Now it’s ready to slide into the oven, which I forgot to mention should have been preheated to 350 before I got in the shower. Oh, and pay no attention to the bottom of my oven.

20130915-182809.jpg
Give it about forty- five minutes to bake. It will give you time to go wake up your kids and tell them to get dressed about forty-five times. The edges should be nice and brown by then, but the middle will still feel jiggly because of the fruit filling. Pull it out and let it cool a bit or the filling will run all over the place. This will also give the sun time to get up so you can get some decent pictures.

20130915-183050.jpg
Remove the sides of the pan and dish it up with some nice fruit, or bacon if you need something healthy.

20130915-183246.jpg
Oh, and of course a cup of coffee.

Here’s a side view of the layers.

20130915-183335.jpg
So all in all, a good start to a good birthday.

Birthday Boy Breakfast Part 1

Well, the hubby’s birthday falls on a Sunday this year, tomorrow to be exact. I was trying to think of a fitting tribute for the man I love without getting all sentimental and mushy about how I am married to my best friend and how he is the best guy in the world etc. (which he is, of course) As I was pondering, one of the men who works for him at his current job site pulled up on his motorcycle and knocked on my back door. I had to tell him that the hubby wasn’t home, having taken the boys out for the evening. He introduced himself since we had never met and then said in one of those thick southern accents I still have a hard time interpreting sometimes,
“So you’re the one married to that guy, huh?”
“Umm, yes,” I said somewhat hesitatingly.
“He’s crazy, that guy”, he continued.
“Well, uh,…” I eloquently replied.
He went on-

“The first time I ever work for him, we were up in this tiny crawl space doin’ electrical. It was dark and hot and itchy and I just wanted to get the **** out of there.” (No apology for his language, by the way.) “I was working as fast as I could so, but I heard him askin’ me somethin’. He was tellin’ me to keep an eye out for crickets. ‘Crickets?’, I ask him. ‘Yeah, crickets,’ he tol’ me. He tol’ me he done caught a prayin’ mantis for his boys and he wanted to catch some crickets so he could feed the mantis and they could all watch how it catch it’s food. I thought he was crazy, ya know, but then I starts thinkin’ he must jus be crazy ’bout his boys to think of them like that when we was up in that ******* crawl space.”

Despite the earthiness of this narrative, by the end I was smiling and thanking him in my mind for giving me a very fitting tribute to my hubby, the man who hunts crickets to bring joy to his little boys. Then I came inside and decided to make him his favorite coffee cake for breakfast.

I am going to post this recipe in two stages, because I want to prep for it tonight, and bake it in the morning. I don’t know about you, but our house tends to get a little hectic on Sunday mornings as we try to get out the door to church, so whatever I can do Saturday night to prepare for the morning, I try to do. This isn’t the simplest cake in my arsenal, but it’s a special occasion! So here’s what we need to do tonight.

Get out your stuff-

20130914-193131.jpg

We’re working with pretty basic ingredients here- flour, sugar, butter, sour cream, cream cheese. If you are wondering what’s in the pitcher, it’s whole wheat pastry flour I just ground in my vita-mix blender. I’m all about health here. Not really, but I have been playing around with different flours since I got the vita-mix for mother’s day, so I’m gonna try whole wheat this time. Usually I would just use all purpose flour for this recipe.

Step one, grease a 9 or 10 inch spring form pan and set it aside ’til morning.

Step two, in a large bowl combine 2 1/4 cups of flour, 3/4 cup of sugar and 1 1/2 sticks of butter.

20130914-193919.jpg

Crumble it up with your fingers until it looks like this. Remember my apple crisp?

20130914-194031.jpg

Now remove one cup of this and set it in the fridge ’til morning.

20130914-194118.jpg
To the remainder in the bowl add
1/2 teaspoon each of baking soda, baking powder and salt.

20130914-200913.jpg
Set it in the fridge ’til morning. Are you sensing a pattern here?

Step three, mix together your wet ingredients in a small bowl-
1 egg, 3/4 cup of sour cream and a splash of almond extract.

20130914-194533.jpg
Confession. I have had this bottle of almond extract for eleven years. I use it very rarely, and a little goes a long way. But it still smells good so I keep using it. If you don’t have almond, vanilla works just fine. Set it in the fridge ’til morning.

Step four, the cream cheese layer. Here’s where it starts getting really good. Get a mixer out for this step. Trust me, it’s a lot easier. I had an aversion to using mixers for a long time, which I will explain in some future blog post perhaps, but for now go ahead and mix
8 oz. cream cheese, another egg and 1/4 cup of sugar until smooth.

20130914-194943.jpg Aaaaaand set it in the fridge ’til morning.
So here is what you have ready to go in the a.m. so you can whip that cake into the oven and still have time to curl your hair for church.

20130914-200027.jpg
The last two ingredients need no prep. I have some homemade lemon curd there in the tupperware. This is another one of those odd items that I almost always have on hand, because the hubby is not only French, he’s also half British. The original recipe calls for seedless raspberry jam, but I have used lots of different fruit spreads, and haven’t hit on a bad one yet. So lemon, raspberry, strawberry, blackberry- pick your poison. And you will need slivered almonds.
So now, stay tuned for the exciting conclusion of this fantastic birthday boy recipe!

You say zucchini, I say courgette

I was prompted to share this recipe by a little facebook conversation I had last week. The conversation was started by my friend who was resigning herself to making more zucchini brownies with the surplus squash she had. My sister then chimed in, telling her that my hubby had a great zucchini soup recipe. We bantered back and forth about creative ways to use up extra garden bounty, including playing zucchini baseball, and then I sent her the recipe. I hadn’t thought about this soup in a while since our squash met the same mildewy fate as our tomatoes this year. Not one zuke did we get, but it’s a great recipe for using up some of those zucchini bats you may be fortunate enough to have laying around your kitchen counters.
But before I give you ingredients, I must tell you that it is the hubby’s recipe- one of the few he learned how to make in his youth in France. And now, since it is a french recipe, and since I am tired of trying to remember how to spell zucchini, I will tell you a little story about his soup a la courgette.

One of these days, I will tell the full and harrowing tale of my Big, Fat, French/American wedding, but today I will just give a little snippet about our rehearsal dinner. The hubby- well, let’s call him the fiancé in this story, was determined to have a big French sit down dinner for our wedding reception, involving several courses and only inviting close family and friends. This idea wasn’t working out very well since we had already invited over five hundred people to the wedding.

I managed to convince him to settle for the rehearsal dinner being several courses and only inviting close family and friends instead of the reception. It all sounded great until we started counting up those close to us. By the time we had whittled down the list to the bare minimum, we were left with about 125 people. I come from a big family.
Well, we planned doggedly on, but the cost of food started to look alarmingly high when confronted with all those courses. We tweaked and retweaked the menu to fit the budget, when he suddenly remembered his soup a la courgette. It was the middle of summer, people had gardens, and surely everyone would have a few courgettes to share. He wasn’t wrong.

In retrospect, it was a bit of an insane idea, holding a multi-coursed rehearsal dinner for 125 people in my parents back yard the night before our huge wedding, but we were young. And the soup at least, was easy and cheap. The fiancé made it himself, in the biggest pot my parents owned. We had an army of young cousins who were volunteered by their mothers to be waiters.

The first hiccup came when the day turned out to be ridiculously cold for the middle of July. It wasn’t raining, but it was overcast and so chilly that when people started arriving that evening, we had to go hunting through the house for every available coat and sweater we could find. People started in on the appetizers, but the soup was the first real course, so we started serving it up in preparation. But as I mentioned, it was a cold night and much as my waitering cousins hurried, the soup was growing stone cold. This wasn’t a huge problem since the soup could be served hot or cold, so we continued on. It wasn’t long however, before we realized that we were going to fall short by quite a bit. It was too late to make more, so I ran to the fridge and pulled out some cream. At first we just added a bit to stretch it, but as there was no end in sight to 125 bowls, we just started dumping it in. The last ten bowls or so were pretty much just cream.
When the last of the soup was served, we finally sat down. It was only then that I realized the evening was not only chilly, but exceedingly windy. All the tables were set up in my parents backyard which is overshadowed by two large evergreen trees. The wonderful soup a la courgette had morphed into bowls of cold cream with pine needle garnish.

We had to throw away a lot of soup that night, but it really is a great recipe and so easy! So now I will finally share it with you. I can’t believe I had to buy courgettes in summertime, but I got green and yellow, just for fun. And the rest of the ingredients are pretty basic-

20130906-173039.jpg

Chop up two onions and about six cloves of garlic and start sautéing them in a bit of butter or oil until softened. If you are friends with me on facebook, you’ll know I bought 8 pounds of butter yesterday, so I went with butter tonight.

20130906-173239.jpg

While those are cooking, chop up your courgettes. As for amounts, I usually just fill up the pot if I can- they cook down a lot. Say goodbye to giant, counter-filling zukes!

20130906-173513.jpg

Cover the pot and let them cook at about medium for twenty minutes or so, stirring occasionally. While they cook, sit down and sew a couple of limbs onto a few dolls if you’re really trying to multi task.

20130906-173713.jpg
Once they are really soft, pour in enough chicken broth to cover the veggies.

20130906-173828.jpg
Then the secret ingredient- cream cheese! I usually just throw a whole 8 ounce box in, but all I had was a 12 ounce tub, so I used about two thirds of it.

20130906-174150.jpg
Add salt and pepper, and now it’s time to blend. The hubby enjoys pureed soup so much that he bought me this wonderful immersion blender years ago. I use it all the time, and it’s great for blending hot soups, but you can easily blend this in a couple of batches in any old blender.

20130906-174528.jpg
Just blend until smooth, adjust seasonings as you go and avoid stepping on your baby and his plastic cup castle.

20130906-174713.jpg
Serve hot (or cold, as the case may be) with a nice crusty bread. But try to avoid the pine needle garnish.

20130906-174951.jpg

What’s in the fridge?

So I have been trying to think lately, what recipes in my kitchen arsenal are blog worthy. But I am constantly changing my recipes based on what I have in the fridge. I hate running to the store last minute, so I usually try to make do with what I have. Saturday was a busy day, I had no dinner planned, and we were headed out the door in a short while, so it was “what’s in the fridge?” time.

Usually the first ingredient I think of when time is short is bacon. It’s versatile, quick to cook, and a little goes a long way in many dishes. Oh, and it’s delicious. I thought I might have just enough to do BLTs so I started cooking it up.

20130826-185444.jpg

But alas, I had forgotten the tragic failure of our tomato crop this year due to SO MUCH RAIN. The poor babies had succumbed to a moldy and mildewy fate, so no tomatoes. Okay, no problem. The fridge holds the answer! I still wanted some kind of sandwich, so I pulled some homemade ciabatta rolls out of the freezer. Don’t hate me because I had homemade ciabatta in my freezer. I figure most people don’t, and usually neither do I, but I made an experimental batch a few weeks back, and we still had some. Usually I buy them at costco, or any other crusty roll or even sliced french bread will do. We just like ciabatta around here because it’s nice and chewy. I sliced them in half and put them on a cookie sheet. The fridge next produced-

20130826-185404.jpg

Another Costco product that I always have on hand. I live with a frenchman so chevre is a must around here. You should hear the food conversations we have around here sometimes, like-

“What do you mean there’s no chevre left , woman? ” or

“Mom, it’s been like a week since you made us any brioche or creme brulee.”

Well, not exactly like that, but I acknowledge that our general menu isn’t exactly normal.
The good news is, lots of cheeses will work with this “recipe”. A sharp cheddar is your next best choice, moving down to the milder cheddars, provolone, or even gouda. But maybe avoid the cottage cheese. The goat just has a wonderful tang that goes surprisingly well with our next contestant-

20130826-185857.jpg

Yep, jam. I voted for apricot here, but fig is also nice. I don’t like berry jams with it so much, but they work in a pinch. Trust me on the jam and cheese thing, and start spreading.

20130826-190457.jpg

The bacon was cooking nicely, but it was also shrinking dramatically as it always does, and I didn’t think it would be enough. As luck would have it, the fridge next revealed six leftover chicken fingers. I chopped them up.

20130826-191008.jpg

I added them to the bacon in the pan. Now we had something to go on.

20130826-191107.jpg

I have used leftover pork roast for this, or you can just chop up a couple frozen chicken breasts too. Lots of options here! Divide the meat evenly over the rolls, and here’s where you separate the men from the boys. Thinly slice some onion and take a poll to see who would like the added onion flavor or who will ‘definitely puke’ if they even smell an onion.

20130826-191754.jpg

The sandwich is good like this, but the ingredients tend to fall off, so I usually sprinkle some shredded cheese on the top, just to melt and hold it all together while it broils.

20130826-192100.jpg

And then you broil it! Just until the cheese starts to brown and it’s all melty and crispy and smells really good. This combination of flavors may seem unusual, but all my menfolk gobble it up. And I do to. Serve it with potato chips and baby carrots if you are rushing out the door, or any other side you prefer if you have more time.

20130826-192546.jpg

Maybe next time I’ll show you how I make easy french fries. Enjoy!

Our Go To Meal

I don’t have much of a story behind the meal I am going to share today. It’s a recipe for Chicken Tikka Masala, a basic Indian curry, that I found in a Cooks Illustrated magazine and I have tweaked it over the years into a family favorite. There are several reasons I love this meal.

1.-It’s cheap. It makes a little bit of chicken go a long way.

2.- It makes a ton of food. We often serve it when we have guests and we always seem to have leftovers.(not because they don’t like it!)

3.- It’s healthy. We often serve it over roasted cauliflower when we are watching our waistlines.

4. It is the only meal, besides Macaroni and Cheese, that all of my kids will eat without complaining.

5.- Did I mention my kids love it?

Whatever the reasons, I always seem to keep the ingredients for it in the house, so it’s what I decided to make this morning for a friend and her family who just had a baby. Here’s what you need.

20130813-190237.jpg

Lest you think I always cook in this orderly fashion, think again. This might have been the only decent looking spot in my house this morning. I snapped that photo and then turned around and took this one right behind me. Just keepin’ it real folks.

20130813-190443.jpg

Start with the chicken- 3 boneless skinless breasts should do it, although I have used chicken thighs with great success as well. Sprinkle the meat with salt, pepper-

20130813-190731.jpg

And this.

20130813-190809.jpg

This is your secret ingredient folks. Garam masala is a special curry blend you can find in your spice aisle. It’s good stuff.

Next, slather the chicken with plain yogurt. I used greek here, but any plain yogurt will do.

20130813-191107.jpg

Stick this under your broiler until it looks like this.

20130813-191204.jpg

Then set it aside. While the chicken is broiling, you can make the sauce. Get a good chunk of
fresh peeled ginger
5 or 6 cloves of garlic
one large onion.
You can chop all of it by hand, but I find it much easier and faster to use my food processor. Throw it all in there and push the button. Or chop by hand, your choice.

20130813-191434.jpg

20130813-191447.jpg

In a heavy bottomed pot, heat up a couple tablespoons of oil over medium heat and throw the onion mix in. Cook until slightly softened, 3-5 minutes. Then add 2 Tablespoons of both Garam Masala and Tomato Paste, and a spoonful of sugar to add a hint of sweetness.

20130813-191852.jpg

Stir this all together until you can smell the spices blooming. Then simply add
1 28 oz. can of crushed tomatoes
1 14 oz. can of full fat coconut milk.

20130813-192141.jpg
Adjust your seasonings, adding salt, pepper, and a little bit more garam masala if necessary. Then chop up your chicken and throw it in.

20130813-192310.jpg

20130813-192325.jpg

That’s it. I would show you a picture of how good it looks served up over rice, or couscous, or roasted cauliflower as the case may be, but I had to give this batch away in order to get some snuggle time with a sweet, dimpled baby girl.
It was a fair exchange.