Fries for a Friday night

“Easy to make” is a relative term. Any skill is going to vary in its ease, depending on the person. Are they experienced at all in the skill? Have they practiced it? Are they determined to make it work? Do they have the necessary tools? Or perhaps, are they nine months pregnant and a little brain dead?
I tend to have a slightly different view of how easy a thing is to make when it comes to cooking. I don’t know how many times people have asked me how to make a recipe, and I have responded with “Oh, it’s so easy to make! You start by chopping an onion and some garlic…”
Then I get an eye roll, which says only too plainly- “You lost me at onion chopping. I want an easy recipe.”

So when I say these fries are really easy to make, I suppose they are not quite as easy as throwing a bag of frozen fries in the oven, but if you want a really delicious homemade fry, it doesn’t get easier than this.

When I am pregnant, I can easily dispense with the ice cream and the secret candy stash. I’m a sucker for the salty fried stuff. But it took me many years to get up the guts to deep fry at home. I always heard those horror stories of people getting burned in oil fires, and I myself once almost burned a house down while messing around with hot oil. And then there is the mess of it all and the expense of using all that oil, not to mention it doesn’t do much for the waistline. I’ve tried recipes where you soak the fries in cold water, dry them individually, toss them in corn starch and fry them once, sometimes twice in huge vats of hot oil. Tasty, but so much work.

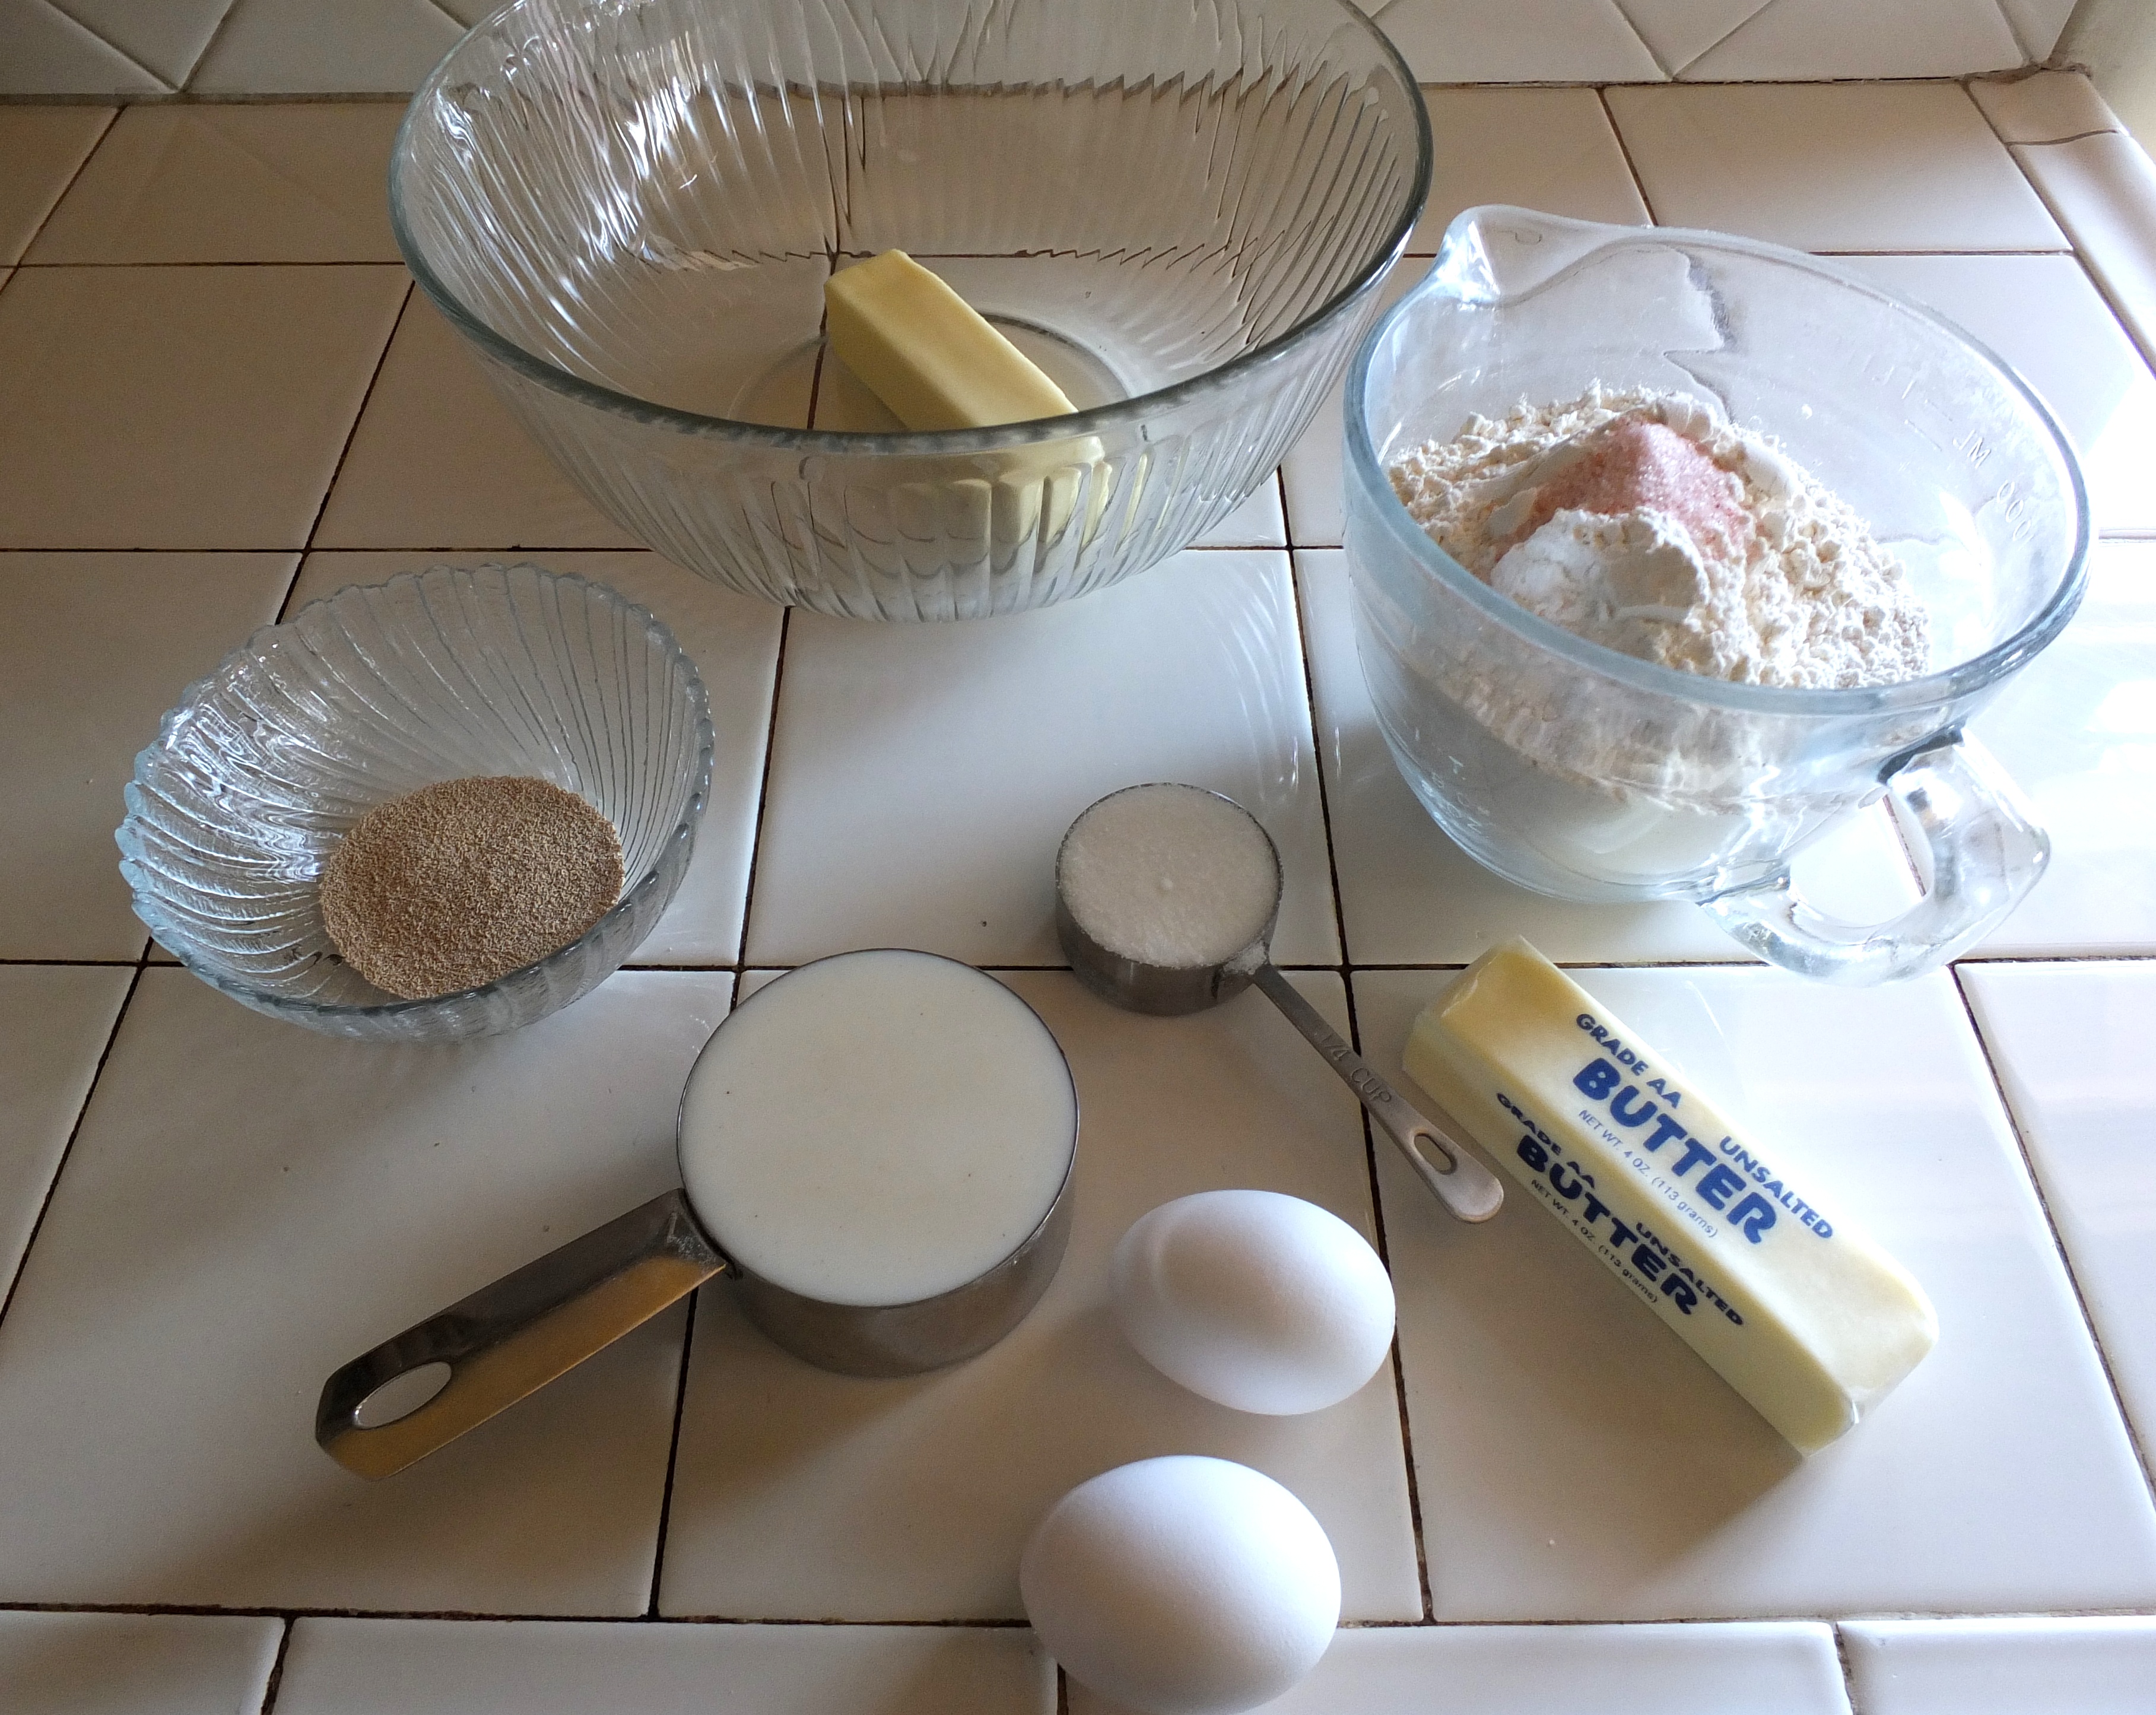
All that to say, I didn’t do much frying until I came across this method on one of my favorite shows, America’s Test Kitchen. I sometimes wish I hadn’t discovered it, because I make fries probably more than I should now. But the America’s Test Kitchen method was discouraging because they required the potatoes to be squared off first, and then cut very small and exact. I think they even suggest using a ruler to get the precise 1/4 inch measurement. If you know me at all, I don’t use rulers in my kitchen. Even measuring cups are optional. So I decided to use the method on steak fries instead- just big hearty wedges of potato. And it worked beautifully. So here goes. This is what you need.

20140502-190502.jpg
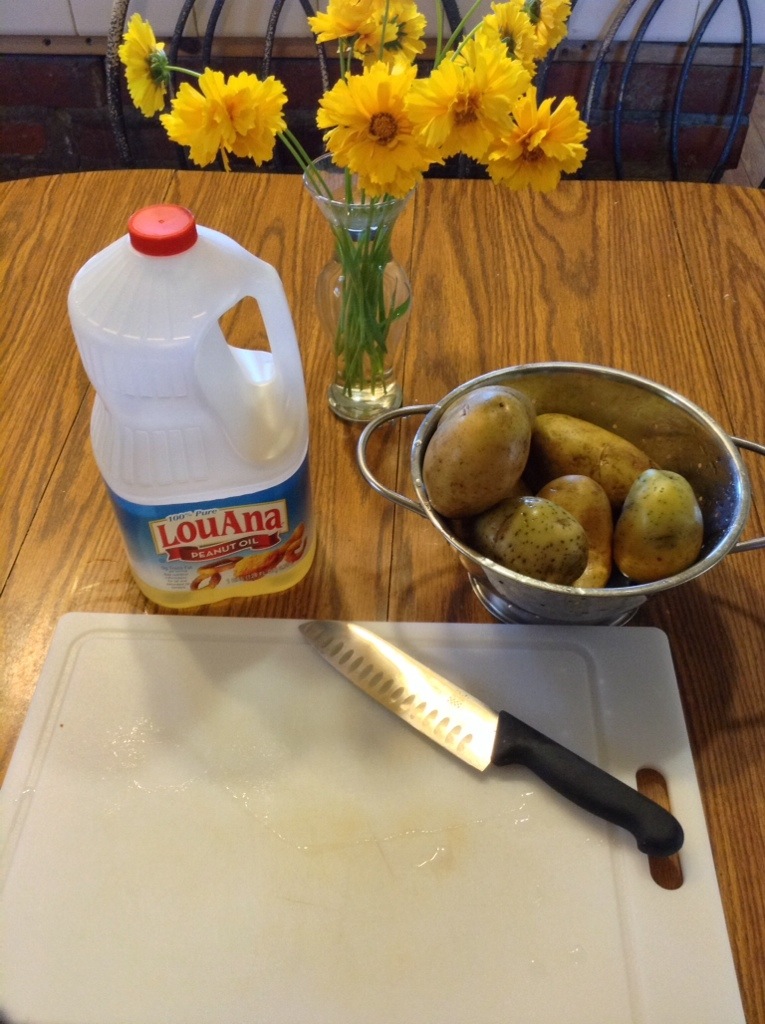
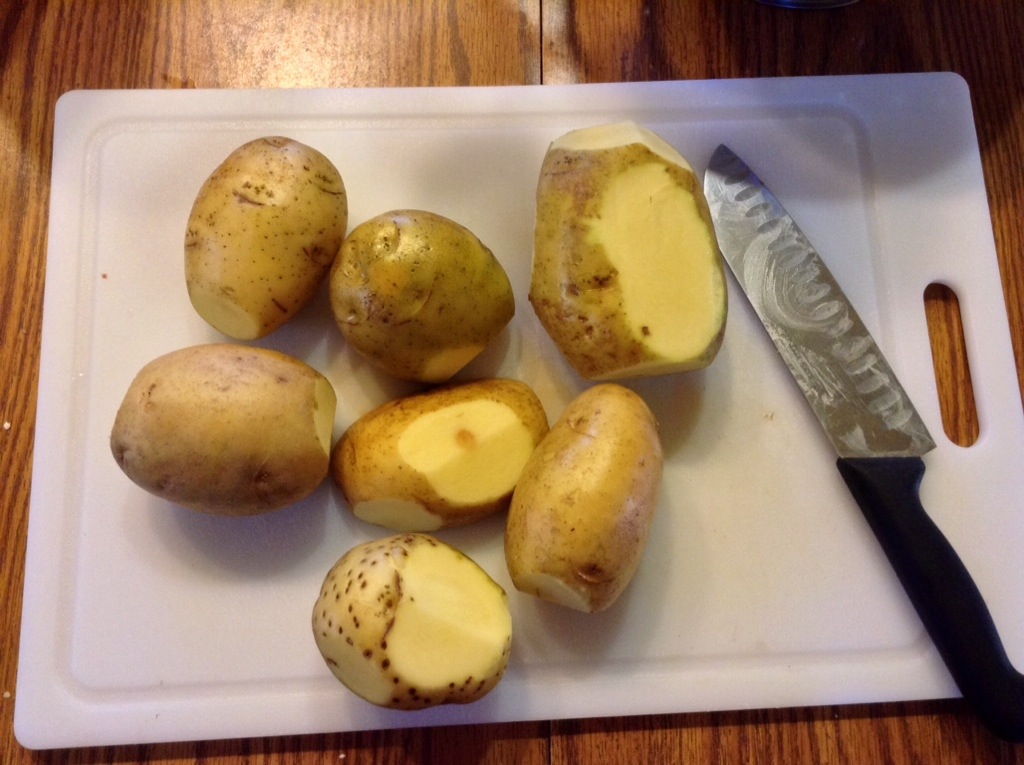
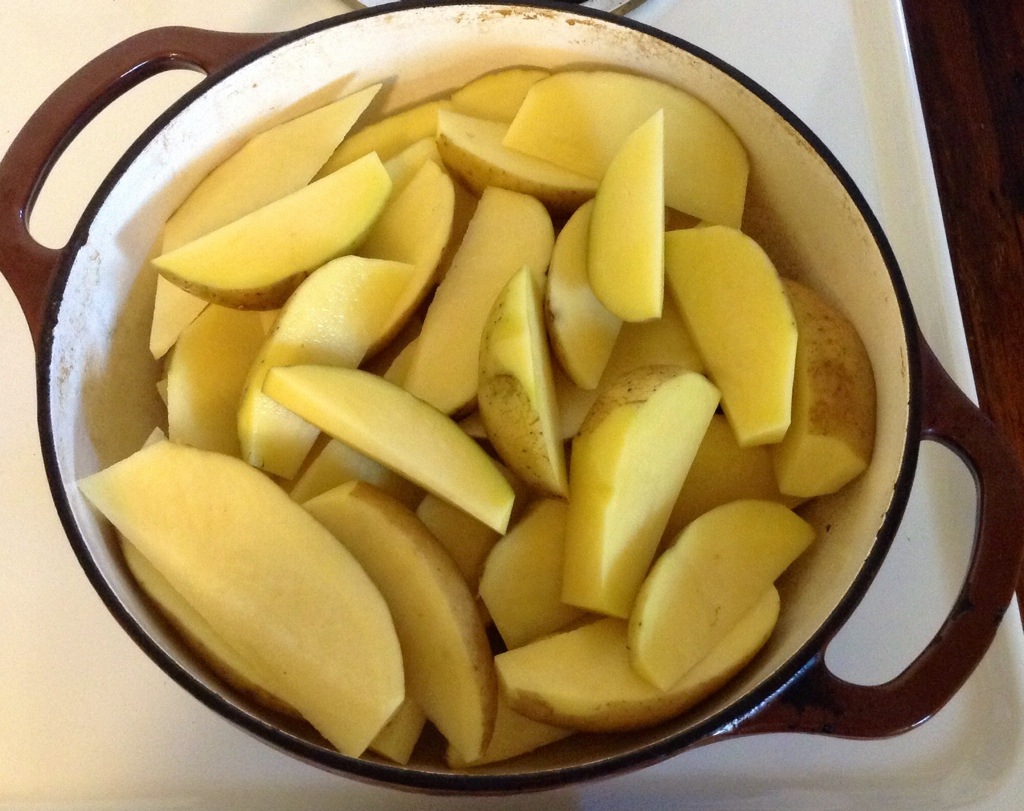
Start with your potatoes. Yukon gold work best because they are tastiest and you don’t need to peel them, but russets would work too. Give them a quick rinse and cut off any imperfections.

20140502-190707.jpg
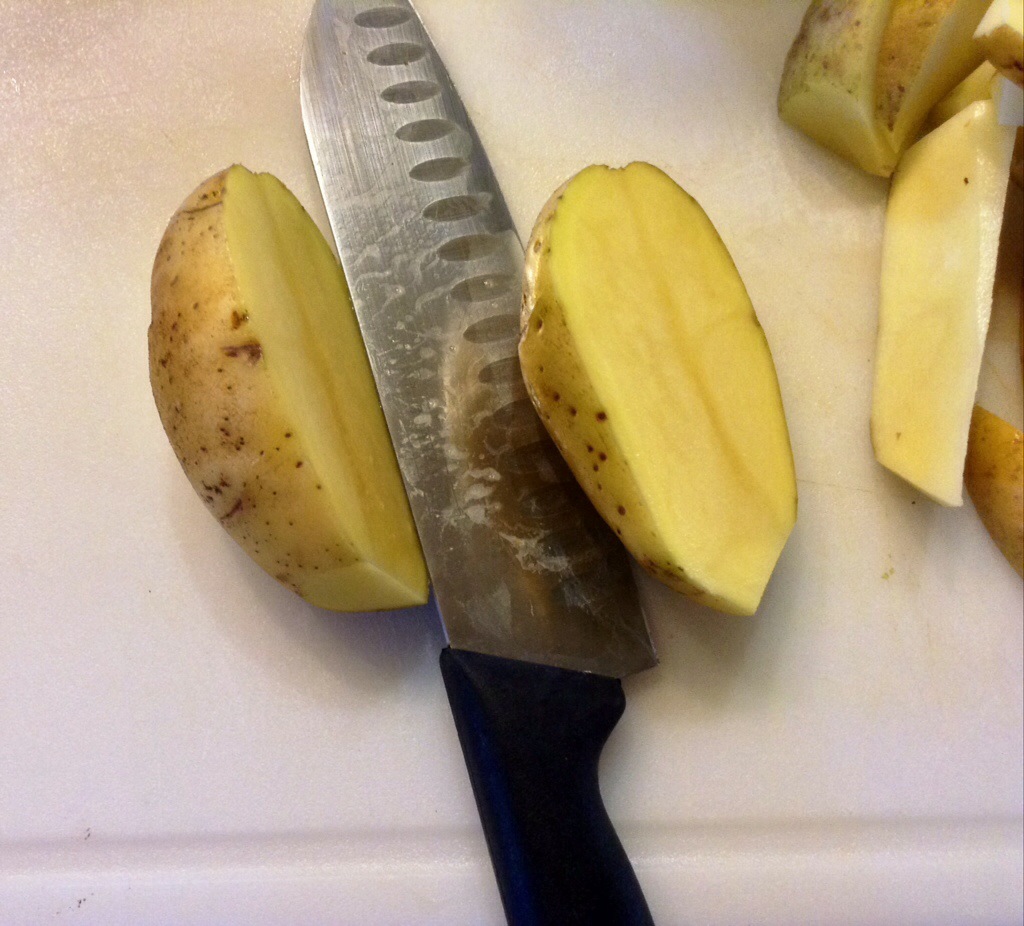
Then just slice them in half.

20140502-190741.jpg
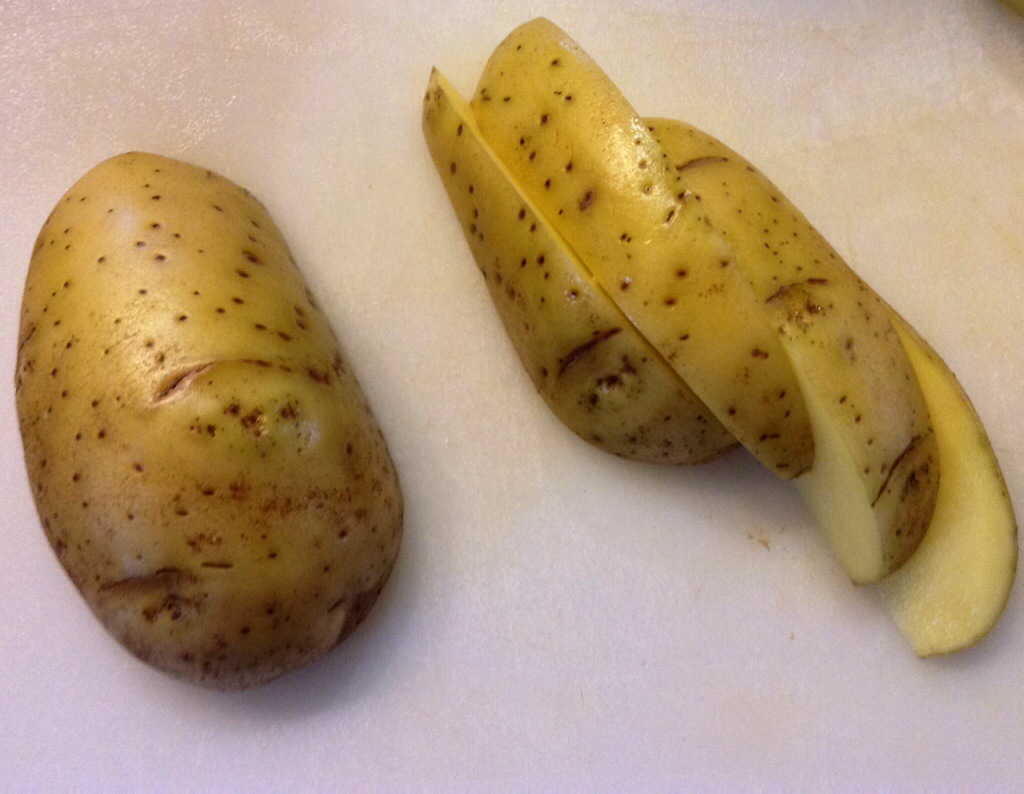
Then slice the halves into four or five wedges each.

20140502-190832.jpg
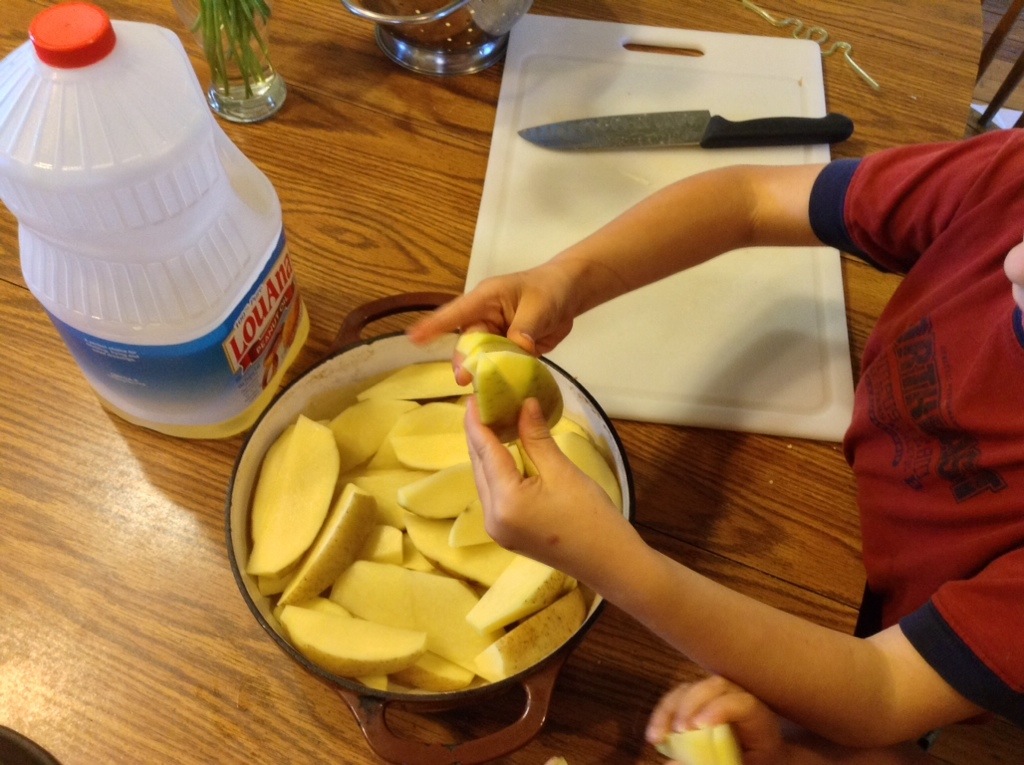
Fill up a deep, heavy bottomed pan with as many fries as you want to make. I used my dutch oven here, and got the boys to help.

20140502-191235.jpg
Set your pan on the stove.

20140502-191302.jpg
Then add your oil. I love this recipe most, because instead of four quarts of oil, it only takes about four cups. It also doesn’t require any thermometers. Just pour the oil in (I use peanut oil) until it almost covers the potatoes. It’s okay if they aren’t completely submerged.

20140502-191455.jpg
Then turn the stove on high. That’s about it!

20140502-191603.jpg
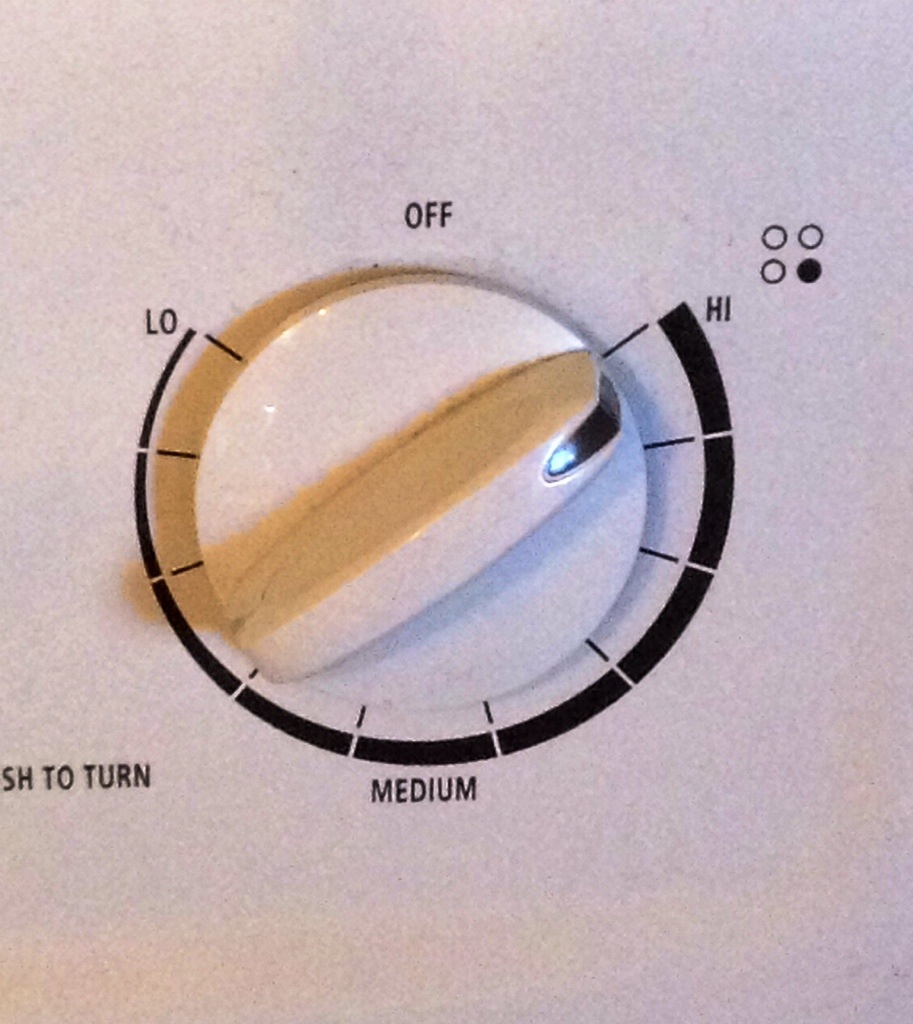
These are going to take about 25 minutes to cook, but it’s hands off, so you can work on the rest of your meal.
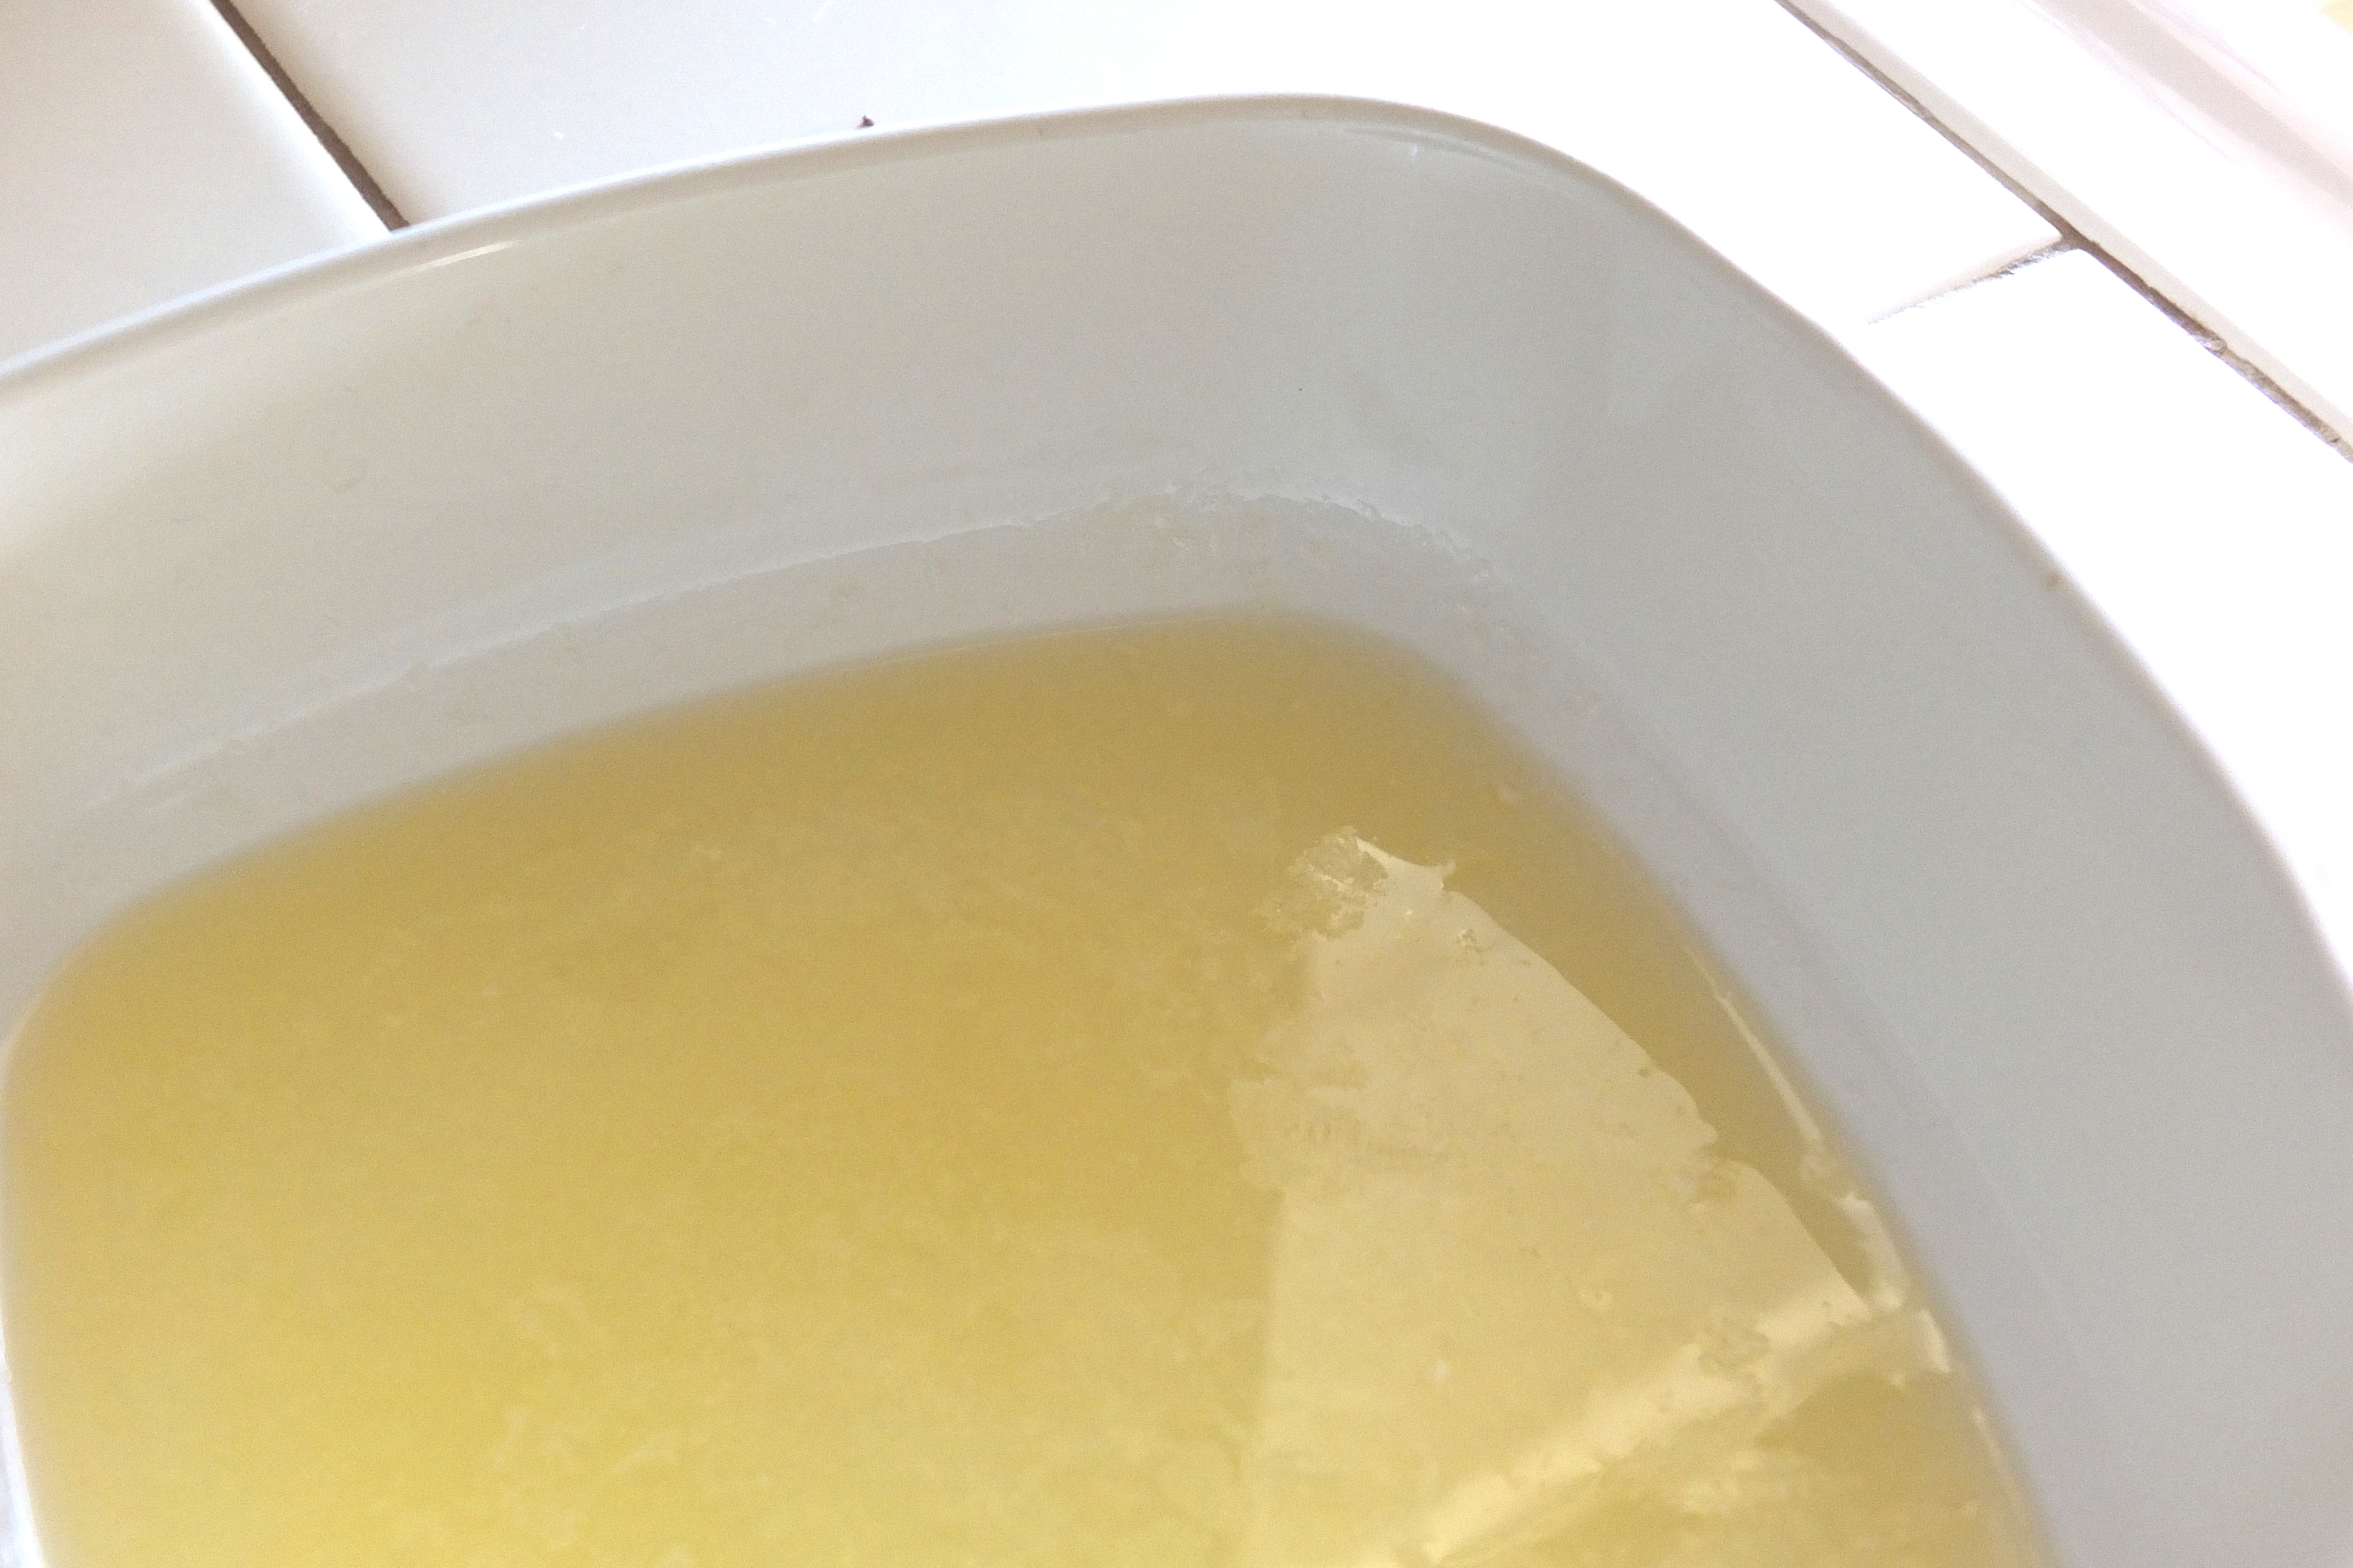
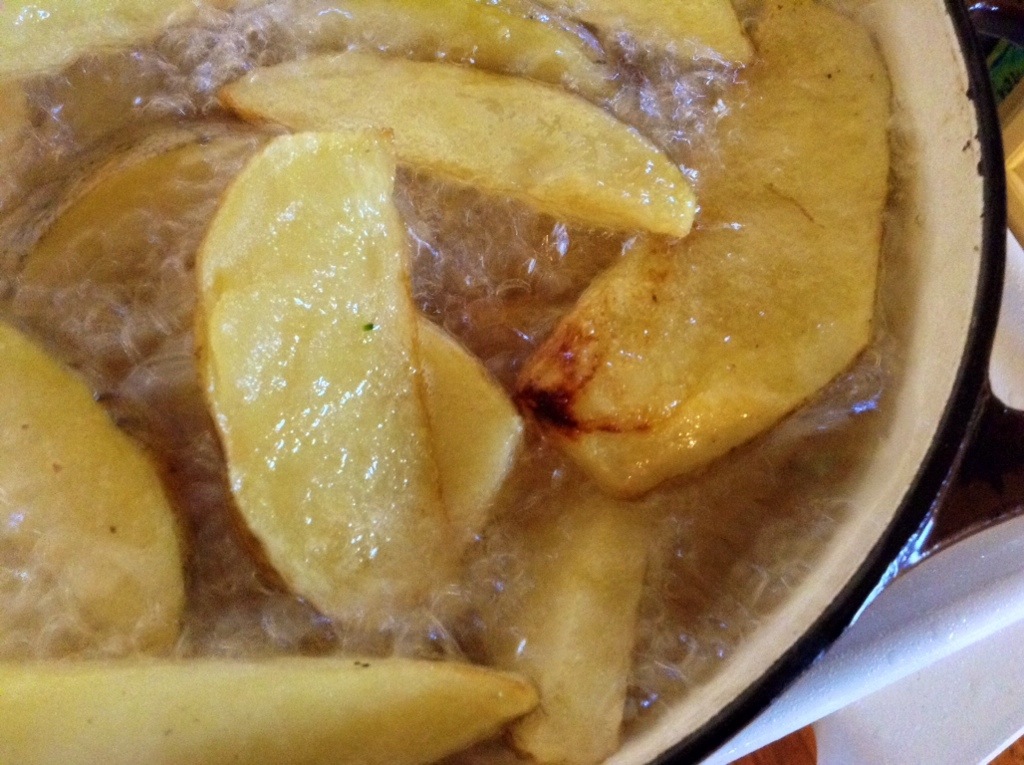
After about 5 minutes, you will start to see little bubbles floating up.

20140502-191725.jpg
After about ten, the oil will have come to a full, rolling boil. The oil may splatter a tiny bit, but it won’t overflow.
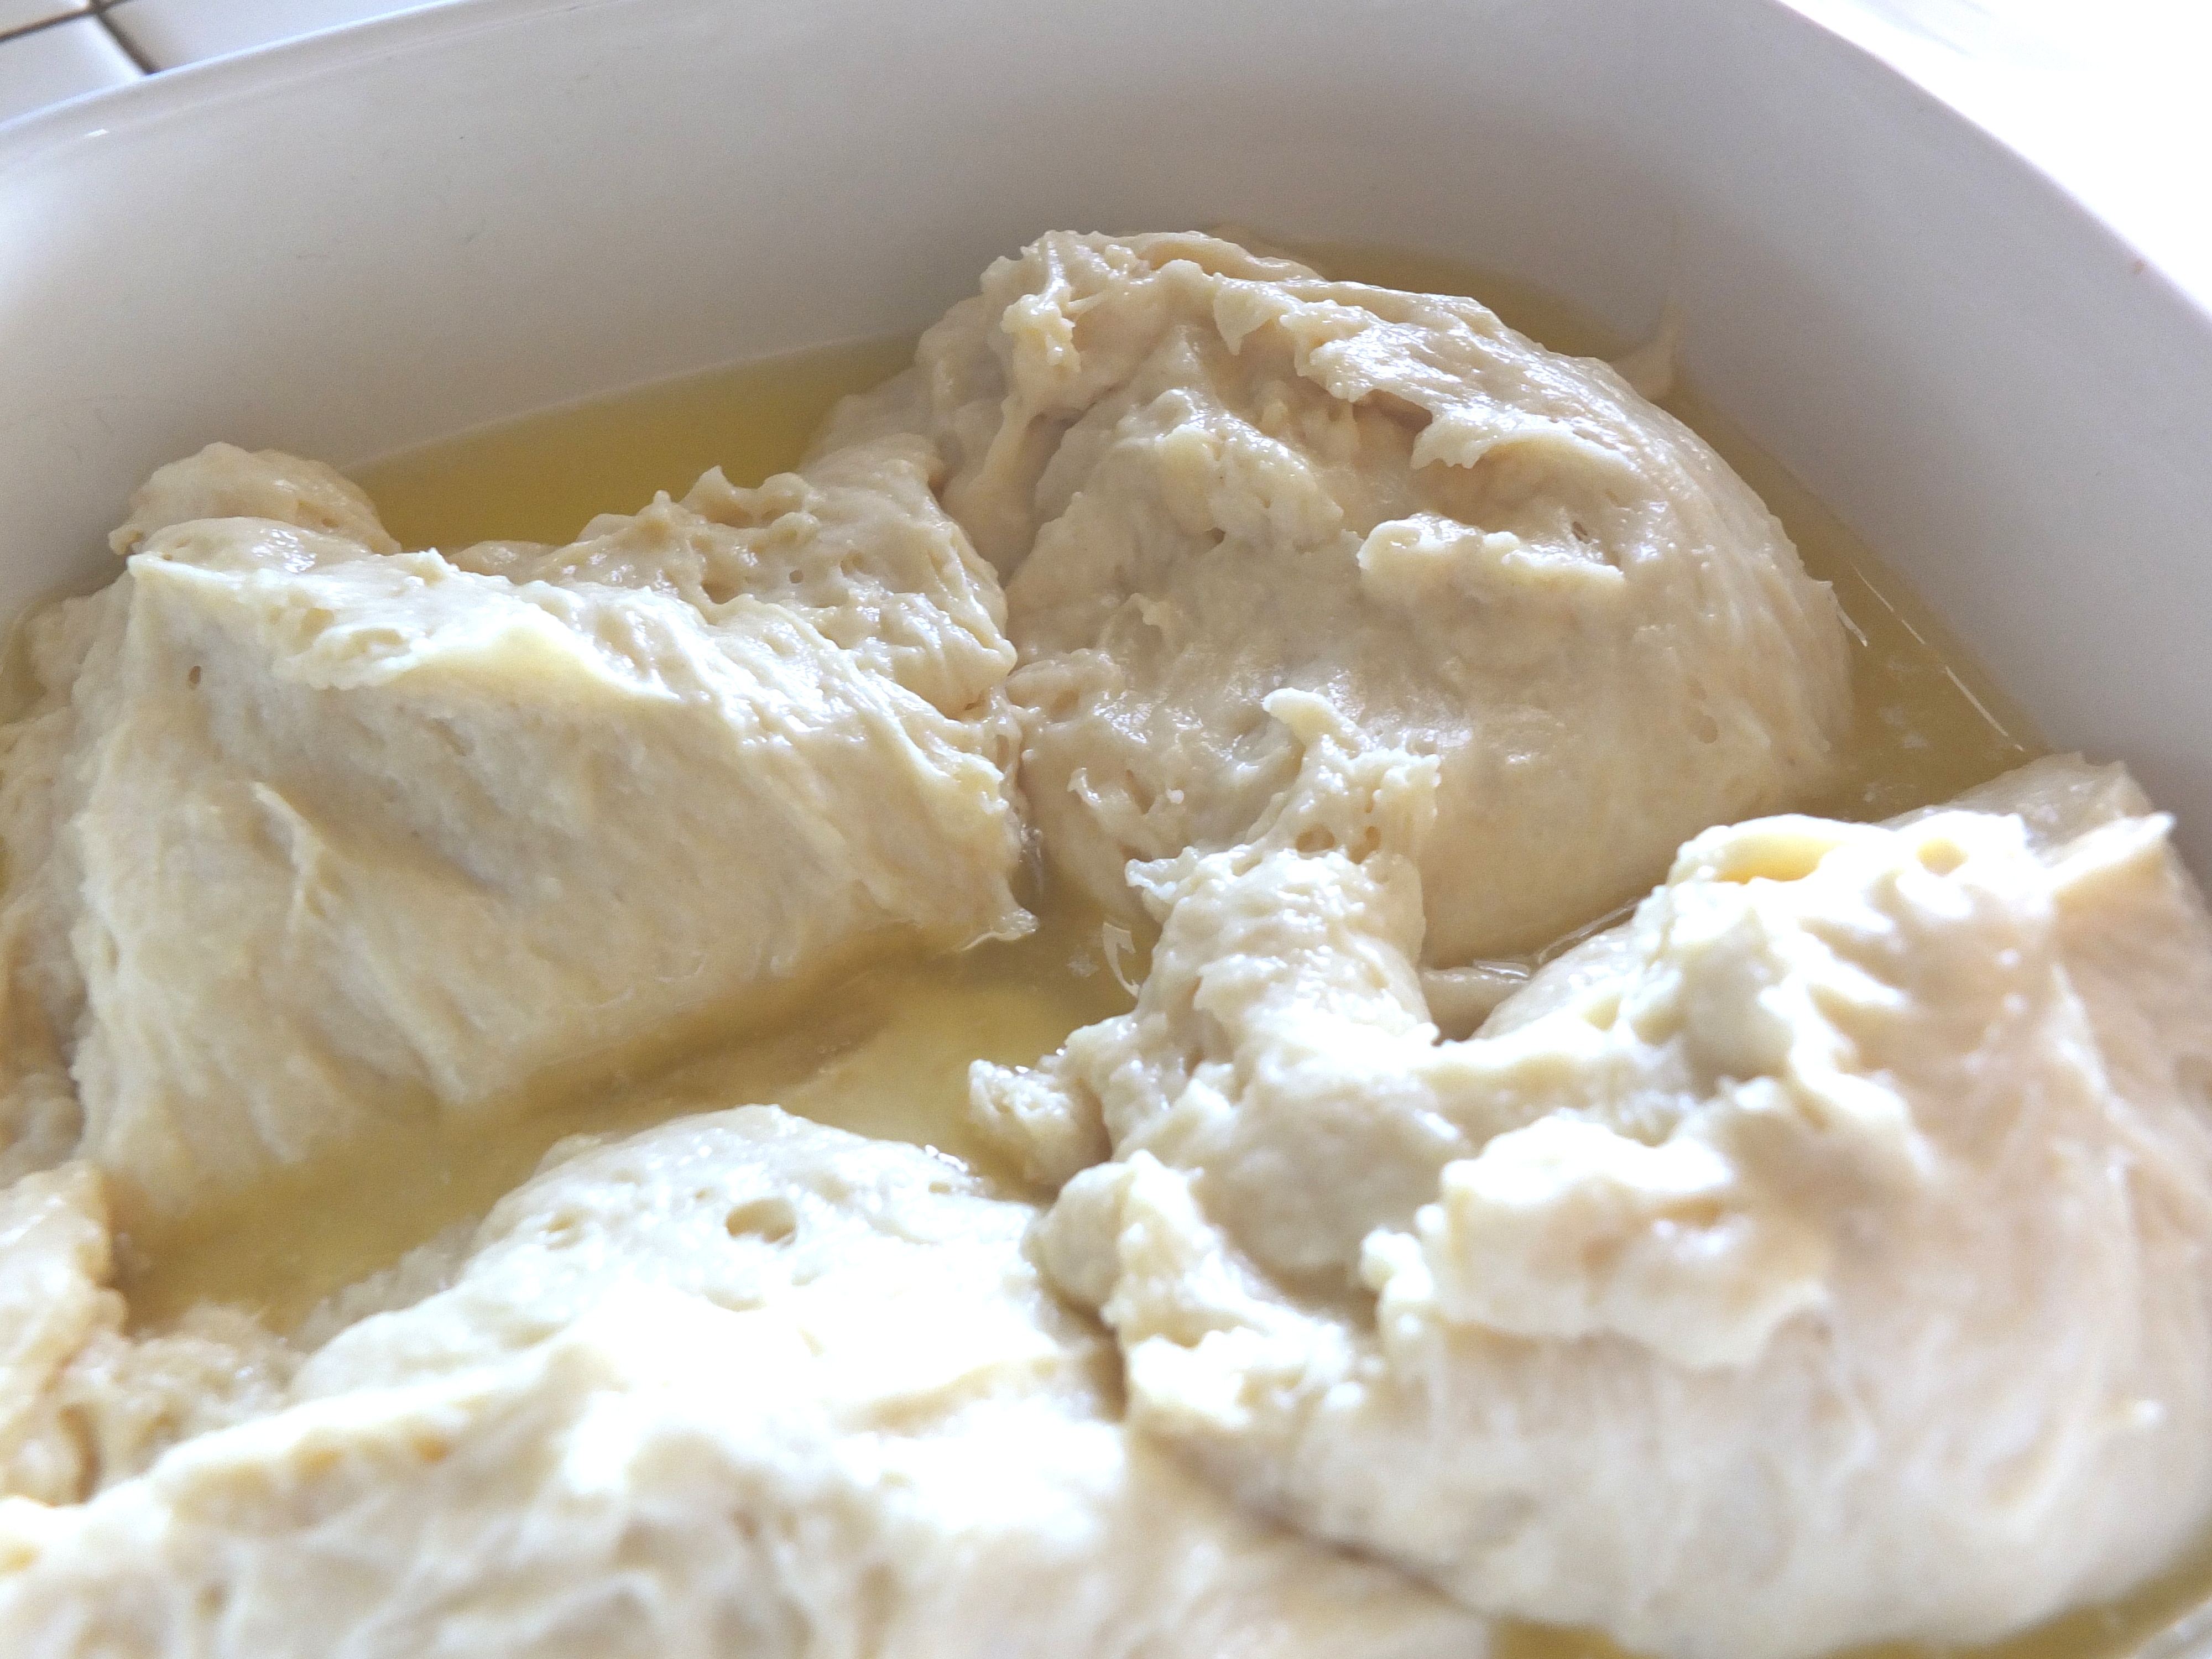
Just let it go, and don’t stir it. The potatoes are very soft right now and will just get mashed up.

20140502-191844.jpg
After ten more minutes, you will see the edges start to brown a bit.

20140502-192011.jpg
Once they start getting really golden and have a nice crust, you can gently stir them with some tongs, or a slotted spoon, just so the bottom ones don’t burn.

20140502-192425.jpg
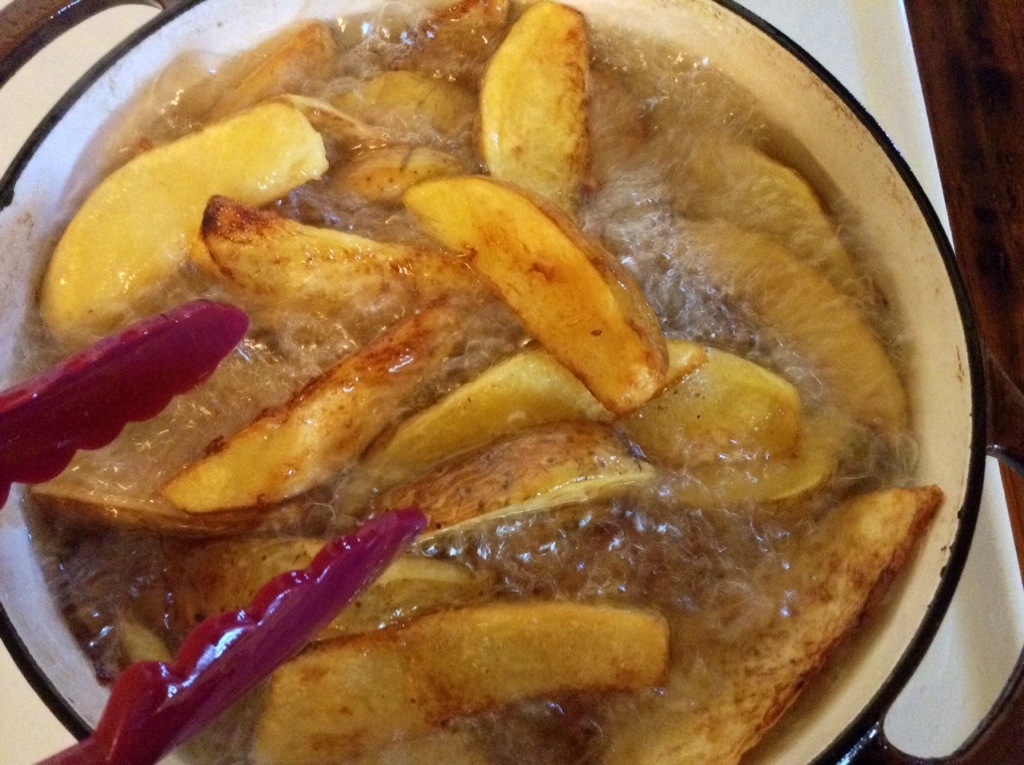
Then we are about done. Once they are a deep golden color, just remove them to a plate lined with plenty of paper towels. I usually do two layers, salting generously as I go.

20140502-192600.jpg
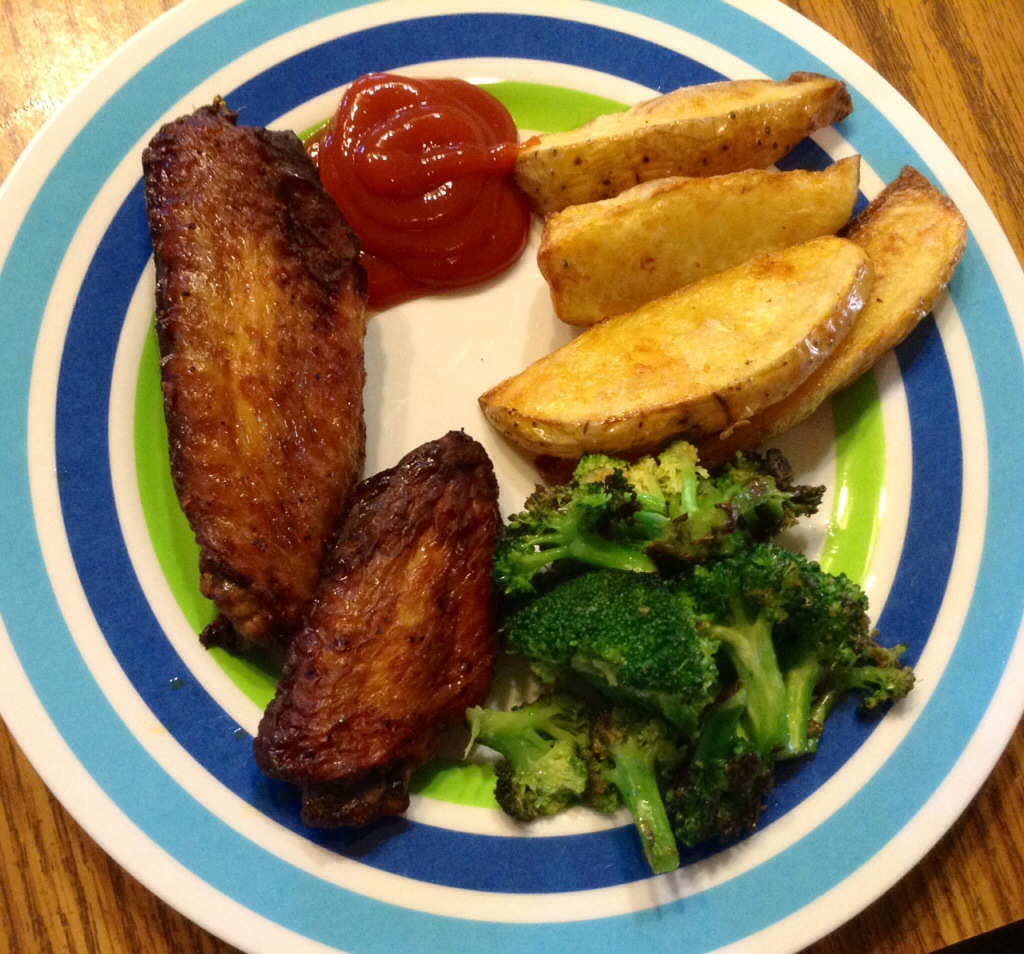
Serve them with whatever you want, like a big pack of pre-made Costco chicken wings and a big bag of precut Costco broccoli that the hubby brought home. Because who am I kidding- I am nine months pregnant and a little brain dead. I’m not deep frying and grilling at the same time.

20140502-192848.jpg
Oh, and quick clean up tip. I wait for the oil to cool down, then put a glass jar with a strainer in my sink (in case a little oil spills)

20140502-193109.jpg
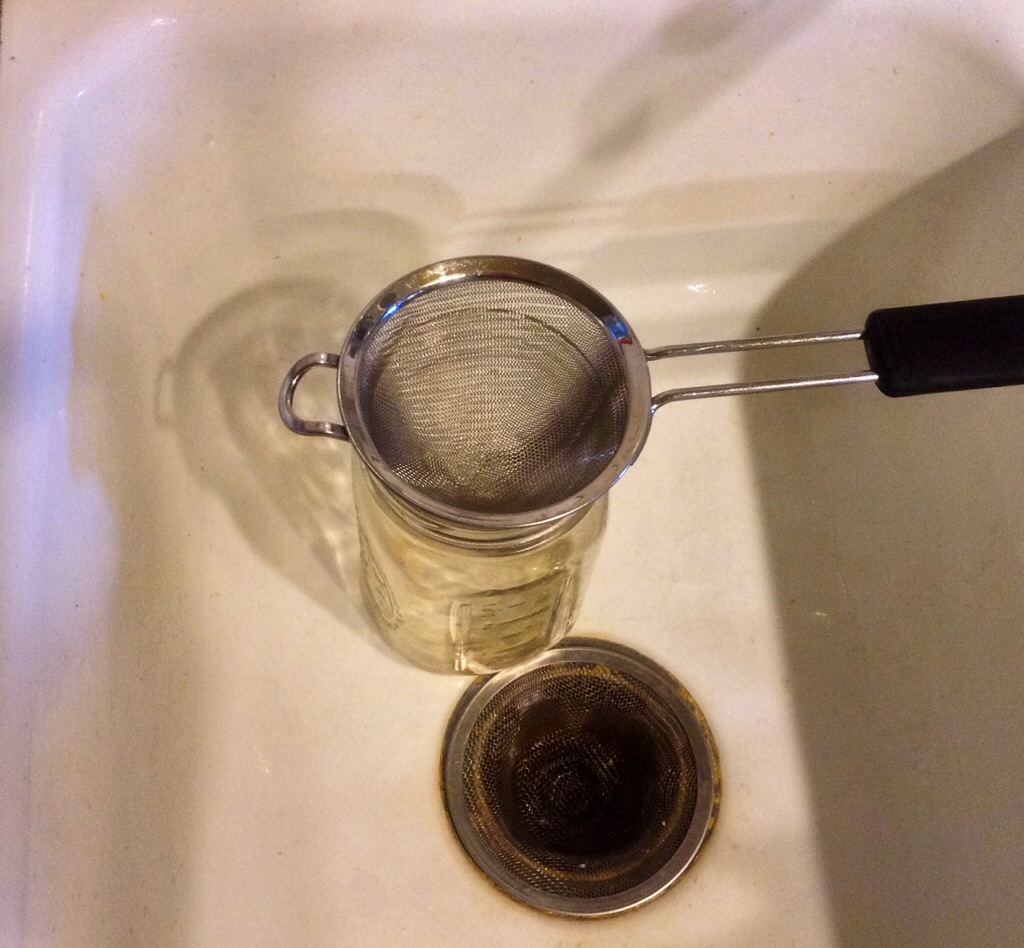
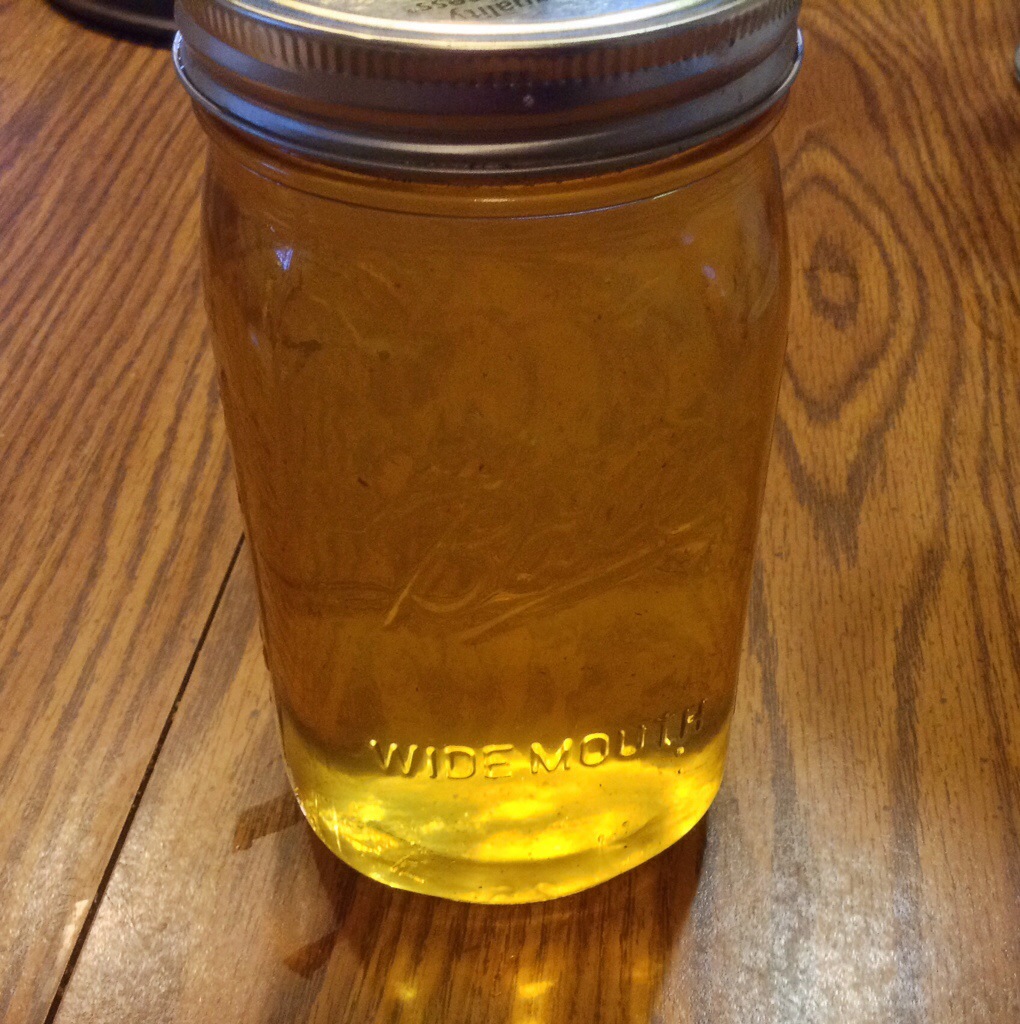
Then I strain the left over oil into a jar and save it for the next time. I usually use the oil for three batches before I discard it.

20140502-193413.jpg
So that’s that! A fantastic, crispy homemade french fry that is “so easy to make!”

Birthday Doll!

I had so much fun with this custom order, that I thought I would share a few pics with y’all.  This was an order for a birthday girl, and she wanted an “ocean princess”.  Her stipulations were blue eyes, a friendly face, and extra long, Rapunzel-esque, blond hair.  She also wanted a dress in different hues of blue to represent the ocean.  I did my best.

DSCF1562 DSCF1563

I did a few things differently with this doll.  The biggest change was using bead work instead of plain stitching and buttons.  She is royalty after all.

DSCF1567

And instead of plain ruffles, I scalloped the edges of the skirt layers, to give a more ‘wave like’ effect.

DSCF1569

I also replaced the buttons on the shoes with tiny pearl beads.

DSCF1571


Coming up with crown was also a lot of fun.  It makes me want to experiment more with beads.  They are a bit more time consuming, but I really like the effect.

DSCF1574

And here is a back view of the extra long hair.  The extra length makes it easier to style in different ways.

DSCF1575 DSCF1576

So fun!

I’ve also been debating whether or not I should keep my shop open these next few months, with the new baby and all.  I think I will try to keep it open for now, since the orders have been so slow.  And we will just have to see how I handle a newborn and an Etsy shop!

The Challenge Continues

I am sure you all have been on pins and needles, waiting to see if I managed to solve the puzzle of the ‘too small house’, so here is an update of the boys room.  After much thinking, I decided to keep the boys room as the boys room.  They really do need the space, and I wasn’t sure how I was going to manage nap and bedtimes with the girly in there.  So she will be in with us.  But more on that later.

If you recall my last post on the subject, here are the before pics of the four corners of the boys room.

DSCF1410DSCF1411DSCF1412DSCF1414

It was one of those projects that, once I began it, I wondered if it were worth it.  Things got pretty hectic in there for a while.

DSCF1417

My first idea was to get as much excess furniture out as I could.  So the white shelving unit found a home in a corner of the kitchen, where I like it much better.

DSCF1418

And then there were the dressers.  We have had those two stackable dressers/shelves since my oldest was born, and even though they are old and beat up, they are incredibly sturdy, so I wanted to keep them.  But I wanted to clear out the closet if possible, so out they came.

  DSCF1424

Remember the deep freezer I had in this corner?  I measured it and thought it might just fit in the closet, so I unstacked the dressers and put them where the freezer was.  I also put up some little curtains over  the shelves, since they really aren’t very pretty.

DSCF1426

I had hoped the freezer would squeeze into the back of the closet, but I failed to calculate the baseboards into my measurements, so it didn’t fit as well as I had hoped.  I had to make a decision.  Which space did I value most- the boys room or my pantry? The pantry had a corner where I figured I could fit it just as well.  I decided it would make more sense in the pantry, so the boys helped me move it.  It does make my pantry a bit crowded, but it is so nice not to have a freezer in the boys room anymore!

DSCF1427

The ugly cot went into storage, and a toy chest got repurposed to my room.  But I still wanted more space.

I wanted a place that I could dedicate solely to the storage of legos, which, as you can see, have slowly been taking over the house.  So I came up with a crazy idea that I wasn’t sure would work, but I wanted to try anyway.

Here is the final outcome, for now.

Corner # 1 –

DSCF1550

I tried to fit all shelves and dressers here, and just managed it.  There are shoes and toys in the dresser drawers instead of clothes.  I got each boy a box for their clothes, that hopefully will help them put their own clothes away and keep them somewhat organized, instead of stuffed pell mell into a drawer.

DSCF1551

Corner # 2-

There really was no where else to move the piano, so this corner just got a good spruce up.  I put a lot of the music and books into storage, and hid other toys neatly in boxes on top. And what piano is complete without a pirate ship?

DSCF1552

Corner # 3-

Here is where things started to get a little crazy.  I decided to get rid of the bottom bunk of the bed, keep the top bunk as a loft bed and use the space underneath as the “lego room.”

DSCF1553DSCF1554

The boys love the new space, since with enough blankets tucked around the edges it easily turns into a fort.  And I am trying to implement the rule that all legos must stay within the confines of the bed/fort.  We shall see if that works. Ha!

DSCF1560

“Umm, but where are the boys sleeping?,” you might be asking. Good question.  No, I am not making all four of them sleep on the top bunk.

Just follow me to corner # 4, and I will reveal my hair-brained scheme.

This is the school room/closet.  The boys nice clothes are hanging on the left, my clothes are hanging on the right. (that’s part of my room rearrangement).  But what are those blue things hanging in the corners?

DSCF1547

I’m sure the suspense is killing you.

DSCF1548

Hammocks of course!

I found the hammock idea online, but didn’t want to spend a bunch of money on a project that I wasn’t sure would work.  So I went to the Goodwill and lo and behold, found a huge piece of sturdy blue canvas for ten bucks.  I cut it in half, added a loop of extra fabric from the armoire project to string some rope through, and had the hubby install some heavy duty rings into the wood frame of the closet.  The other side hooks underneath the top bunk for sleeping, and they store neatly away in the corners during the day.

DSCF1556

The boys have gone nuts over them.  They have been sleeping in them for about a week now, taking turns on who gets to sleep on the top bunk and who gets a coveted hammock. So far it is working.

DSCF1558

I was worried of course that letting the boys sleep in swings would get out of control very quickly, but it is actually working much better than having three or four of them piled together on the bottom bunk. They seem to sleep well and comfortably, and putting the hammocks away in the morning is much easier than making a bed.  So far so good!

So that is probably as much as I am going to do for the time being.  It freed up a considerable amount of space, got rid of a bunch of clutter, and gave the boys a few exciting new features to their room.  Now I just need to finish a few things for little girlie’s space.  So until next time!


A fun request

Just a quick little post, since I haven’t blogged about dolls in quite a while.

One of the things I love about my little shop is the ability to do custom jobs for people.  My doll business has been slow, but I do have the occasional order trickling in, and this one was creative.  It was from a lady who is expecting her second daughter.  She asked me to make a big doll and a little doll, as a fun way to announce to her oldest daughter that she was going to be a big sister.

She wanted them to match, but not be identical, and she wanted autumn themed dresses, since both the girl’s birthdays will be in the fall.

This was the first 18 inch doll I have sold.  Exciting!

DSCF1489

And her little sister.

DSCF1497

I love it when people give me a lot of freedom to design the dresses.  I had fun with these leafy, ruffly ones.

DSCF1494

She also requested that I stitch their names on the dresses.  I think she has awfully good taste in names, eh Domekia?

DSCF1491 DSCF1496

Yay for sisters!

DSCF1495

Planting Time

20140412-223800.jpg

We planted corn in our garden this afternoon.  Since we moved to the south, I don’t usually plant corn in the garden because bugs seem to enjoy it more than we do. But the boys begged to plant some this year and I was feeling sentimental, so I went ahead.  

“Why would you feel sentimental about planting corn?” you might ask.  

Well, for the same reason that listening to Paul Simon,  making fresh salsa, eating huge bowls of ice cream and laying out in the sun for way too long makes me feel sentimental.  Because of my dad.

My dad taught all of his daughters how to plant corn.  The majority of our childhood gardens were devoted to corn, since it seemed to grow so well in my home state. I have so many fond memories of preparing the ground with a rented rototiller, and racing my sisters down the long rows with hands full of seed to see who could plant the most.  Dad taught us about fertilizing with ‘chicken shit’- the only time it was permissible to use that word. He taught us about, weeding, watering, thinning the rows and pulling the ‘suckers’  off when they started to get bigger.  If we wanted to go to summer camp, we had to weed so many rows per week. And if the corn wasn’t “knee high by the fourth of July” we would begin to worry. But we always seemed to have a good harvest either way.

I always seem to think a lot about dad at this time of year, and I realize more and more that it is because he always seems to come alive when the weather grows warm.  Summer and dad go together hand in hand. He is a California boy, transplanted to the gray and rainy Pacific northwest and I know the winters there are always hard on him.  I think of him even more now as his memory fails him, and he begins to fade from this life.  I shed tears when a song comes on that I know he loves, or even when I see that tiny little golden kernel of corn in my hand.  I get panicky that I will start to forget all the good memories of my dad, and so I rush to the computer to write things down.  So don’t mind me if I get a little rambly as I wander down memory lane.

When I was sixteen, there was a bit of a crisis in my family.  My dad was experiencing incredible strain and stress at work- so much so that we were praying for a new job for him.  Things got worse and worse as we progressed through one of the rainiest winters of my childhood, (which is saying something,) and it felt like we hadn’t seen the sun in weeks. (which we probably hadn’t.)   My mom was working full time as well, trying to help keep all six of us in private school. We as a family, also worked as the janitors for our high school to try and keep tuition down.  If dad lost his job, we weren’t sure what we would do.  The days of that winter seemed particularly long, cold, rainy and dark- off to school before sunrise, so mom could get to work on time. And since the sun set around 4 PM, it was usually dark when we got home and threw some dinner together. Then it was studying ’til bed time and do the whole thing again the next day.

The aura of stress around dad that winter was so palpable that when he finally quit his job, we were relieved for his sake.  But then came the hunt for a knew job- the indeterminate amount of time where dad was without a pay check and things were very uncertain.  My mother never worried out loud, but we all new things were tough.  And then we got in a car wreck on the way home from school one night. (it was dark and rainy, if you can believe it)  None of us were hurt, but our damaged car and an injury to the other party added to the strain.   I distinctly remember that it was the first time I really began to feel how heavy a thing life can be.

But it was a good time too.  There seemed to be an understanding between us girls that we should all be on our best behavior and make as light of things as we could.  One afternoon, we got home from school and since we knew mom and dad would be home late, we decided to try and come up with something good for dinner.  To our dismay- there was next to nothing to eat in the house.  It had been a long time since dad had been paid.  But instead of despairing, we all got the giggles and started reaching into the dustiest corners of the cupboards and hunting in the long forgotten recesses of the freezer.  When mom and dad got home, the table was covered by many small sauce pans and skillets, all containing the oddest variety of warmed up canned goods and freezer burned vegetables. It was such a pathetic, and somewhat disgusting dinner that we all just laughed and laughed and carried on.

Dad had had several interviews, but nothing that seemed like a good fit, except for one job- and he was sure he would never get it.  It was a position as a manager of a private business club very close to home.  It was such a good position, and paid so much more than he had ever been paid, that he wouldn’t let himself hope.

“There were several other men applying who had much better credentials”, he would say, as if he didn’t really care.  
But we all knew he really wanted that job, and we prayed hard for it. He went in for a second interview, and a third, and in the end, he got the job. Perhaps he didn’t have the best resume, but I am convinced to this day that he got the job based mostly on his vibrantly wonderful personality.  No one can help loving dad.

The good thing about hard times is that they make even the little things of life so much better.  I’ll never forget the joy of seeing my smiling mother stumbling through the kitchen door, arms overloaded with groceries, after dad got his first paycheck. Had there ever been such joy over a full fridge?  And that year, the new job and the new prosperity combined beautifully with the Spring.  The rain stopped, the sun shone and for Easter that year, we got to do something we had never done before.  Instead of homemade or hand me down dresses, we all went to the mall to buy a new Easter dress.   All of us, not just dad, seemed to come alive again that spring.

And soon it was time to plant corn again.  But dad was busy settling into a new job.  He didn’t think he would be able to plant a garden that year.  We sisters were disappointed at first, but I think we had all learned a little something about stepping up to the plate through that long winter.  We talked about doing it ourselves. Hadn’t dad shown us how? But when I pointed out that we couldn’t rent a rototiller, my oldest sister (whom I have always admired for her strength) simply grabbed a shovel and started tilling the garden by hand.  Inspired by her determination, we all jumped in and did what we could.  We dug the rows, we spread the ‘chicken shit’, we dropped the little golden kernels, covered them up and watered them.

And when dad got home that night with a smile on his face (when had he last come home from work smiling?) we got to show him what we had done.
It is a sweet memory, and it was a time of life lessons only beginning to be learned. Not only the lesson of learning how to plant a garden, but seeing for myself that-
“Weeping may last for a night, but joy comes in the morning.”
And
“Lo, the winter is past, the rain is over and gone. The flowers appear on the earth and the time of singing has come.”

We have had many nights of weeping since then, and many long winters. But every spring since then, if possible, I have tried to plant a garden.  Not just for the sake of memories, but for the lesson I need to learn new every year. And even now in this season, when I am too pregnant to wield a shovel, my heart swells to see my own children learning- digging the soil for me and handing me the seeds.

Caroline’s Closet

Well, the journey continues as I try to reorganize this little house of mine.  Thanks for all of the input from my last post on this topic.   I think, after hours of walking around with a tape measurer, calculating every square inch ( no, I am not exaggerating)  that I am going to try and fit her in my room after all.   We have two smallish closets in our bedroom, and I am planning on emptying one of them if I can, and letting the boys keep their space for now.  But more on that later.

If I am going to try and fit her in my room, I wanted to find a piece of furniture to keep all of her things in.  I looked at different kinds of shelving options and dressers, but what I have always really wanted was an old fashioned armoire.  I love the look of a nice armoire, neatly organized inside, with room both for shelves and a hanging bar for dresses.  Problem is, I hate spending money on furniture, and everything that I liked was way out of my price range and way too big for my space.  That sent me to Craigs List, where the notice

“Old armoire for anyone in need of a Pinterest project”

caught my eye.  The pictures were terrible, and it was hard to tell exactly what I was looking at, but the price was definitely in my range- 25 bucks.  I thought it was worth a gander.

When I got to the ladies house, her garage was a sight to behold.  It was packed, floor to ceiling, with old furniture.  She assured me again and again that she was not a hoarder, and told me, as she dug the armoire out, that three old aunties and a grandmother had died in the last few years and left all of their stuff with her.

When I finally saw the piece, I wasn’t overly impressed.  The doors were half off, some of the wood on the sides was buckling, and the ugly blue paint covering it was all gloppy and peeling off.  But it had character, it was the right size, and I figured I was only out 25 dollars if it didn’t work out.  She loaded it up.

Now the hubby and I have differing views (ahem) on what constitutes a worthwhile project.  He took one look at my decrepit armoire as he helped me unload it, and just gave me one of his looks.  Some of you know those looks.  Let’s just say there are serious eyebrows involved.  But I am afraid the look only stiffened my resolve to make something of it, and I told him I would do all the work myself.  He never said a word.

The first thing to do was to get the awful paint off and see what we were dealing with.  Thankfully, the boys were more than willing to help with this job and had great fun peeling big long strips of blue paint off the old wood.  There were several layers, but they came off quite easily.  At my son’s birthday party, some of his friends even joined in the fun.

c  DSCF1446 DSCF1447

See the character emerging?

DSCF1450

But the deeper we got, the more worried I became. The side and back panels were flimsier than I realized and there was a lot of water damage.  Some of the wood started peeling off with the paint, and the back was totally warped.

DSCF1451

I almost gave up, but I told myself to keep going since the frame was still nice and sturdy.  I removed the doors, which were worth keeping, got a hammer and just started tearing out all the flimsy warped wood.  I was left with an armoire skeleton and a big splintery mess.

DSCF1469 DSCF1470

The skeleton needed some patch work as well, but nothing that a little wood glue and filler couldn’t fix.  But I was puzzled what to do next since I was very determined not to spend more money on this project, and I didn’t want to ask the hubby to go buy me new wood panels and cut and install them.  I guess I’m stubborn that way, or I am more intimidated by his eyebrows than I care to admit.  So I took my SOS to Pinterest and found one last idea that I thought might work.

I found an old gift certificate I had forgotten about (don’t you hate it when that happens) and placed an order.  Then I found half a can of old paint and started painting since the wood was not really worth refinishing.

DSCF1468

DSCF1471

A few days later, my order arrived- A nice sturdy, brightly flowered fabric.  I just prayed the idea would work.

DSCF1479

Since I had pulled out all the old paneling, there were nice little grooves all around the edges of the armoire frame.

DSCF1476

I started with the back panel.  I cut the fabric with some extra length, so I could fold it over several times and sew it into a nice thick edge.  Then I took my putty knife and wedged the thick edge tightly into the grooves.

DSCF1477

It worked!  The fabric was nice and taut, and gave a very nice, smooth look when it was all tucked in.

DSCF1478

Emboldened, I did the side panels as well, making it double sided so the fabric showed inside and out.

DSCF1480

I love the overall effect!  Even the hubby was impressed.  The sides may not be terribly sturdy, but the frame is solid, and the fabric isn’t going anywhere.

DSCF1483

All that was left was to reattach the doors and bring it inside.

DSCF1484 DSCF1486

Oh, and get some clothes to put in it!

A labor of love

Naming a baby is one of the fun parts of having a child, at least most of the time. The naming of our boys was fun, yes, but also a bit arduous. Thanks to a family tradition of giving children two middle names, and preferring that each name sounded good in English as well as French, it was a struggle. (For instance, I always liked Henry, but wasn’t so much a fan of Ahn-ree)
And then getting all three names to have a nice rhythm when added to the last name always felt like a complicated puzzle. After coming up with twelve boy names, and having used up most of our male family names, we were scraping the bottom of the barrel if this baby had been a boy.
But a girl name! Wow, did we have a lot of girl names stored up! The problem now was whittling them down. But the name we kept coming back to was Caroline. Not only is it elegant and classic, but we thought it was a lovely way to honor my mother, Carol- a jewel among mothers and grandmothers.
I like to consider the meaning of a name as well, but I was looking up meanings for Caroline, there were two that kept cropping up- the Italian meaning “feminine form of Charles“, and the German meaning “manly one.” That put me off a bit. The meaning of a name isn’t necessarily a deal breaker for me, but Manly One?!!
But then I found the French meaning-   Song of Joy.”    Why the same name can have so many meanings, I do not know. But we are sticking with the French on this one, because it’s perfect.
Then came the middle name. We decided on breaking with tradition for our daughter and going with just one.  I had always planned on using Marie. It’s my mom’s middle name as well as my own. But last year my sister decided to use that name for her daughter, and then a cousin used it for their daughter, and I started to feel like there were other names in the world that I wouldn’t mind using.  I liked the flow of Caroline Marie, so I tried to think of similar names.  I finally narrowed it down to Margaret, another classic and elegant name, but the hubby voted on French again.

Marguerite- “little daisy“.

So now we can’t wait to meet Caroline Marguerite.   The hubby would like everyone to call her Cah-roh-leen, with a nice throaty rolled R.  I am aware, however, that we live in the Southern United States, and will be content if she goes by Caro’lyn’.  (I may be calling her ‘Lina’ for short.)

So now that that secret is out, I want to show you what I have been making for ‘little Lina.’   With all this name business going on, I couldn’t help imagining a christening gown as well.  I made one when my oldest was born, but it was very simple. It was as un-girly as I could make a long white dress, and have used it for all four boys.  But it was time for a new and more feminine looking one, and I wanted to try something a la Alabama Chanin.

I started with a supersoft white jersey, but when I saw the same fabric in a lovely pale rose, I decided to line the white dress with it.

DSCF1341

DSCF1342

I used a very basic, sleeveless, a -line pattern, and did a little hand stitching around the neck and arms.

DSCF1343

Next, I wanted to stencil it, but couldn’t decide what motif to use, until we chose her middle name.  Then it was decided- I designed and cut out a

‘little daisy’ stencil.

DSCF1339

I traced it with disappearing ink all around the bottom edge of the dress.

DSCF1367

Then it was lots of outline stitching for a while.

DSCF1369 DSCF1368

I decided to pull out all the stops on this one, and added little pink buttons and lots of beaded accents, so it has a nice weight to the bottom.

DSCF1431 DSCF1432 DSCF1434

When it is held up to the light, it looks much more pink.

DSCF1435 DSCF1436

At the end, I thought it needed a little something else, so I added a simple satin sash.

DSCF1440

And a little, pale pink sweater, just in case.

DSCF1444 DSCF1445

So there it is.  It was so fun, it makes me want to start dress making on my shop again.  I have made a lot of little girl clothes over the years, but never one that has brought me so much joy.  A true labor of love!


Bread for the down days

I know that bread is a loaded word these days.  My family does not seem to have a hard time with gluten, but I often avoid even mentioning the word gluten in public, for fear of what I might stir up.  It’s a tricky and sometimes exhausting topic.  I have read many books and articles, trying to figure out what is evil and what is not, in the carb world. I have tried my hand at new kinds of bread- sprouted grain, soaked oat breads, home made sourdoughs- all in an effort to eat less white flour and avoid chemicals.  I grind most of my own flour.  We’ve tried going without bread entirely, but I am a carb kind of girl- especially when I am pregnant.  And when I want comfort food- keep your chocolate and your ice cream- I am looking for a thick slice of warm bread with lots of butter on it.

Today was definitely a comfort food kind of day.  My house, undergoing a huge surge of nesting instinct, is currently all topsy turvy.  Closets are emptied out- bags of give away clothes and trash keep multiplying.  Every time I pull something out of the back of a cupboard, the boys seem to be full of fond memories for it and fight me tooth and nail either to play with it or keep me from tossing it.  I am shifting all the winter clothes out to make room for summer, but winter keeps coming back!  There are snow flakes and white cherry blossoms dancing all over my yard as I speak, and I can’t straighten my house out until the seasons straighten themselves out.

So whenever I feel my life is going to pieces, I head to the kitchen.  Baking is my stress relief, and recipes that can be trusted are a link to sanity.   No hunting the internet for something new and exciting-  it’s time for my worn out, trusty old cookbooks.  Books like my old church cookbook-

DSCF1370

And recipes like this- an old classic from my Auntie Frances that I hadn’t made for many years, but had fond memories of.  As far as bread recipes go- it’s a very easy one- no kneading required.

DSCF1371

You will notice that not only does this recipe contain plenty of white flour and sugar- it also contains two sticks of butter.  So if you need to jump ship here, go ahead.  I am going recklessly on.


I was struck with the monochromatic ingredients of this recipe, combined with the white countertop, but it seemed to fit my mood, so I left my rainbow colored spoons out of the picture and went with white on white.

DSCF1372

I have altered the ingredients and the process of making this bread slightly, so I will walk you through it.

Start proofing 1 package (2 1/4 tsp)  of dry yeast in 1/4 cup of warm water.  It needs to get nice and foamy.

DSCF1373

Melt one stick of butter in a large bowl.

DSCF1374

Add 1 cup of milk and two eggs.

DSCF1375

and 1/4 cup of sugar.  (I cut the sugar content in half- that counts for something, right?)

Stir all that together.

DSCF1376

Now add three cups of all purpose flour and 1 tsp. of salt.

DSCF1378

Your yeast should be foamy by now, so go ahead and add that too.

DSCF1379

Stir it all together until you have a very wet, sticky mass.

DSCF1380

That’s it!  Now cover it up and let it rise in a warm place, about an hour.  You can also put this in the fridge and it will keep for several days until you are ready to use it.

DSCF1381

After an hour, it will look nice and puffy.  Just stir it all down again and turn on your oven to 350.

DSCF1382

Now comes the fabulous part.  I hope you haven’t forgotten about that second stick of butter, because it needs to go in a 9×13 pan.  Stick it in your preheating oven until it is all melted.

DSCF1383 DSCF1384

Once it’s melted, take your very sticky dough and plop it in big spoonfuls, as evenly as you can, over the butter.

DSCF1385

Then it needs to rise again- only about twenty minutes, till it starts to get puffy again.

DSCF1386

Then into the oven for about 30 minutes.  It should be nice and golden on the top when you pull it out.

DSCF1387

As a side note, the first time I made this for my hubby, he was elated because he thought I had finally figured out how to make brioche the way he remembers eating it as a child in France.  This isn’t really like other brioche recipes that I have tried (except for the butter content) but apparently it’s a pretty close match to the real thing.  So next time the hubby asks me to recreate a childhood recipe, I guess I’ll just keep adding butter until I get it right.


Either way I can’t describe to you the amazing buttery, yeasty smell that will permeate your house when you make this, and it will lift your mood instantly.

I was so cheered up, I used a bright blue plate to serve it!

DSCF1389


No need to serve it with butter, but jam isn’t half bad.

And now I can tackle the pile of shoes in my bedroom with renewed vigor!

The Great, Small House Challenge

I don’t generally consider myself a whiner, but if there is one thing that makes me sigh and wish for better things, it is the size of my house.  At 1000 square feet, two bedrooms and one bath for six people, it is just too small.  I know I am not alone in feeling this.  Pinterest knows I am not alone in this.  Ikea knows I am not alone in this.  I hardly know anyone who sighs and wishes their house was a little smaller.

On good days, I know there are advantages to the smallness.  Less to clean, less to maintain, less to keep warm in the winter and cool in the summer.  “Remember the pioneers!” I say.  “Remember the sod houses and the one-room log cabins and the shanties on the prairie.  Remember it could be worse.”

Still, I can’t help those days when I want to scream if I bump into one more crowded corner or have one more box from an over-full closet fall on my head.  I get very tired of waking up from those dreams where I open a door I never noticed before and find a whole new wing to my house- empty, clean, uncluttered.   I try not to think about the other big, empty house we still own, waiting to be finished…. some day.

And now I have another baby on the way.  And she’s a girl.  And it may be frivolous, but I have this longing to create a sweet and pretty little space for her- a place I can call “the girl’s room”.  There would be flowers and ruffles involved.

I go through this cycle fairly frequently- wish, sigh, pity myself, then get sick of all that and do something about it.  I think I am done moaning now, so on to the challenge! I thought I would blog about it, just to help with motivation and keep myself on track and out of the slough of despond.  I have some time to complete this project since the baby will be in my room for a little while, but I am going to take advantage of that wonderful nesting instinct that tends to kick in about now and get started.

Here is what I am dealing with.  I am showing you the four corners of boys room in all it’s daily glory- unmade beds, unfolded laundry, a floor that needs vacuuming and general clutteriness.

Corner #1

The closet.  I can’t tell you how many times I have tried to reorganize this space.  I have been thinking of trying to fit a crib etc. in this space, but I have no idea where I would put everything else.

DSCF1410

Corner #2- The homeschool corner

Yes, my boys have a piano in their room.  We used to have it in the living room, but it made everything so awkward and crowded that I moved it here, where it fits much better.  I think it is going to have to stay.  The top could use some rearranging, to say the least, and I am debating over the little white table and chairs.  The boys do most of their school in the kitchen anyways.

DSCF1412

Corner #3

The bunk bed.  Thankfully all the boys still fit on this bed, and love sleeping together.  There is literally no other space I can fit it, so it will be staying where it is, but hopefully straightened up a bit.   Hah.

DSCF1411

And last but not least, corner #4.

Currently we have a camping cot in this corner for extra sleeping space.  My sister left it here when she moved and the boys love sleeping on it, but it isn’t absolutely necessary (besides which, it is just plain ugly.)  We also have, as you can see, a deep freezer.  Again, there really isn’t anywhere else this could go, and I really need the extra freezer space.  The boys room does tend to become my all purpose room as well- the basket on the floor is some of my extra sewing stuff.

DSCF1414

So there you have it.  Is it possible to find a space for my little girl, and a girly space at that?  Am I asking the impossible?  Perhaps.  But a girl’s gotta try.  Suggestions would be welcome!

Picnic Pasta!

Just a real quick post for a Friday night.  I meant to post this a few weeks back, when the weather was balmy and I was sure that spring (and picnic weather) had arrived for good.  Joke’s on me I guess, seeing as we went from 80 to 30 degrees in a 24 hour period.  But that’s what spring is, I suppose- as uncertain and changeable as the appetite of my three-year -old.

But I digress.  Enough about the weather. Bring on the food!

I call this my Picnic Pasta, because it is an all in one sort of meal that is quick to throw in a basket with some paper plates and plastic forks, and I find it a little more exciting than sandwiches.  But we eat it at many other events as well, particularly potlucks.  And like all pasta salads, it can be made with an infinite variety of ingredients.  This is just how I (and my kiddos) like it best.

Lots of peppers, tomatoes, meat and cheese!

DSCF1272

Start by boiling a big pot of water.  When it’s roiling along, add 1 lb. of pasta- your choice.  I like to use penne rigate because it is easy to spear with a fork, or for little fingers just to grab.  It’s a picnic food, after all.

DSCF1273

While that is boiling (about ten minutes) chop up your veggies, meat (usually some form of salami) and cheese. (I had cheddar in my fridge, but blue cheese is nothing to sneeze at)  Don’t you love the colors?  And if I had my way, there would be some red onion added to the spectrum, but I am usually out voted.

DSCF1274

When the pasta is done, drain it and run it under cold water so it doesn’t get all sticky and mushy.

DSCF1276

Then just throw it all in a bowl and toss.  So easy!  And if you are really going for easy, pack a bottle of ranch dressing along side it.

DSCF1277 DSCF1278

But for those of you who want a little something extra special, toss the salad with this french vinaigrette I posted a while back.  Just be sure to double it.  A little avocado wouldn’t go amiss here either, but make sure you add it at the last minute, since it turns brown very quickly.  It is such a yummy combo!

DSCF1279

Either way- enjoy at a picnic, a potluck, or on your own private patio.  (I like alliteration. Sorry.)